kairo

Water Testing For Koi Or Fish Pond

Drinking water – Frequently asked questions

Do I need to filter or boil my water?

You do not need to filter or boil your tap water. Be aware of door-to-door sales representatives making false claims about the City’s tap water being unsafe.

In some cases, the use of a water treatment device might be justified or could improve the aesthetic quality of your tap water:

If you are served by one of Ottawa’s municipal well systems, you may want to consider an in-home treatment device (such as a water softener) for aesthetic reasons.

If you have a home with a lead water service pipe or lead in your internal plumbing, you may also want to consider using an in-home filter to remove lead from your tap water.

Is the manufacture and sale of water treatment devices currently regulated?

The manufacture and sale of water treatment devices for home use is not regulated. However, the National Sanitation Foundation (NSF) in consultation with Health has developed voluntary performance standards for water treatment devices and certification by the NSF is the only guarantee that a device can meet specified performance standards for removal of specific contaminants

drinking water hard or soft?

Water hardness is caused by the presence of calcium and magnesium minerals in water. water supply is considered very soft due to the natural softness of the source water. Hard water does not pose any health concerns, however it can lead to scale deposits on hot surfaces such as kettles and hot water tanks.

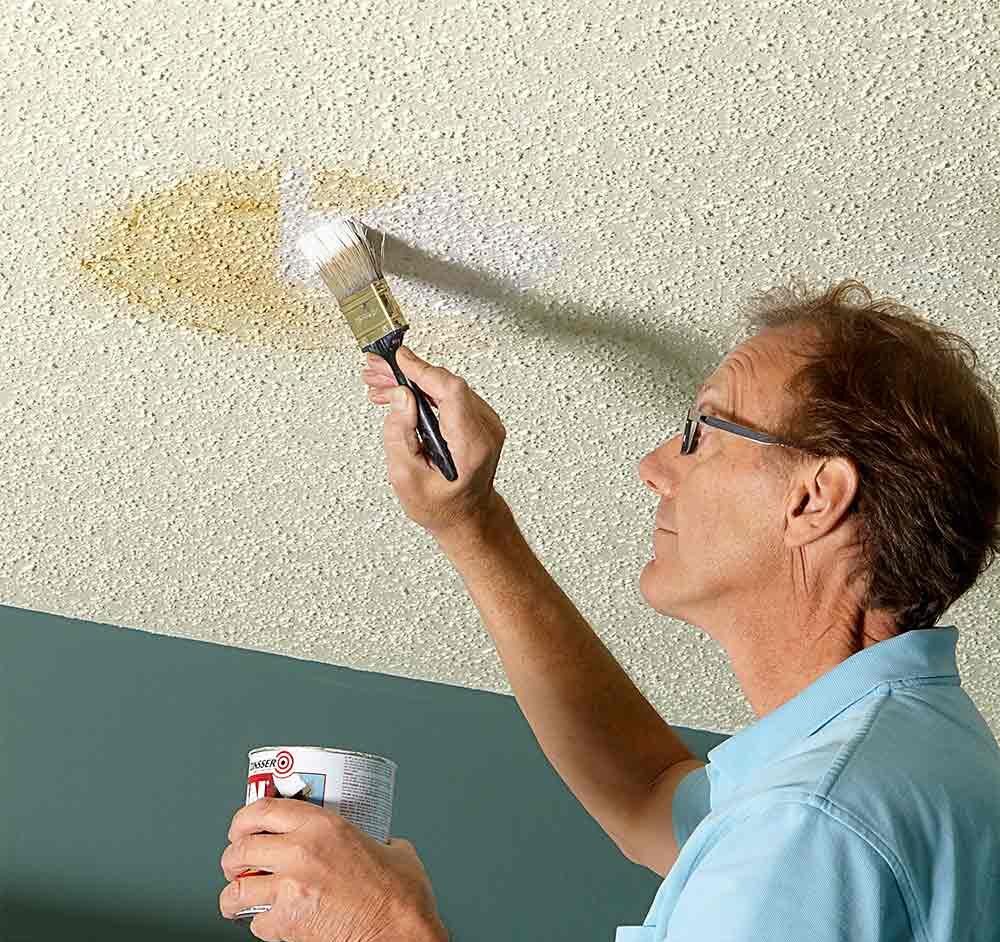
Why does my water have an “earthy” or “musty” odour?

water system draws from the River, which has a natural, slightly “earthy” or “musty” odour. This odour is caused by trace levels of natural organic substances produced by plants and algae in the river. The water purification process removes most of these substances, but some individuals may still notice an odour, particularly when tap water is warm


How to Test the Water in Your Fish Tank

In a newly set up aquarium, water testing is critical to avoid fish loss as ammonia and nitrite rapidly rise. In an established aquarium, water testing is important to ensure the continued health of your fish.

Test kits should be considered an important part of the operating expense associated with keeping an aquarium. If you cannot afford test kits or feel uncomfortable testing water yourself, check with your fish shop to see what they charge for doing water tests. Some offer free water testing, or at least one free test each month, or will quote you a flat fee for monthly testing. Compare their charges against the actual cost of test kits.

Which Kits?

Ammonia, pH, nitrite, and nitrate water test kits are by far the most integral to aquarium water upkeep. Hardness and alkalinity tests are useful to establish what your levels are, but don’t warrant purchasing an entire kit for them unless you have special needs such as a planted tank. Phosphate is worth testing for if you have algae problems. All testing should be recorded in a log or journal so that you have a record of what is happening over time.

Ammonia

Ammonia will be elevated during the start-up cycle in a new tank, but can also be elevated in mature tanks if the water is not changed regularly, filters are not kept clean, if the tank is overstocked or overfed, or if medication is used that disrupts ​the biological cycle.

pH

The acid-base balance of the water, measured as pH, is the most frequent cause of fish stress, which can ultimately lead to fish loss. It is usually the most overlooked parameter. Fish cannot tolerate sudden changes in pH; even a change of 0.2 can result in stress or death if it occurs suddenly.


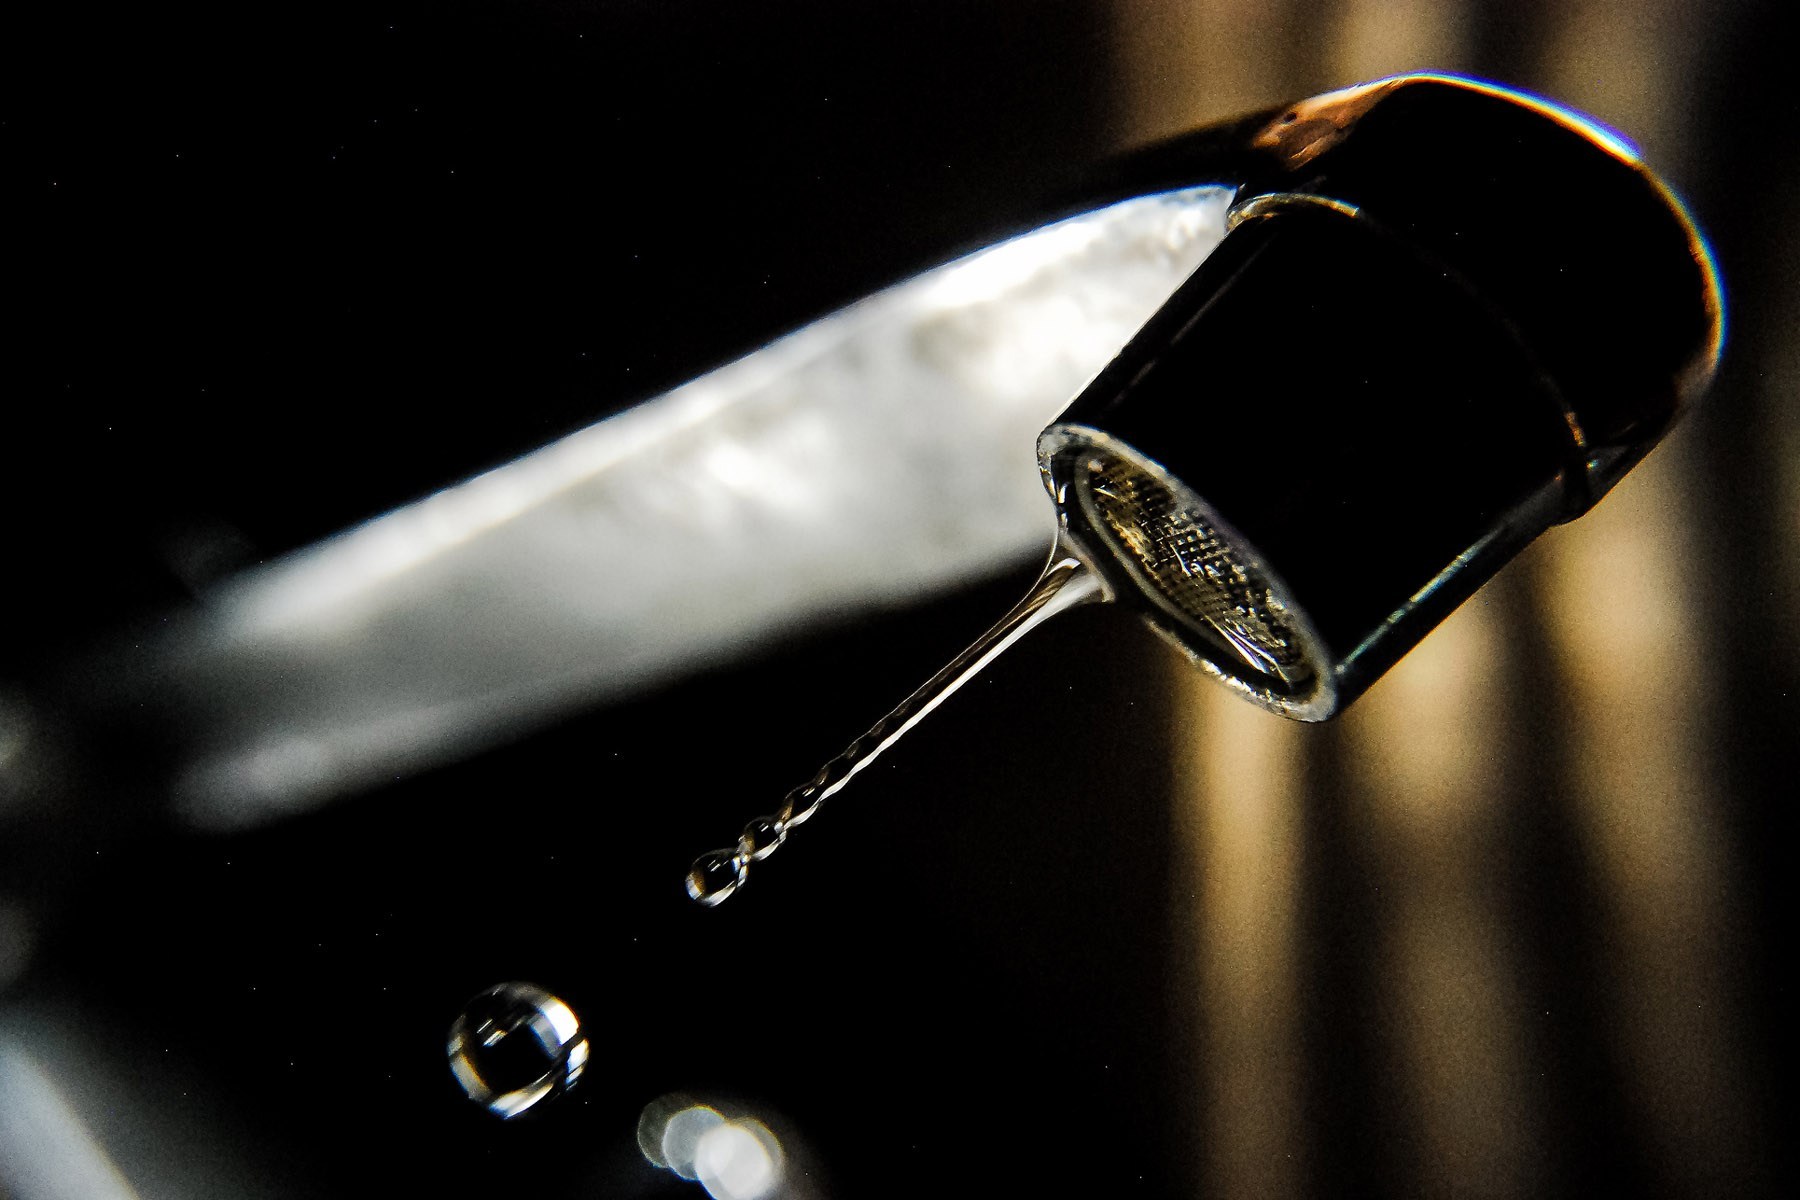
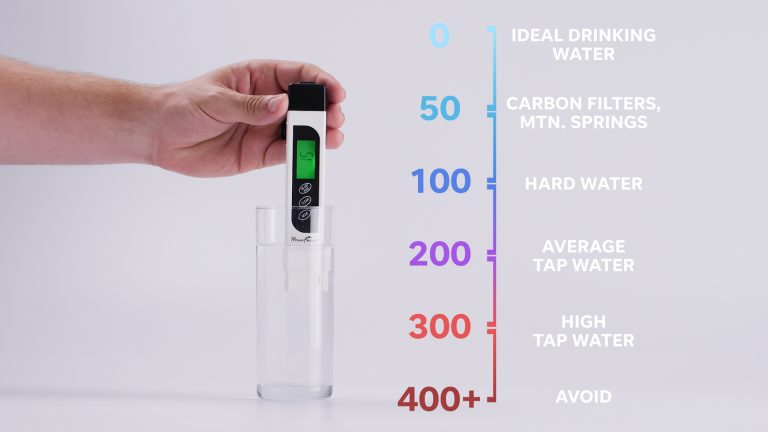
How to test if your water is safe for drinking

Access to safe drinking water is critical — but how much do you really know about your water? Of course, it’s supposed to be clear and odorless, but there’s a lot more to learn about what’s actually in it. It might have excess amounts of chlorine, copper or iron, for example. Or there could be a nitrite, lead or bacteria problem, depending on how the water is sourced and where it’s stored. There’s just no good way to know how pure your water is by look and taste. If you want hard facts about what’s going into your body with every sip, you need to test your drinking water.

I usually drink water from my refrigerator, which has a built-in filter; theoretically, that should be better than tap water, right? But testing showed that the fridge water had the exact same particle count as my tap water. Granted, the fridge filter was old and needed replacement, but the test gave me the information I needed and encouraged me to be more diligent about swapping out the filter. Still, the test results prove the water I’m drinking isn’t as pure as I’d like it to be, so I’m looking at additional solutions to make sure my family is drinking high-quality, clean water.

With a few cheap products and minimal time, you, too, can test your water. The process is quick, easy and affordable. Whether you drink water from your tap, well, fridge, bottle or filter, you might be just as surprised as I was.


HERE’S HOW TO TELL IF YOU HAVE LEAD PIPES IN YOUR HOME

Want to know if you might have lead in your home’s pipes and faucets?

Experts tell us that “there is no safe level of lead exposure.” This stuff is just not good for you, especially for developing children and pregnant mothers. The Centers for Disease Control say that even at low levels, lead has been “shown to affect IQ, ability to pay attention, and academic achievement.”

There are several potential sources of lead in your home plumbing that can get into your drinking water:

Service line connecting the water main to your house

Solder in your plumbing

Older brass faucets and valves

To really know what’s going on, it’s a good idea to have your water tested. You can call your drinking water utility or your county health department to find out how to test your water.

Your Service Line

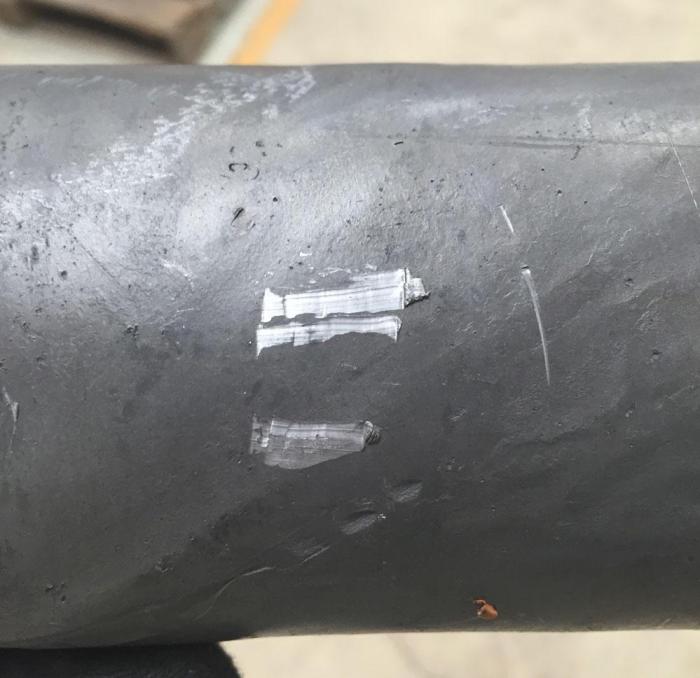
The drinking water service line coming from the water main into your house is usually in the basement.

The first trick—without even having to touch it or do anything—if you see that the service line is a dark matte gray color, that’s usually a good tip that that is a lead service line.

Next, scrape the service line with a screwdriver, if it is lead, the metal would be soft and turn really shiny.

If your supply line turns a brownish, copper color, that means it is a copper supply line.

Aside from lead or copper, you can also have a plastic or galvanized steel service line coming into your house. If it’s steel, a magnet would stick to it. If it’s lead or copper, a magnet would not stick to it.


WATER QUALITY

Water quality is one of the most important factors in a healthy ecosystem. Clean water supports a diversity of plants and wildlife. Though it may seem unrelated at first, actions on land affect the quality of our water. excessive nutrients from fertilizers, and sediment frequently get carried into local lakes and rivers via runoff from urban areas or agricultural fields. This lesson considers the factors that influence water quality by observing and evaluating several water samples.

Performance Expectations:

2-PS1-1 Matter and its Interactions: Plan and conduct an investigation to describe and classify different samples of water based on their chemical and observable properties including temperature, pH and turbidity.

2-PS1-2 Matter and its Interactions: Analyze data from the testing of the water samples to determine which materials have the properties that are suited for certain purposes such as drinking, swimming or cooking.

OBJECTIVES

Develop criteria for the quality of water and understand that there is more to water quality than “meets the eye.”

Engage in a sample of water quality tests used by scientists.

Explain how water quality in both groundwater and surface systems is impacted by land use decisions.

Classify solutions as acidic or basic, given their pH, and classify substances by their chemical properties (flammability, pH, acid-base indicators).

Use tools and equipment appropriate to scientific investigations and make accurate measurements with appropriate units.

Identify the need for evidence in making scientific decisions and then use data and samples as evidence to separate fact from opinion.

BACKGROUND

Scientists measure a variety of properties to determine water quality. These include temperature, acidity (pH), dissolved solids (specific conductance), particulate matter (turbidity), dissolved oxygen, hardness and suspended sediment. Each reveals something different about the health of a water body.

The result of a single measurement, however, is actually less important than monitoring changes over time. For example, if you measure the pH of the creek behind your house and find that it is 5.5, you might think it is acidic. But a pH of 5.5 might be “normal” for that creek. If the pH or the turbidity of your creek begins to change, however, something may be happening (probably upstream) that is affecting water quality. Taking routine measurements at scheduled intervals allows you to monitor overall changes in water quality.

Useful Steps To Engine Rebuilding Your Favorite Car

WHAT DOES AN ENGINE DYNAMOMETER DO?

Marine and automotive technicians are constantly required to fine-tune engines to ensure that they deliver optimal performance. Engines are crucial to the propulsion of any vehicle or marine vessel, and any issues will leave drivers frustrated and looking for a solution from an experienced technician. One of the many ways that these technicians tune engines and keep a high level of performance is through tests on an engine dynamometer.

What Does an Engine Dynamometer Test?

The purpose of an engine dynamometer is to measure engine output to make sure that the configuration is delivering the force that it’s supposed to. To give technicians a sense of how optimal the engine they’re testing is running, they hook up the dynamometer to the engine and let it run. The engine dynamometer will test the horsepower, rotations per minute (RPMs), force, and torque levels to get a sense of the engine’s power.


Calculating Performance

A dynamometer, also known as a “dyno”, is a device that measures force, torque or power. For chassis or engine applications, a dynamometer is designed to create a load to duplicate various speed (RPM) and torque (Nm or lb-ft) requirements. From this data, power (HP or kW) can be calculated. This in turn provides a snapshot of the chassis or engine performance for comparison to the manufacturer’s specifications. Typically, a dynamometer gives the operator the ability to vary the load applied to the unit under test to mimic specific requirements.

Troubleshoot, Identify, Verify

An engine dynamometer is a device used to test an engine that has been removed from a vehicle, ship, generator, or any other piece of equipment powered by an internal combustion engine. The purpose is to confirm performance before the engine is installed back in the equipment. Engine dynamometers can help facilities troubleshoot by determining when an engine is overheating, or by identifying intermittent performance and sensor issues. They also verify the quality of builds, rebuilds, or repairs in a controlled environment before vehicles are put into use.

Engine dynamometers are coupled to the engine under test via a drive or Cardan shaft. Engines are mounted to rolling carts and can be loaded on the cart prior to movement into the dyno room. Typically, engine dynamometers create loads using a water brake, EC or alternating current (AC) design.

Water brakes are designed to test engines rated up to 7,500 kW or 10,000 HP

EC units are designed for lower power engines (less than 400 HP)

AC designs can accommodate a wide range of applications (10 HP to 5,000 HP) and offer exceptional natural (transient) response


Applications for Dynamometers

In addition to being used to determine the torque or power characteristics of a machine under test (MUT), dynamometers are employed in a number of other roles. In standard emissions testing cycles such as those defined by the US Environmental Protection Agency (US EPA), dynamometers are used to provide simulated road loading of either the engine (using an engine dynamometer) or full powertrain (using a chassis dynamometer). In fact, beyond simple power and torque measurements, dynamometers can be used as part of a testbed for a variety of engine development activities such as the calibration of engine management controllers, detailed investigations into combustion behavior and tribology.

In an engine dynamometer, water flow, proportional to the desired applied load, creates resistance to the engine. A controlled water flow through the inlet manifold is directed at the center of the rotor in each absorption section. This water is then expelled to the outer dynamometer body by centrifugal force. As it is directed outward, the water is accelerated into pockets on the stationary stator plates where it is decelerated. The continual acceleration and deceleration causes the dynamometer to absorb the power produced by the engine. Through this transfer of energy the water is heated and discharged.


Measuring how much power you need

If you’ve got something like a giant factory machine made up of levers, gears, drive belts, and other bits and pieces, and you want to know how big an engine or electric motor you’d need to make it work, you can use a machine called a driving dynamometer. It’s essentially just an ordinary engine or an electric motor with some appropriate measuring meters or monitors attached so you know how much power, force, or speed is being used at any given moment.

Measuring how much power you have

If you’ve got an engine or motor, you can use a different kind of dynamometer to measure how much torque (turning force), power, or speed it can produce. Here, the dynamometer acts as a variable load that the engine/motor drives. It works by soaking up or absorbing the power that the engine/motor produces, so it’s called an absorption dynamometer.

An absorption dynamometer is a bit more sophisticated and interesting than a driving dynamometer. If you think about it, it needs a way of soaking up and dissipating potentially a huge amount of power, and there are all kinds of different ways to do this. One easy way is to use electromagnetism.

If you wanted to test out the power of an electric motor, you could connect its driving axle up to the axle of a generator. As the motor spins around, it would make the generator spin too, producing an electric current proportional to the motor’s power; measure the generator current and you have an indication of how powerful the motor is.


Why Dyno Test an Engine?

There are lots of great reasons to perform dynamometer testing on your engine. Learn more here.

If you’re reading this article, you probably already know what it means to dyno test an engine. In short, you power up the engine and add a controlled amount of resistance. From the test, a dynamometer measures your engine’s force, torque, and horsepower. Depending on your career or hobby, these are significant numbers.

But is finding out how many horses you have under the hood the only reason to dyno test an engine? Absolutely not. There are solid, practical reasons to dyno test an engine, bragging rights aside.

Here are a few of them:

To Help Keep Your Engine Running Properly

The computerized dynamometer provides accurate torque and RPM numbers. And then it can accurately measure horsepower. Whoever is tuning your engine now has a basis for changing the engine’s tuning, or they might even recommend changing the engine itself.

These are some of the variables that can be tuned using this method:

  • Intake manifold selection
  • Ignition timing and advance curve
  • Primary tube diameter and length for the headers
  • Carburetor spacers
  • Cam grind and timing
  • Carburetor size and jetting

For an Engine’s First Run

It makes sense to do the first run of an engine on a dyno. Engine break-in routines specified by cam and ring manufacturers can be accomplished under controlled conditions. Blow by can even be monitored as the piston rings seat. The engine can be pre-lubed and pre-heated before every start.

To Find Out the Temperature of Your Exhaust Gas

When it comes to tuning your carburetor—jetting, size, spacers, and fuel distribution—knowing your exhaust gas temperatures is as important (or maybe even more) than horsepower and torque numbers. You could save yourself a major engine repair with this information.

To Get a Written Record of Your Engine’s Performance

A dyno test will give you details about each test, weather conditions on the day of testing, and graphs of your engine’s performance. You can compare your personal performance experiences with the dyno numbers so you can make future adjustments or modifications.

Additional information from the test can indicate both torque and peak torque, plus horsepower, volume metric efficiency, the temperatures of the cylinders and pistons, airflow — I.e., measurements of virtually every engine function.

The Only Local Moving Checklist You’ll Ever Need

THE ULTIMATE MOVING CHECKLIST

There are so many to-dos when it comes to completing a move successfully. If you’re reading this, you are probably already well on your way to a successful move. To help you keep your move organized, here is our helpful moving checklist

60 DAYS OUT FROM YOUR MOVE:

Declutter the house: There’s no need to take things you no longer use to your new home, so open those closets and peak under those beds. Make organized piles of what you’re keeping, what you’re donating/selling, and what should go straight to the landfill. Purging before your move will make unpacking and organizing your new home feel much better.

Organize records: Make sure all of your important documents are in one place. Go ahead and obtain school records for your kids and medical/dental records from your health professionals.

Get a quote: While you’re here, contact us for free quotes from moving companies

30 DAYS OUT FROM YOUR MOVE:

Confirm moving plans: Touch base with your moving company and finalize the date and time for your move.

Order moving supplies: While you can always get new boxes from packing supply stores and places like Home Depot, there are several websites that allow you to order used moving materials, which are cheaper and better for the environment!

Start packing: There are probably plenty of items that you won’t really need to use over the next month or so like Christmas decorations or your ice cream maker. Start packing these infrequently used items so that as your moving date approaches, you’ll have less to do. Don’t forget that if the packing process just seems too overwhelming, Cheap does offer full service moving solutions.

Develop an unpacking plan: You likely already know where you’re headed. Think about how you want furniture arranged in your new house and where you want movers to place all your boxes. It’s helpful to clearly label your boxes with what room they go to in the new house.

Change of Address: Visit your local post office or go online to fill out an address for mail forwarding. Mail forwarding lasts for 6 months from your initial change of address request, so you’ll want to make sure all of your contacts have your updated mailing address.

MOVING WEEK!

Utilities: Contact your utility companies and schedule the end of service date for a day or two after your move. Make sure utilities are turned on at your new home prior to moving day.

Finish packing: Finish up the last of your packing. Make sure to pack all of your valuables and important documents in a separate box that you personally carry to your new home. Additionally, it’s smart to pack a box of things you’ll need for your first couple of nights in your new home. This way, items like linens, toiletries, a change of clothes, paper towels, are close on hand and you don’t have to dig through a bunch of boxes to find the essentials.

Inventory: Make sure you have a thorough inventory of all your items. This way you can easily check to make sure all of your belongings make it to your new home. It’s a good idea to take pictures of everything the movers are picking up so you can prove any loss or damage more easily.

Clean: Once the movers have loaded up the truck, make sure to do a thorough cleaning of your old home or apartment. To make things easier, schedule a maid service to do a deep cleaning for you, so it’s one less thing on your list.

Move!: Step aside and let the movers do their thing! Make sure you give clear instructions on where you want everything in your new place.

POST-MOVE

Get organized: Once the furniture is in place and the movers have taken off, get started with unpacking. Start with the kitchen, and then go room by room getting things organized.

Update Your Address: You’ll need to update your address with your bank and any credit card providers, order new checks, update your driver’s license. Also speak with your insurance agent to make any necessary updates to your insurance policies.

Meet the Neighbors: Get out and explore your new neighborhood!! Congrats, you’re all moved!


First Rate Movers

You can be confident that our crews will be prepared with tools, mattress bags, wardrobe boxes, clean moving blankets, floor runners, and all other equipment necessary to safely protect your belongings and property during your move. Confidence in our ability to provide a first rate professional moving service allows us to include $1,000,000 of full replacement value insurance

moving company stands out from the crowd is not just our commitment to excellent service but also the pride our movers take in their work. Unlike many movers, we hire only full-time employees – no part-timers or day labour.

Moving Large, Bulky Items So You Don’t Have To

Have you ever tried to lift a big screen TV, sofa or piano? It’s not an easy task, even with a few friends by your side. Large and heavy items can be dangerous to move without the right equipment and training. If dropped or mishandled, these items can damage your flooring, the item itself, and even others. A professional moving company will have all the right equipment and lifting techniques to move any large items safely so you don’t have to risk it.

Packing and Unpacking for You

Packing and unpacking can be more stressful than the actual move itself. To make matters worse, poor packing is the number one cause of broken items. Fortunately, full-service movers can pack and unpack for you. They are trained to pack the right way and can do it in a fraction of the time.

Safely Transporting the Items

Not all of us are cut out for driving a large moving van. They are long, tall, wide, and filled with thousands of pounds of your belongings – what could possibly go wrong? In Canada, there are hundreds of rental truck accidents every year caused by people who are not skilled enough to drive these vehicles. If you want your items to arrive safely in one piece, your best bet is to hire a moving company with professionally trained drivers with the right licenses for the truck size.


the ultimate moving help.

no move is too big or too small

help create a customized plan to fit the needs of your upcoming move. have a team of dedicated experts to guide you through the entire process from start to finish. From single-family homes to apartments, to retirement communities, to condos – no move is too big or too small.

4-8 weeks before moving day

Begin clearing clutter from your home. Start with closets, the garage, basement and attic.

Get rid of everything you don’t want moved. Host a “garage sale” or use an online auction service to dispose of unwanted items. Donate unwanted clothing or household goods to charitable organizations.

Contact Planes. Set a date for a virtual or in-home survey. This will allow us to properly estimate your upcoming move. If your move is a corporate relocation, share your company’s moving policy.

If this is a long distance move, make family travel plans. Reserve hotel rooms and airline tickets as needed.

Decide if you want to pack yourself – or if will you will take advantage of our professional packing services. We can always provide a quote to help you decide.

Confirm your moving service by signing the estimate/order for service and returning it to us. If you’re hiring us for a full-service move, read the “Your Rights and Responsibilities Manual” so everyone is on the same page. Keep the phone number and name of your salesperson and move coordinator handy.

Get packing supplies like boxes, tape, paper or bubble wrap, furniture blankets, mattress bags and markers. Contact Planes for high-quality, pro packing supplies.

As you start packing, label, label, label. You’ll thank yourself later!

Begin packing what you can. It’s never too early to box up items you know you won’t use before the move, such as books, pictures, knick-knacks and out-of-season clothing.

1-4 weeks before moving day

Use up supplies of canned goods, frozen foods and other household items. Buy only what you’ll need and use before moving.

Confirm details with Planes. Notify us if you add or subtract items or change move dates. Confirm any extra stops required to pick up or deliver goods during the move.

Say your goodbyes. Host going-away parties for you and your kids.

days before

Cancel subscriptions, cable and utilities, lawn maintenance and any other services.

Be aware that moving companies are not allowed to transport anything toxic, perishable or combustible. That includes anything with a warning label, cleaning supplies and grill tanks (we can take the grill, just not the tank).

Collect things you definitely want packed together and group them.

Drain all fluids from hoses, lawn mowers, propane tanks, etc.

If taking your fridge/freezer, it is recommended that the doors be left open for 24 prior to moving to avoid mold.

Wait to pack your cleaning supplies until you’ve done your last cleanup—especially if you have a security deposit. Don’t forget to clean the oven!

Have an essentials grab bag with toothbrushes, chargers, medicines paper towels, toilet paper, coffeemaker, paper plates/cups and plastic ware.

Unplug all electronic appliances 24 hours before so that they will be at room temperature.

Clear walkways of ice or snow.

If you’re using packing services, make a “do not pack” section and mark it clearly.

For long-distance move packing customers, labeling rooms will really help. Using painter’s tape, label the door to each room of your current home and ask the crew to inventory/mark company packed boxes accordingly. Then, use the same room labels at your destination.

move day

Be well-packed with boxes labeled.

As part of your move, we disassemble standard beds, but you’ll need to disassemble any specialty beds.

Secure designated parking as close to the house or apartment as possible.

If you’re using our packing services, group and label any extra-fragile items needing special attention to the packers.

Check closets, cabinets, drawers and any other storage spaces for overlooked items. Also keep in mind that we can’t go in attics or crawl spaces.

When your Planes moving professionals arrive, ask any questions you may have before they begin. Also, show them which bathrooms they can use.

Remain close by until loading is complete. And inventory will be emailed to you. Make sure to look it over.

Sign necessary paperwork (High-Value Inventory Form and Bill of Lading/Freight Bill). The High Value form will be filled out and given to first crew leader on site, either pack day or load day if not packing. Any items listed on the high value form must be available for inspection by the crew.

Confirm the exact destination address and your contact information with your move coordinator.

Be available to accept delivery or authorize an adult to accept delivery and pay any charges for you.

When unloading, be ready to direct where each piece of furniture will be placed, including laying rugs and setting up any beds that were disassembled.

Check your household goods as they are unloaded. Note discrepancies on the van operator’s copy of the inventory before signing. Keep all documents pertaining to your move in a safe place for tax filing purposes.

Check for property damage before the Planes team departs.


MOVING FAQS: UNDERSTANDING THE MOVING PROCESS

When is the best time to move?

The busiest times for moving companies are during the summer months, taking place roughly between May 15 – September 15. Near the ends of these months, the volume of shipments is extremely heavy—this tends to be the case for all professional relocation and moving companies.

It’s important to take all factors into consideration when deciding on the best time for you to move. If you have some flexibility in your schedule, providing the moving company with a five-day window for loading your shipment can be greatly beneficial. This will allow the individuals who schedule your drivers and moving crew greater flexibility when scheduling your move. If possible, try to be flexible with your arrival time frame as well—keep in mind that you most likely are not the only shipment the truck is currently moving. Offering a flexible time frame can make a world of difference, and make your entire process of moving much easier.

How do I select which moving companies will provide me with a free moving estimate?

Your first step is determining if you need a full service moving company. It’s a good idea to research local, national, and long distance moving companies— ask your neighbors, friends, coworkers and family members if they can make recommendations. Investigate each of the movers you select with the Better Business Bureau. Good service is the best measure of a good mover!

When should I begin contacting moving companies for free moving estimates?

Try to provide the moving companies with as much notice as possible, especially if you are moving during a busy summer season, as noted above. Six weeks from the actual move date is a great time frame for estimators to come into your home and complete a visual survey of your household goods shipment. It is also a good idea to add even more time to make a decision, in the event that you are obligated by your employer to submit moving estimates for a corporate relocation. Try to decide which mover you will use at least four weeks from your actual load day. Additionally, call the mover to confirm your booking and schedule your packing, loading and delivery dates. This time frame can be shortened if you are moving outside of the peak moving season (September 15 through May 15 are considered “off peak” months, which generally feature less moving traffic).

What happens when a relocation specialist comes to my home?

The relocation specialist will arrive at your home to complete the visual survey of your items. Once this is completed, he or she will calculate the weight, packing cost and any other charge related to your move—please remember that the relocation specialist must clearly see what you are moving in order to provide you with an accurate estimate. Crawl spaces, attics, and cluttered closets can often be deceptive, so organize your house well before the relocation specialist arrives.


things to keep handy on moving day

When prepping for a local or long distance move, it’s human nature to get caught up packing away all your personal belongings so there’s nothing left behind to scoop up at the end of an exhausting process. But what if you get to your new home and realize you need scissors, only to remember they’re tucked away deep in one (which one?) of the many boxes in the back of the truck?

We’ve been there, we’ve cursed ourselves for not being better prepared, and we’ve since compiled a list to keep you from suffering the same frustration. Here, we present a handy little checklist of the top ten things to have handy during the first 24 hours in your new home… just in case.

A last-minute packing kit including a spare box or bag(s), scissors, tape and magic marker (because yes, you’ll likely have forgotten to pack something)

Paper towels and toilet paper

Toiletries for first day or two: soap, toothpaste, toothbrush, shampoo, deodorant, razor

A set of utensils for each person (because Murphy’s law will enact itself if you have takeout delivered to the new casa before you’ve unpacked your kitchen stuff)

Pet food, bowls, leash and crate/bed

Prescriptions, allergy meds, aspirin, contact lens solution

Phone or iPod speakers (our completely unscientific research, i.e., personal opinion, finds the unpacking process to be approximately 97% more enjoyable when set to music)

Phone and laptop chargers

Snacks, snacks, snacks

Any other items that can make your first night more comfortable: a shower curtain & hooks if the new home doesn’t have an enclosed shower, a water filter if the new fridge doesn’t have one… whatever helps you settle into your new place with as little hassle as possible.

Even though we live in a world where practically everything’s available 24 hours a day, inconveniences are bound to present themselves when moving your life from one home to the next. A little bit of prep work can go a long way toward keeping your cool in the midst of a move, and taking a few minutes to set aside the essentials can mean the difference between sleeplessness and sanity.

Drywall Water Damage Ceiling Repairs

How to Paint a Ceiling

A professional home painter shares his tips for painting both smooth and textured ceilings, with equipment recommendations and tricks of the trade.

Use a Stain-Blocking Primer to Cover Flaws

Roof leaks, overflowing sinks, tobacco smoke and big spills can all leave ugly ceiling stains or dinginess that is impossible to conceal with plain old paint. But cover the stain with a coat of stain-blocking primer and your troubles are over.

Sand Before You Paint

Over time, and as the layers of paint build up, bumps and crud can get stuck to the ceiling. On untextured ceilings, it’s a good idea to start with a quick once-over sanding with 100-grit drywall sanding paper. This helps ensure a perfectly smooth paint job and increases paint bonding. The easiest way to do this is with a sanding pole. When you’re done sanding, wipe the ceiling with a damp sponge to remove the dust.

Rules for Painting Ceilings: Cut in Before You Roll

Cutting in before you roll allows you to cover most of the brush marks with the roller. Carefully brush paint along the edge of the ceiling a section at a time. Cut in about 10 linear ft. and then roll that section. This method has a couple of advantages over cutting in the entire room at once. First, the cut-in section will remain wet until you roll, so it blends in better. Also, it’s simply less boring to alternate between cutting in and rolling.

Rules for Painting Ceilings: Roll Both Directions

There are a few tricks to getting a smooth, consistent coat of paint on the ceiling. First, work in sections about 5 or 6 ft. square. Move quickly from one section to the next to make sure the paint along the edge doesn’t dry before you roll the adjoining section. This is called “keeping a wet edge” and is the key to avoiding lap marks. You’ll get the best coverage by immediately rerolling each section at a right angle to your first roller direction as you go.


Paint a Ceiling

Prepare to Paint

Painting a ceiling isn’t much different from painting a wall. A good job takes preparation. To repair existing damage and protect your furniture, floors, fixtures and trim, read Prep for Paint.

For the best results use a ceiling paint and primer in one. It’s formulated to spatter less and has a flat finish to help hide imperfections. A gallon generally covers about 400 square feet.

As for color, white can brighten rooms without much natural light. On the other hand, a large room with high ceilings feels cozier by painting a darker color. Small rooms can feel less confining by minimizing contrast between walls and ceiling

If you’re not going to paint the walls, apply painter’s tape around the edges for a crisp line. Then cut in using a 2- to 2-1/2-inch sash brush and a cut bucket, which is a smaller receptacle that you can easily carry up and down the ladder. Don’t load the brush too much, and start each stroke away from the edge and work the paint toward the tape. Make long strokes and always finish brushing back into the wet paint. Paint several inches onto the ceiling and feather the edge.

When it’s time to roll, use a low nap roller for smooth ceilings, and a 1/2-inch or 3/4-inch nap for textured ceilings. An extension pole helps you reach the ceiling without a ladder.


How to Paint a Ceiling – Tips & Best Practices

Painting a ceiling can be a long, arduous process—but it is often necessary and worth the visual impact. Follow this guide to painting flat ceilings for helpful tips concerning the right material choices, the best techniques, and the potential decision to hire a professional. This guide does not cover tips and processes involved in painting with drop or textured ceilings.

Ceiling-specific Paint. Buy a variety designed specifically for this application. These are usually flat finish latex and come out with the most ideal results. They perform well in the two areas where this project could go wrong: splatter and drying. These application-specific varieties are slow-drying and less likely to splatter—though some drips are inevitable.

No Gloss Finish. Don’t buy a product with a glossy finish. Semi-gloss and high-gloss finishes are highly reflective and detracting for room design. The best choice for most rooms will be a matte or flat finish in latex. However, there are certain situations that might call for a semi-gloss, such as in bathrooms and even kitchens.

High Quality. You save yourself a lot of time and get better results when you choose higher quality products. A higher-quality product or one with a primer mixed in will require less coats overall. This work can be tough on your back and neck, and you will have limited use of a room during the days that the project is active. A shorter completion time can be a major advantage.

White vs. Colors

In most homes, these surfaces are white or some shade of white, and that trend continues in remodels and new construction. White makes for a brighter, lighter room and gives the illusion of a larger and taller space. It doesn’t distract the eye, allowing for intentional accents to draw attention.


Tips For Painting Ceilings

They’re usually much larger than a single wall and are often illuminated with raking light that accentuates even the smallest flaws, which means ceilings present some unique painting challenges. Add to that the difficult task of working overhead and things can get messy in a hurry, so we’ve grilled a pro to help you get the best result.

Over time, and as the layers of paint build up, lumps and bugs can get stuck to the ceiling. On ceilings that aren’t textured, start with a quick once-over, sanding with 100 grit abrasive paper. This helps ensure a perfectly smooth paint job and also increases paint bonding.

Roof leaks, overflowing sinks and tobacco smoke can all leave ugly stains that are hard to conceal with regular ceiling paint. Apply stain-blocking primer to cover any stubborn ceiling marks. Try Zinnser Smart Prime, which is formulated for this purpose and water-based for easy application.

Use a paintbrush to cut in at the edges of square-set ceilings. Doing this before you roll means the majority of the brush marks will be covered with the roller. Carefully brush paint along the edge of the ceiling in 3m sections, then roll that section.

There are a few tricks to getting a smooth and consistent coat when applying paint to the ceiling. Work in square sections about 2 x 2m, moving quickly from one section to the next to make sure the paint along the edge doesn’t dry before you roll the next section


How To: Paint a Ceiling

Painting is perhaps the easiest of DIY home upgrades, but tackling the ceiling can be a daunting endeavor, particularly since it requires a bit of elevation and contortion. Here are some pointers on prep and techniques for how to paint a ceiling that will help you accomplish the job easily and successfully, just like a pro.

Clear the room out, and cover the floor (and anything that remains) in cloths.

Before you begin, remove as much of the furniture from the room as possible; doing this will make it easier for you to maneuver through the space where you’re working. Use drop cloths to cover any furniture that’s too cumbersome to move.

Mask tops of walls and crown molding with painter’s tape.

If you are just painting the ceiling and not the walls, use quick-release painter’s tape (see this guide for the best painter’s tape options) where the walls meet the ceiling. Painter’s tape should also be applied around any moldings that decorate the ceiling’s edges.

Prime before you paint the ceiling.

Apply a coat of interior latex paint primer by roller (with an extension rod to reach the ceiling). Don’t cut corners and skip this step: The primer will provide a stain barrier and, in most cases, will make it possible to use only one coat of paint to finish.

Cut in around the ceiling’s edges using an interior latex paint with high viscosity.

Now, switch to paint, either one that is labeled as “ceiling paint” or an interior latex paint with high viscosity—measured in Krebs Units (KU), this is generally 106 KU or greater. You’ll find the KU measurement in the manufacturer’s specs for any given paint, if it’s not located on the back of the paint can itself. The slightly thicker paint sticks better to the ceiling and stays there until fully dry.

Important Things To Look For In An Electrical Panel Upgrades

What is a Panel Heater?

A panel heater is a type of electric heater that you can mount on the wall. You can put panel heaters anywhere you like, as long as there is a 30cm clearance at the top and bottom of the panel to allow for the convection current and a nearby power socket. As panel heaters are usually IP22 waterproof, you can also use them in the kitchen and bathroom with complete confidence.

Panel heaters are a popular choice due to their slim design and fast acting heat. They work particularly well in smaller spaces or spaces you use infrequently as they provide instant heat as soon as they are switched on meaning that you don’t have to wait around before you can comfortably use the room.


How the panel heater works – Natural convection technology

Econo-Heat wall panel heaters offer out-of-the-way wall mounting and are an economic way of providing efficient room heating at a low cost. Using natural convection technology, heat is mainly generated behind the heater in the space between the panel and the wall, which leads to an efficient up draught of heated air circulated into the room (the heated air rises at a speed of 0.7m per second!). This principle of convection means that about 90% of the heat comes from the back of the panel, while only 10% is radiated from the front of the panel. This form of background heating is extremely economical, safe and efficient.

Your Econo-Heat wall panel heater is designed as an alternative to conventional bar heaters and other forms of high output heaters that use large amounts of electricity. It operates at relatively low surface temperatures (75 – 90°C, dependent on the ambient temperature), and uses minimal electricity.


Benefits of Electric Heating

Electric is the fuel of the future for heating requirements. With volatile oil prices and supplies, less and less natural gas and more renewable electricity production, heating your home with an electric heating system will future proof your property Dwindling supplies of north sea gas, the uncertainty of imported gas supplies, the volatility of oil prices and the commitment to reduce the U.K. carbon footprint all point towards electricity as the fuel of the future. The government has set a clear path towards a lower carbon future, with electricity to be generated by nuclear power and sustainable sources e.g. wind power, solar energy, wave power etc. Electric heating is 100% efficient and carbon neutral at the point of use, and with electricity being generated by nuclear and renewable sources in the future it will become completely carbon neutral. The government also promotes the use of micro generation technologies e.g solar panels, photovoltaic’s and wind turbines. Electric heating appliances are compatible with all these micro generation technologies. As more low carbon and renewable sources of electricity become available we will increasingly see electric heating being favoured over gas.

Low Installation Costs

Electric heating is very easy to install. There is no requirement for unsightly pipe work, and minimal disruption during installation. Because each electric radiator can work independently, it is easy to add to a system as necessary or as budgets permit. Also because each radiator is controlled independently from the system, it allows much better control over room temperatures and energy usage than is possible with a boiler based system.

LOW OWNERSHIP COSTS

The true ownership costs of a heating system should be looked at over a system lifetime. Electric heating systems have no moving parts and can be expected to last over 15 years. The boiler industry quotes a lifetime of 10 years for a boiler. Boiler based systems require costly yearly maintenance whereas electric systems are maintenance free. Electric heating is 100% efficient at the point of use meaning all the fuel used is turned into heat unlike boiler systems where energy is wasted through the flue. No Maintenance and no annual inspection. Yearly maintenance and safety checks can add significant costs to the running of a system. Gas boiler systems require yearly maintenance and if used within rental properties, both private and social housing landlords are responsible for annual safety inspections. This can also be a major hassle for landlords needing to gain access to properties to conduct maintenance and safety checks. Electric heating does not require any maintenance or safety inspections.


What does this mean?

Put simply the cost of buying your gas powered boiler is more than an electric heating system. So is the cost of servicing, maintenance and potential repairs. In addition, the electric heater should last 50% longer than the gas boiler! Put together, this figure will almost always cancel out the fact that gas is cheaper than electricity; electric heating is a better solution over the long term for your wallet!


Meet the Modern Electric Heater

The electric heater has evolved over the last few years. They now have sophisticated and ultra reliable thermostatic controls. These can ensure that your room temperature is kept constant whilst activating the heater only when needed. It is much easier and cheaper to keep a room warm then to let it cool and reheat it!

The array of options can be decided by you at the time of purchase. Heaters can have a plug-in control module, or they can be supplied with every imaginable feature built in. You can even control all your heaters from one programmer and link them to a smart system; enabling heating control away from home!

It is also important to consider then fact that electric heaters are generally safer. A gas or other fuel burning system will produce carbon monoxide; which is deadly and must be removed from the home. This is not an issue for the electric heater.

Indeed, if a radiator bursts or the boiler breaks it is highly likely that your heating system will be shut off. But, if one electric heater breaks; the rest will still function perfectly. There really is much more to electric heating than meets the eye!

Picking The Best Home Builder To Build Your Future

Things to Consider When Hiring a Custom Home Builder

Building a custom home is a lifetime dream for many owners.  Choosing the right builder is essential to making that dream come true. Hiring a custom builder is an important decision and should be a thorough and careful selection process. Most likely, you will be working with a builder for upwards of 12-14 months, and like any relationship, there must be honest, sincere communication.  Hiring a custom builder can help you get significant value out of building your home.  They can become an advocate that can be a resource helping you navigate this experience.

WHAT IS THE HOME BUILDER’S RESPONSIBILITY?

First and foremost, the best home builders advocate for the homeowners and collaborate as a vital member of the design team. On behalf of the homeowner, the builder works with the design team to help their clients establish a realistic budget for the custom home project. The architect and builder can share best practices and collaborate in customizing the design of your home.

The builder monitors the cost, scope, and execution of the building project during the design and construction process. Great builders are transparent, communicate well, and are always available to their clients to ensure the projects stay on budget and on-time.

Builder Responsibilities:

The builder contracts with the homeowner for a construction home, track all cost, submit pay request for approval to the designer and bank. Additionally, they provide any lien release waivers for completed work and prepare estimates and collect money for any approved change orders.

The builder will manage all subcontractors during the design process to accommodate the architect’s team and homeowner.

Your builder will act as a liaison between the design team, building inspectors, and governing jurisdictions.

The building contractor will manage and obtain all approvals, inspections, and the certificate of occupancy on behalf of the homeowner.

The builder will order, check, and receive all building materials and manage all aspects of the building, and installation.

Upon completion of the construction, the architect may review the project with the builder to check for any deficiencies. If any problems, the builder will work with subcontractors to resolve these issues. Then the city will conduct a final inspection and issue the certificate of occupancy. Afterward, the builder will deliver the home to the owners.

The builder will correct all discrepancies noted on the homeowner’s punch lists. Additionally, the builder will educate the homeowner on the operation and maintenance of their new custom home.

WHEN SHOULD YOU HIRE A CUSTOM HOME BUILDER?

Hire a builder sooner than later in the custom home designing process, so they can guide through the project and help control costs. Negotiate upfront with the builder how they are compensated and trust their experience in negotiating bids from subcontractors and suppliers.


Best House Design Ideas

If you’re going to the expense of a significant home improvement or house building project, then you are going to want to consider incorporating some clever house design ideas to create a sense of wow factor. But which home design ideas offer the biggest reward?

At the design stage, think about whether you are looking for house design ideas to add architectural interest, to transform how you live in and interact with your home, or a combination of the two.

Mirrors: A Big House Design Idea for Small Spaces

If you’re working with a small footprint, ideas to help the space feel bigger are always welcome. One idea that’s definitely worth incorporating was showcased in Samantha Parr’s beautifully built oak frame home: it’s just 100m² but clever use of mirrors makes this space seem bigger

The first floor of Samantha’s home is open plan and has exposed rafters. One gable is glazed with views out, the other gable wall cleverly features mirrors above the kitchen units — giving the impression that the house actually expands beyond this gable end. But in fact the mirrors are reflecting the interior and views out. A convincing technique!

Incorporate Statement Fretwork into Your Home Design

To keep materials consistent throughout their energy efficient home, and to herald the nearby Black Country and its local artisans, these homeowners chose to include a touch of industrial style with seven fretwork panels made from mild steel that adorn the staircase from top to bottom, and the striking pergola entrance porch.


Building a new family home? Here are things you need to consider when choosing your builder

A trade background

A good choice is a builder who has had experience working in a core trade such as carpentry, plumbing or electrical. They’ll know exactly what happens on a site and importantly can sympathise with the different points of view on a building site (builder vs trades vs customer). They’ll put the right team together who will get you the right results.

Confident and knowledgeable

The right builder will be able to answer your questions instantly and with confidence. Their body language should support what they’re telling you — do they maintain eye contact or do they look away uninterested? If you’re talking to a salesperson in a large building company, the salespeople should still have the knowledge and training to be able to answer everything you need to know during your meetings with them.

Receptive to your needs

A builder who’s passionate about building your home will genuinely listen to your needs to make sure they understand what’s important to you in your home.

They’ll come up with ideas for your home

A builder who enjoys and is good at building homes will put in the effort to give you ideas that will help you get the home you want. You won’t be getting a quick ‘no’ to your suggestions (a sign there’s not enough money in it for them) then find them pushing for other things because they just have bigger margins.

The rule of five references

The builder should be happy to give you references. They should be both from clients they’ve previously built for and clients they’re currently building for. To get a good feel for their projects, speak to at least five of their clients to get their thoughts on how the build went. Also, ask if you can visit homes they’ve built to see first hand the quality and finishes they achieve


Incredible DIY Home Projects

If you’re looking to become a DIYer or if you’ve been a DIYer for years we’ve got an assortment of incredible DIY projects you can try. Check them out.

Use Firewood For a Project

If you have a stack of firewood, grab a couple pieces and a saw and make one of these simple firewood projects. Whether you make coasters, a stool or a shelf, you can create something in just a couple hours.

Cedar Potting Bench

This super-simple potting bench will make your gardening projects much more enjoyable—and it’ll help you stay organized

Build a Wooden Bench for Less

Need outdoor seating in a hurry? This simple bench, based on author and ecologist Aldo Leopold’s classic design, can be constructed in a couple of hours, even if you are a novice woodworker. All it takes is two boards and 18 screws, for a cost of less than $25.

Arbor and Benches

Build this simple seating/planter/arbor project to create a quiet, private space in your yard or on a deck. It provides shade and comfort as well as a welcome screen from neighbors. You can install it on an existing patio or build it on your deck


Things to Consider When Choosing a Builder

It is important that you choose the right contractor when building your dream home.  Choosing a builder/contractor affects every aspect of the project. Whether you are building on your land or a lot the builder/contractor owns, there are many contractors in the marketplace and to have a well-built home and enjoy the building process you need to hire the right one.  Whether you have purchased vacant land for sale yourself, or plan to build on a lot owned by the contractor, location is everything.  You need to love where you are building! That’s first and foremost.  You’ll never love your new home if you don’t love its location!

Experience: Make sure the contractor you want to choose has experience. Look at the years that the contractor has been in the construction industry. It is important that you align the skills of the contractor with the home you want to be built. New contractors might not have the experience and skills to provide the quality service that you want. An experienced building contractor will have the skills and the facilities to build your home.

Reputation: The contractor’s reputation is a valuable asset. Look at the reputation of the contractor. A contractor gets a good reputation from consistently providing quality services. Look at online reviews of the contractor and try to interact with the contractor’s previous customers. Know more about what they think of the contractor. Word of mouth is also a good way to know about the contractor’s reputation. Talk to people that have worked with contractor, used the contractor and worked alongside the contractor e.g. building inspectors

Past work: Look at past works of the contractor. Most contractors put the pictures and details of previous houses they have constructed on their website. Before you choose a contractor visit completed projects and make sure they are up to par with your expectations, visit jobs in progress and see the construction taking place, look for ideas that you have not thought of and get an impression of the contractor’s work, professionalism and culture. If you like what you see, then you can choose that contractor.

Time: Make sure the contractor you want to build your home in the land for sale that you bought is time conscious. Time is important. Make it clear that you do not negotiate your deadline, you do not want excuses and you will not tolerate delay. Make sure the contractor provides you with a start date and a completion date. Research the policies and guarantees of the contractor. Know if other customers have complained about delays and missed deadlines.

The Different Types Treatment For Racoon

RACCOONS

How to Get Rid of Raccoons Humanely

Getting rid of raccoons takes an integrated approach; applying several control methods at once will give you better success at eliminating raccoons and keeping them away

Remove Food and Water

Raccoons invade your yard or home in search of food. Make your yard less inviting and your raccoon control plan more successful by eliminating any potential food sources that might attract them.

Identify Areas of Damage

Knowing where your raccoon is spending most of its time and pinpointing the damage will help you target your control method.

Choose the Right Control Method

Once you’ve identified where your raccoons are frequenting, you will be able to choose a control method. It’s important to note that the more layers of defense you have against raccoons, the better your chances are at getting rid of them and keeping them off your property.

Raccoon Repellents

Use a repellent to keep raccoons out of frequented areas or to keep them off of objects and surfaces.


How to Get Rid of Raccoons

They’re furry. Even cute. They’re pet-sized and adorable enough to earn nicknames like Trash Panda and Shuffle Cat. But raccoons can be a menace when they make their homes in your attic or crawlspace.

The Damage Raccoons Can Cause

Those cute little furballs can be a whirlwind of damage in your attic or garage. They’ll do damage to your house itself, your property and even bring in the threat of disease.

Raccoons Bring Parasites, Leave Smell

Perhaps the worst damage can come when the raccoons decide to use an area of the attic for a latrine. It can stain the ceiling beneath with droppings, urine and their objectionable odors.

Raccoons can even bring parasites and diseases into your home. The raccoon roundworm is an infection spread to people by the accidental ingestion or inhalation of the roundworm eggs from raccoon feces. And it’s especially dangerous to children.

Protecting Your Home From Raccoon Damage

With cold weather and the raccoons’ breeding season just around the corner, now is the time to make sure your house doesn’t become a raccoon’s winter getaway.


How to Get Rid of Raccoons

The rustling sounds you hear near your garbage cans at night may not be wind gusts or a top-heavy container falling over.

Your yard may have become the favored feeding spot of a furry visitor. While raccoons may seem cute, they can be a pest to homeowners and farmers – and even a carrier of disease. That’s why it’s important to understand raccoons and their behavior should you spot one near your home.

Physical Characteristics

Researchers believe that over 10,000 different species of ants exist, but only a handful of breeds regularly venture indoors.

Here’s a guide to the most common household invaders and the risks they carry:

Adults may weigh from 10-30 pounds and measure two to three feet long (tail included)

Distinctive blackened areas around the eyes

Grizzled-gray fur with a bushy tail that features dark rings

Eats both plants and animals

May run up to 15 miles per hour and also swims

Found throughout most of the U.S.

Less active in winter, but do not hibernate

More active at nighttime as they seek out sources of food

While their activities are defined by the seasons, raccoons only live three to five years in most cases. Roughly 50-70% of their populations consist of animals under a year old. Their role within the food chain helps to prevent overpopulation.

A Raccoon’s Life Cycle Moves as Follows:

The spring months see the birth of a new generation of raccoons after a gestation period of about 63 days. Most new groups consist of one to four babies, called kits. The young stay with the mother for six to ten months.

The youngest raccoons are weaned during late summer and fall, at which point many will leave home to build their own dens.

As they reach adulthood, raccoons will roam about during winter and early spring in search of mates. Males (called boars) are known to travel greater distances than females (called sows) during breeding season as mating occurs only once per year.


How To: Get Rid of Raccoons

Behind that adorable masked face lies a determined forager and a potentially destructive intruder. When it comes to dealing with wild animals, there are seldom guarantees. But if you’re determine to get rid of raccoons on your property, you can do worse than start with the tips and tricks detailed here.

Sure, raccoons are sort of cute, but know this: If it feels threatened, a raccoon can be dangerous, particularly if it’s carrying a disease (e.g., rabies). Tread carefully, and remember that there are professionals trained to deal with raccoons and other creatures. Your local government most likely includes an animal control department with field operations aimed at helping residents cope with wildlife. Of course, if you’ve been frustrated by repeated incidents or feel the need to get on the case immediately, continue reading to learn how to get rid of raccoons safely and effectively, whether they’re causing trouble under your roof or strictly outdoors.

OUTDOORS

Raccoons are scavengers; if they’re hungry, even mere morsels of food left out in the open can lure them to your property. To eliminate a raccoon problem, therefore, it’s important to keep discarded food waste out of sight and to the greatest extent possible, contain or mask its odor. Purchase and use receptacles with lids that close tightly and lock into place. Additionally, consider double-bagging any trash that’s going to spend at least one night outdoors before your next scheduled garbage collection date.

Any food—even pet food—left outside can attract raccoons. If you must feed your pets outdoors, feed them only at certain times of day, and remove anything uneaten. If you and your family like to cook and/or dine al fresco, always take the time to clean up afterward. Here, it’s well worth being thorough; as a precaution, hose and wipe down your picnic or patio table at the end of a meal. For best results, use a cleaner that contains bleach, a chemical that goes a long way toward vanquishing odors. Note that bleach works so well at eliminating food odors, you might even pour some over any trash bags left outdoors in a unsecured receptacle.

INDOORS

While raccoons can make a real mess of your yard, strewing trash in all directions over a surprisingly broad radius, they can wreak even greater havoc indoors, endangering your family’s health and safety.


How to Get Rid of Raccoons

There are plenty of humane ways for how to get rid of raccoons. Here are some easy ways to get rid of raccoons.

It’s no secret that raccoons are a nuisance. On the hunt for food and a place to establish their den, they can show up in your yard, your attic, your chimney, rummaging through your garbage and more. While they’re not out to destroy your home sweet home, it is important to get them out and keep them out. Here’s how to get rid of raccoons.

If you see a raccoon nosing around in your neighbor’s trash, they would probably appreciate a heads-up. However, here’s a list of things your neighbor really wants you to STOP doing.

If you don’t have a raccoon problem yet, but you’ve seen them in your area, you’ll want to start with prevention. Keep food sources out of sight, with garbage well-secured in outdoor trash cans, using a thick lid and a weight or pressure straps on top. Also, be sure your pet’s food is kept indoors. Install a tray on bird feeder polls roughly six inches below the feed to catch any dropped seed, and be sure the feeder isn’t in a location near trees that the raccoon could use to jump from to get on the feeder. Also, be sure to cut trees back to six or eight feet from your home so raccoons can’t get to your roof and make their way into the attic to form their den.

How Do You Get Rid of Raccoons?

You can even deter raccoons from coming with cayenne pepper. These masked marauders hate the smell of the spice. Add one small canister of cayenne and one bottle of hot sauce to a gallon of water, then spray the solution all over your garden plants, bushes and shrubs, and reapply after a rainfall. There are various other repellents you can use as well, like Mint-X trash bags, which are specifically designed to repel raccoons. They’re all-natural trash bags that have a mint fragrance, which raccoons dislike. Motion-activated floodlights can also serve to deter raccoons.

How To Perform A Final Move In Cleaning After Construction Or Renovation

Moving in? Read Our Easy Move-In Cleaning Checklist

Start fresh in your new home by following our professional move-in cleaning checklist. Plus you’ll learn how to make your home chemical and allergen-free from the beginning, and get our top tips for preventing mess build-up in living areas and the kitchen.

Should you clean your house before moving?

Your place is brand new or freshly vacated, so it should be clean, right? Not necessarily. If the house has just been built a whole home clean is necessary to remove any remaining dust or chemical residue that comes with construction.

What is a professional move-in cleaning checklist?

A professional move-in cleaning checklist is useful regardless of whether you choose to clean-it-yourself or use a move-in cleaning service. By referencing a checklist, you can be sure that no crack or crevice goes uncleaned.

How to clean a new bedroom

Cleaning bedrooms thoroughly before you move-into a new house is important as you’ll be exposed to any lingering allergens here when you sleep. As with all rooms, we would recommend working from top to bottom so you can easily keep track of what areas you have already cleaned and avoid transferring dirt to previously cleaned areas.

Cleaning a bathroom before you move-in

Old bathrooms can be problematic to clean if the previous tenants didn’t clean regularly. It’s a good idea to closely inspect your bathroom for mold, damp areas or damage (eg. holes in grout) before you move-in as it will be easier to address these issues while the bathroom is empty


MOVE IN & MOVE OUT CLEANING

Are you Moving?

Moving into or out of a home is the mark of an exciting transition in life, but it can be a very stressful time. There’s so much to take care of, with everything from packing to decorating your new home and everything in between. One of the biggest pains of moving is cleaning your former or new house to prepare it for sale or the big move-in day.

Move-Out Cleaning

If you’re moving out, it’s always a good idea to clean up your house or apartment, either to make it spotless for the new occupants or to ensure you get your security deposit back. It’s also important to clean the house if you are putting the home on the market and need it spotless for pictures and open houses. No matter the reason, your former home should be just as clean as when you moved in, if not more.

Classic Move-Out Cleaning

Do you have a tighter budget but need to satisfy the conditions of your sale or lease with a basic cleaning? ***

Was your old home well maintained, with mild to moderate build up in the kitchen, bathrooms, and floors?

Premium Move-Out Cleaning

Are you preparing for Open Houses or a photo shoot?

Was your old home rarely cleaned, with heavy build up in the kitchen (grease, crumbs, fingerprints, mold), bathrooms (soap scum, mold, hair/fur, fingerprints, etc.), and floors (bugs, shoe prints, splatters)?

Beyond satisfying the conditions of your sale or lease, do you want to get a thorough cleaning performed for the new owners or tenants?

Move-In Cleaning

Moving into a home has the promise of a fresh start, a new beginning. However, there’s a lot to arrange before you move in, including cleaning and preparing your new home for new furniture and new occupants. In all the chaos of moving, you might not have time to make a trip out to the new house to prep it for the move-in.


Easy Tips for a Move-In Apartment Cleaning

There’s no better way to start your life in a new home than cleaning your apartment like a pro before moving in. This is a crucial step because you can never know how clean your new place actually is. In addition, cleaning it after you’ve moved in would be more difficult and time-consuming.

How clean should an apartment be before moving in?

When moving into a new home, you shouldn’t neglect the importance of move in cleaning. This step is crucial for preparing the apartment for your family and ensuring that you move into a healthy, clean and fresh environment.

Professional cleaning standards

If you decide to hire professional move in/out cleaners in Mobile to help you out, you’ll be glad to hear that your new home will be squeaky clean. These cleaning professionals follow the highest hygiene standards, so your apartment will be cleaned to the last detail. What’s more, trusted expert cleaners employ sustainable cleaning practices, so they can remove all the allergens, toxins and chemical residue that previous tenants might have left. So, if you’re still wondering how clean your new home should truly be, try to meet the experts’ norms.

How do you do a moving in cleaning?

Move in cleaning isn’t a simple task since it’s more demanding than regular cleaning. You need to pay attention to some areas you might otherwise neglect or use more effective cleaning supplies.

Here are a few helpful cleaning tips that can make your move-in clean-up more organized:

Clean from the top. Cleaning from the top down is the most efficient way to deal with dust. This way, you won’t have to go back to re-clean the areas, but simply work your way down from the ceiling fans and lighting fixtures to the floors.

Deep clean the cabinets and closets. Rarely do people consider the interior of their cabinets and closets. Yet, it’s a must-do task on professional cleaning checklists for a reason.

Disinfect the bathroom. Since this area requires a thorough scrub, don’t skip anything. Be as meticulous as possible, dealing with every single spot. You should also replace the toilet seat.

Tackle the appliances. Kitchen appliances also require special cleaning attention, so make sure to deep clean them. The fridge, sink, oven and microwave should be disinfected, but make sure to use a product that won’t damage the finish


Move Out Cleaning or Move In Cleaning

Whether you’re renting your home or apartment and hoping to get your deposit back, or you’re a property owner preparing the space for the next inhabitants, keeping on top of the cleaning is important. If you’re about to move out of an apartment at the end of your lease, you want to leave things looking better than you found them. And if you want to be sure prospective tenants are rushing to give you their first month’s check, the best way to do that is to make the place sparkle. Luckily, we are here to help with move out cleanings and move in cleanings!

Experienced

Not only can booking move out cleaning services through save you money, but it can save you time and buy you peace of mind, too. Instead of trawling through Craigslist or getting the opinion of a friend of a friend of a friend on which move out cleaning services to use, you’ll find all the information you need on the platform, from biographies to testimonials. Whether you’re a property owner or a tenant, using to find the best one-time cleaning services can significantly reduce the stress involved in moving.

Skilled and Capable

Whether you use the website or the app, will connect you to the best move out cleaning professionals in your area. You’ll be able to see their reviews and ratings, so you’ll know that they’re up to the task of cleaning your place, no matter how much junk you’ve accumulated since you moved in!

Reliable

Using to source the best move out cleaning service for your needs is the best way to ensure that you leave your old home spotlessly clean. For renters, this is a great way to safeguard against unexpected bills at the end of a lease. Using to connect with move out cleaning professionals ensures that you can’t be billed for any clean-ups that need to be done after you’ve left.

Flexible

Is easy to use, whether you go to the website or use the app. Enter your zip code and the size of the property to be cleaned and you’ll instantly receive quotes from the best move out cleaning professionals in your area. There’s no need to worry about buying brooms or cleaning supplies: the move out cleaning service providers you book will come fully equipped and ready to go to work.


MOVE-IN CLEANING CHECKLIST

You bought or signed a lease on a new home and as the date approaches to move in your things, you realize the house or apartment might need some cleaning before you get settled. This guide has everything you need to know about starting off on the right foot with a freshly cleaned space.

How to Clean a House Before You Move In

We recommend cleaning before you move anything into your new home, as the cleaning will come much easier without all your belongings filling the space. If you won’t have time to clean the space yourself (with everything else to take care of in the transition), consider hiring a move-in cleaning service.

If you choose to handle the job yourself, we recommend considering following these steps:

Start with the fridge. Having a clean space to store your food is incredibly important. Consult our refrigerator cleaning tips for help accomplishing this task.

Once the fridge is clean, move on to the rest of the kitchen. Clean from top to bottom and make sure all of the appliances are thoroughly cleaned. Don’t worry about the floors.

How To Become One Of The Best Immigration Lawyer

How to choose an immigration attorney?

Once you decide to consult with an immigration attorney, you will face a challenge of selecting an attorney who is right for you

If you are not living in a big city, there may be few immigration attorneys to choose from. You may go for a phone consultation with an immigration attorney if you just have a few questions and your case is not pending in immigration court. You may send your papers by e-mail to an immigration attorney in San Francisco for review. Immigration attorneys in San Francisco give consultations by phone or skype, accept credit card payments over the phone.

Please keep in mind that not all the people who will try to help you with immigration issues are in fact immigration attorneys. There is a lot of immigration fraud in the Russian and Hispanic communities in big cities all over the United States.

Immigration attorney Lena Korial-Yonan in her article 6 Tips on How to Choose the Best US Immigration Lawyer for Your Case says that you should pay attention primarily to the immigration attorney’s education. She goes on to say “How can you tell the best from the average immigration lawyer? You must first look at their education. Specifically, you need to find out when comparing lawyers which law school he or she graduated from and whether they had any special accomplishments in law school.”

After law students graduate from law school they take a licensing exam also called Bar exam. The requirements and difficulty of the bar exam differ from state to state. It is believed that the California bar exam is the hardest in the United States. In July of 2012 only 55% of students passed California bar exam, while in Missouri 90% of exam takers passed. The ranking of states’ bar exams by difficulty can be found here


Best Tips When Choosing Immigration Lawyers

If you are that person who is thinking of moving to another country, then you will often need to apply for individual documents and visas to be legally allowed to work or live there. Applying for permits can often be a stressful and time-consuming experience. If you want the whole thing to run smoothly, then it is best to hire the help of a specialist immigration lawyer. They will have the tools and the expertise to support you along every step of the process. With so many different agents out there it can be tough to know who will be best for your needs.

CHECK PROMINENT LAWYER’S WEBSITES

Many sites are there online which could give you good lawyer referrals. Some favorite sites can be viewed online, which provide rankings of lawyers about immigration and green card visas. There is data on these locations, which is helpful. So you can find some useful information about attorneys. Checking the ratings is a great way to arrive at a decision about the lawyer whose services you may want to engage

Check client reviews

Once you zero in on a particular lawyer or law firm, try to Google for more information and view how they are rated. Clients always give reviews to these lawyers, and these reviews would help you understanding how good they do their work. Do not just rely on the number of reviews and decide, but do take the time to read each review carefully. These client opinions matter a lot, as they are full of insights about the lawyers and their performance

The cost of their service

How much does the lawyer charge for their services? Some lawyers charge hourly, while others will charge a set rate for completion of an entire job. You should always be entirely clear on the fees that they charge so that you are not left with any nasty surprises when it comes to paying your bill.

Look closely to their services they offer

What services do they offer? Many Immigration lawyers will be able to deal with a range of issues relating to immigration law. If you require something a little more unique, then you may have to search for a specialist type of lawyer


Hiring A Lawyer

The process of immigrating to the United States is one of the most important life experiences many people will go through in their lives. Moving countries is usually complex and stressful and the consequences of failing to plan properly can lead to nightmare scenarios. It is not a surprise, therefore, that many people turn to immigration lawyers to assist with immigrating.

Do you need a lawyer?

The old saying “He who represents himself has a fool for a lawyer” applies to immigration law like many other types of legal matters. Immigration law, particularly American immigration law is one of the most politically divisive areas of the legal system and it is therefore not surprising that it has grown incredibly dense and is constantly changing. No fewer than three major agencies administer the US immigration system and dozens of other agencies play a role. Many people turn to agencies like the US Citizenship and Immigration Service and the US Department of State to determine how to immigrate to the US.

Even if you can manage to succeed filing the application yourself, your lack of experience could lead to mistakes that can be costly in terms of time and money. If you have to hire a lawyer later, your mistakes may limit your options and immigration lawyers are likely to charge more to clean up the mess.

What about people that call themselves “immigration consultants”?

In most states, people who work as immigration consultants are violating the law by practicing law without a license. Because these individuals are operating illegally, their work is not regulated and you do not have the same recourse available to go after someone who is dishonest or incompetent.

What to look for in your lawyer

There are a number of factors to consider when hiring an immigration lawyer and with more than 7,500 immigration lawyers practicing in the US, the process of selecting just the right lawyer can be difficult


DO I NEED AN IMMIGRATION LAWYER?

There are many compelling reasons to hire an immigration lawyer to meet your immigration needs.

Significance of the Process

First and foremost in the minds of my clients is the recognition that the result of the immigration process can literally be life-changing and that it can impact their families for generations.

Ease in Which Mistakes Are Made

The U.S. immigration system is commonly known to be extremely complicated–the Tennessee Bar Association has noted that it is second only to the federal tax code in complexity

Potentially Devastating Consequences

Every year I see people who are looking for solutions to consequences that resulted from a mistake they made in the immigration process. Most of the time the solution–if there is a solution–costs them more time, money, and anxiety than if they had hired an immigration lawyer in the first place.

Questions To Ask Before Choosing Your Immigration Lawyer

How long have you practiced immigration law?

How long have you been a member of the American Immigration Lawyers Association?

Do you limit your practice of law to immigration? If not, what percentage of your practice is immigration?

Will you provide a written fee agreement?

Will you explain to me exactly what my immigration status is and the process you will be undertaking on my behalf?

Will you respond to my communications promptly?

Will I have access to the immigration attorney or just to his/her staff?


Why hire an Immigration Lawyer?

Immigration law was setup to create a set of rules by the federal government to determine who is allowed to enter the country and also the length of their stay. Immigration law also helps the government manage the process to allow immigrants to apply to be a U.S. Citizen.

An immigration Lawyer defends their client’s case and help prevent them from being deported to their country of origin. They also spend their time helping their clients to become a citizen of a new country. Becoming a citizen in another country can be complex and an Immigration Lawyer can be helpful to gather the the documentation their client may need to become a citizen. At times, they will provide legal advice about how their clients can obtain a work visa for a specific period of time.

Being in a different country and trying to become a citizen can be overwhelming. LinkedIn ProFinder can make that process easier. Their are plenty of experienced and knowledgeable Immigration attorneys in your local area who would love to assist you with any case you may have and to make sure that you have the best representation.

Top Home Remodelling Projects For A High ROI

Fix Up or Buy New: What’s Your Best Housing Option?

This is a question with no one-size-fits-all answer, although most families can make the decision with a bit less drama than is normal in a popular TV series that profiles families debating whether to make over or sell their homes.

The most important issue is location. Is staying in your current neighborhood important to you, and, if so, does the kind of home you want exist in that neighborhood? If not, can you legally create that ideal home on your budget?

The second major question is budget: Is it more economical to renovate your current house or buy another one? The answer to this question will depend upon your home, your budget and your needs. In cities where homes are less expensive, it is often cheaper to buy than to build. In cities and neighborhoods that are in high demand, it may be cheaper to build an addition or renovate outdated spaces.

Here are 5 questions to ask yourself when deciding whether to renovate your existing house or find a new home.

Can you renovate within the current footprint? Renovating within the home’s existing footprint generally costs 50 percent less, says Cannon Christian, president of Renovation Realty in San Diego, which handles renovations for homeowners who are selling their homes. Be careful about garage conversions because they are considered an improvement in some neighborhoods but a detriment in others, he warns. And, there are times an addition is cheaper than modifying existing space, Wilson says, since existing space contains old problems that need to be corrected.

Do you want to live through a renovation? Renovations cause dust, noise and disruption for weeks or even months, and they always take longer than the initial contractor’s estimate. If you’re redoing your kitchen, for example, you may be without a sink or stove for several months.

Can you legally do the renovations you want? Every municipality has building rules, including ones regulating how much of the lot you can cover, whether you can add a second story and how close structures can be to the property line. Permits are required for major renovations, and renovations also can trigger a requirement that existing elements, like outdated electrical panels, be brought up to current building standards.

Does the renovation make sense for your home’s value? Putting a $100,000 kitchen into a $150,000 home never makes sense, but updating a 1970s kitchen with new cabinets and countertops probably does. Never make renovations that are disproportionate to the value of your home.

How does your home compare with others in your neighborhood? If an addition will make your home much larger than others in the neighborhood, it may add less value.


Remodeling

While your current home may seem drab at times, remodeling the space allows you create new spaces, update its function to meet your needs and create an ideal home, depending on your budget. However, it comes with a lot of disadvantages that may or may not be worth the investment.

Advantages

  1. Costs less: The cost to remodel your home is less than buying a new home because it’s on a room-by-room basis. You don’t have to remodel everything in your home, which means your budget can flow with what you need to do. Moreover, there are ways to save money on your renovations so that you get a great end product without spending a fortune.
  2. Personal touch: Renovating allows you to change your existing home to meet your personal expectations and desires, as compared to buying a new home that may have a few features you want but not at all. Why spend hundreds of thousands on a new house and update it when you can keep your old home and update it a little at a time?

Disadvantages

  1. Not for major overhauls: If your home needs a complete do-over, then a remodel isn’t for you. It’s not worth the investment to spend thousands of dollars to change every single room in your home when you could buy a new house with all of the updates. It’s better to renovate a few rooms in your house rather than all of them. It’s also not worth it to remodel your house if you’re trying to downsize.
  2. Financing issues: Remodeling requires a homeowner loan, family loan, payments to contractor or vendor loans. You must have home equity, so if you haven’t lived in your home for a long time, it could be hard to get approved.
  3. Construction: Remodeling means your home will be in shambles for days to weeks as the room is updated. You can choose to stay in a hotel — which means spending a few extra dollars — or stay in your home. It’s a bit stressful and loud — and it requires patience, which not every homeowner has.


$7,000

For many people, the kitchen — often a relatively large space — is their first thought. It’s a room that’s used frequently and that might have a public function, as well. Unfortunately, $7,000 doesn’t go far when it comes to replacing old appliances with shiny new ones. But if you’re willing to do some of the work yourself, it’s still possible to have a considerable effect.

“You can redo the kitchen counters and paint the cabinets to refresh the look. It’s not a full remodel, but gives you a fresh space.

You’d have to paint your own cabinets — “If you hire someone, it’s almost as much [money] as getting new cabinets, Although it’s tedious, it’s not particularly hard work. The bulk of the money can be spent on countertops, which, depending on the size of the kitchen, could be low-budget Ikea butcher block, granite or somewhere in between. And if there’s money left over, you can add a simple peel-and-stick tile backsplash or a cute light fixture to gussy things up.

The same amount could be used to upgrade a small bathroom, taking it down to the studs and adding new tile, redoing the shower and upgrading the fixtures. At that price range, the renovation wouldn’t be fancy, but it could include several new elements.

But $7,000 can also be used strategically for a more subtle but impactful result. If your house has hardwood floors that are old, scratched or otherwise not at their best, you could hire someone to refinish them. Once the furniture goes back in, every room would look a little fresher.

Or, you could use the funds for a twofold improvement that similarly brightens up the house. First, paint the home’s interior. Then hire a designer to help improve the lighting, particularly in more public spaces such as the living and dining rooms, where good lighting can enhance the space. “In over 20 years of working with clients, I have yet to walk into a home that was properly lit.  “Most of us are mostly home at night, when there’s very little light. That’s why lighting is so impactful.”


Reasons Why Renovating Is Better Than Buying a New Home

You can enjoy the updates. When you prepare your home for sale, your real estate agent may recommend updates — from minor fixes to a major overhaul — that will help increase your home’s value. But rather than making updates just before putting your house on the market in hopes of boosting your return on investment, consider renovating now to improve your own quality of life at home.

You’re emotionally attached. How can you possibly sell the house you raised your kids in when the lines showing their heights at different ages are still in the kitchen doorway and you can still picture them taking their first steps across the living room floor? Sometimes the memories are too good to leave, at least for now. In this case, it may be better to remodel a couple rooms than reluctantly sell your home.

You skip the cost of moving. Moving is expensive when you factor in the cost to make updates, place your house on the market, pay closing costs and then fund a move. The cost of moving even a short distance can climb quickly — north of $10,000 — if you’re hiring full-service movers, and it can still reach above $1,000 for just a moving van rental. Especially if you’re expecting a modest net profit on your house, the additional cost to relocate may not be worth it.


You’re making the property safer.

Whether you recently purchased your fixer-upper or you’ve lived there a couple decades, it may be time to overhaul some dated systems and ensure your home is keeping you safe and healthy. Consider having professionals check for old electrical wiring, dated heating systems and moist areas that may invite mold

Renovations build more equity.

If you’ve only been in your house a few years and you have a mortgage, your equity in the house may be minimal. As a result, you wouldn’t net much profit from the sale of your house. Instead, you have the opportunity to strategically improve your home with projects that can grow its value. A new roof, a master suite addition or a kitchen renovation can all be key changes that will make your house more desirable down the line. But be careful not to overimprove. A swimming pool in a neighborhood where no other houses have one doesn’t add much value, for example.