October 2020

Tips To Consider When Searching For A Move Out Cleaning Company

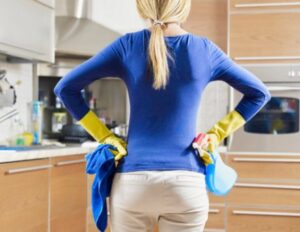
How to Make Sure Your Rental Passes Inspection After Moving Out

If you live in a rental apartment or house and are in the middle of moving out, it’s time to start thinking about cleaning. Most landlords require a move-in deposit that covers any damage or dirt left behind once you move out. Instead of giving up your deposit, you can almost guarantee a passed inspection with fool-proof cleaning tips. A few extra hours of deep cleaning can save you a precious few hundred bucks

Follow a Cleaning Checklist

It’s easy to get overwhelmed with the amount of cleaning tasks in front of you. Instead of keeping your mental to-do list in your head, write it out. Or better yet, find a cleaning checklist online. Print it out and physically check off each item as you complete them.

A good rule of thumb is to complete the following cleaning tasks after the basics are covered:

patch nail holes with spackle and repaint

wipe baseboards with soapy warm water and a washcloth

scour the bathtub, but don’t use steel wool (it scratches the shiny porcelain layer off)

rent a carpet cleaner and deep clean all carpets twice

wash windows inside and out

dust off obscure areas (tops of ceiling fans, air vents, and ceiling corners)

Especially if you rented a house, it’s important to spend time fixing up your outside area. If you moved in to a pristine yard and pleasant curb appeal, your landlord will expect the same appearance when you move out.

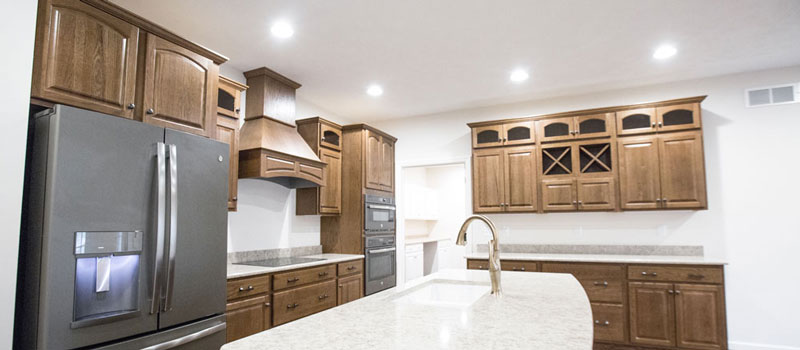
Spend Time in the Kitchen and Bathrooms

Real estate agents always say that kitchens and bathrooms sell houses. It’s true that these two rooms are the most distinct rooms in your home. Because of their unique functions, they’re also the easiest to get dirty. Spend extra time making sure they look spotless.


End of Tenancy Cleaning Service Guide

You are hoping to retrieve your hefty deposit when you move out. If, however, you do not properly clean the property at the end of your tenancy, there could a nasty surprise in the form of a reduced (or non-existent) deposit return.

Use this cleaning service guide to ensure that you do not miss a thing. After all, you wouldn’t want to lose a chunk of your deposit because you forgot to clean the living room blinds, would you?

Remove all personal items

To start off, you need to ensure that all of your personal items are removed, or at least packed away. This obviously needs to be done in order to move out at the end of the tenancy, but doing so before cleaning allows you to reach everywhere that you need to during the process.

Now you must remove any extra nails or screws from the interior walls, and to fill the resulting holes with putty or spackle. Remember to remove any excess, leaving a smooth surface behind.

Clean window coverings

Most blinds and curtains are able to be cleaned simply through vacuuming. If they are musty (for example, with tobacco smoke), take them down and air them for as long as possible. Alternatively, use a fabric spray such as Febreze to remove the odors.


Tenants to have a smooth moving experience

An inspection will be done only after all your personal property has been removed and you have cleaned the property. At that time, you need to take the keys to the office. We consider you still living at the property until the keys are turned in. Rent will be charged until RPM receives the keys and the garage door remote – do NOT leave keys at the property. YOU WILL NOT BE ABLE TO RE-ENTER THE PROPERTY AFTER ALL KEYS HAVE BEEN TURNED INTO THE OFFICE.

The better the condition of the property when you leave, the faster the deposit can be sent out. You will need to give us your forwarding address to send your deposit refund to. If you vacate the property prior to the end of the lease term, you will still be responsible for the rent during the remaining term of the lease. However, we will do our best to try and lease the property.

CLEANING SPECIFICATIONS

Remove all trash and personal items from your home and yard.

Clean all appliances thoroughly, including microwave, range hood, etc. Clean sinks, cabinets and drawers.

The carpeting must be professionally cleaned and receipt turned in with the keys.

Wash non-carpeted floors. Remove the stains and marks.

Wash walls carefully; pay special attention to the areas around light switches, hallways, doors and baseboards.

Clean all windows. Secure all screens and remove cobwebs inside and out.

Make the needed repairs to the screens and the screen doors.

Clean and disinfect the bathrooms thoroughly.

Repair or have any damage you or your pets have caused repaired.

Discontinue your phone services at least 24 hours before vacating.

If you are responsible for the lawn care: Mow, trim and remove debris from the yard.

Make arrangements to have your trash picked up before you discontinue service.

Do not place the trash and the garbage in the recyclable cans. A fine may be applied.

Tenant is responsible for the following:

Yard care (if not mentioned in the lease), Minor trimming, pruning & weeding beds

Testing and changing batteries in smoke detectors and/or carbon monoxide detectors

Changing all inoperable light bulbs and fluorescent tubes in easily accessible light fixtures

Keep dryer vents & house vents clean inside & out

Pest control (for details, please call the office)

Inside & outside window cleaning

Tenant is responsible for all maintenance of water softener and water purification systems (if applicable).

Drain stoppage (clogging) when caused by tenant.  Do not put potato peelings, onion skins, or artichoke trimmings through the disposal.  Any other food placed in the disposal should have water run through the drain for at least 10 seconds after grinding.  This carries the food out to the main sewer.

Payment of rent or other charges as determined by lease and addendum.

Do not use the drop-in cleaners in the tank of the toilet.  This will destroy the rubber in the fittings.  The type that clip to the bowl edge are best.

No foreign items are to be flushed away.  This includes: baby wipes, tampons, diapers, paper towels, dental floss, clumping kitty litter, etc.  These items will clog the drain and you will be charged for the repairs.


MOVE-OUT GUIDE

CLEANING

If you paid for Prepaid Cleaning when you moved in, a base interior cleaning will be completed when you move out (floors and carpets included). If you do not return the home in the same condition you received it, you will be charged additional costs. The following is an example of items that would result in a charge against your security deposit. Please contact your property manager if you have a question about a specific item.

Dirty window coverings

Garbage and debris left behind

Stains on the flooring

Pet damage

Smoke damage

MOVE-OUT INSPECTION

Return all keys and remotes to our office no later than the end of the day you vacate. If you’re returning after business hours, please leave any remotes on the kitchen counter, and use our drop box to return keys in an envelope with your name, address, unit, phont number, and forwarding address. Failure to return these items may result in a deduction to your security deposit. We will not consider the property vacant until we receive the keys.

Please have all personal items removed, and cleaning completed, by the time you return your keys/remotes. Additional access to the property will not be available.

After you vacate the property, the Property Manager will conduct a Move-Out Inspection. You will receive full documentation of the condition of the unit, with applicable photos, and a full accounting of the charges. You do not need to be present during your move-out inspection.

Please make sure we have your forwarding address on file so you can receive your Move-Out Inspection as quickly as possible.

UTILITIES

When contacting utilities, please be sure to keep services in your name through the last day of proper notice and to have your name removed (and name added) as of that date, but do not shut off service.

Do not pay your closing water bill (and sometimes your trash bill, depending on where you live). will prorate the charges and, when available, use your security deposit to pay these closing bills. This assures there will not be a lien placed against the property for non-payment.

If it is the cold season, please leave the heat set at 60 degrees, and leave the cupboard doors open under the sinks so that pipes don’t freeze. You could potentially be responsible for damages if you do not take these steps.


GUIDE FOR CLEANING OUT YOUR APARTMENT WHEN MOVING TO A NEW HOME

It would seem that cleaning out your apartment when you’re moving to a new home would be a bit easier than if you were cleaning out a house. However, there are a few details that you want to pay attention to when you’re cleaning so that everything is in order for you to leave the unit as it was when you moved to the residence

Follow the landlord’s moving out cleaning list

When you moved into the apartment, the landlord probably gave you a list of the things to clean if you planned to move out. You can use this list to go around your apartment to make sure everything is checked off. If you abide by the regulations that are stated in your lease and you leave the apartment as it was when you moved in with little wear and tear, then you’ll usually get your security deposit back if you paid one.

Make sure to repair what needs to be repaired

If there are any holes in the walls from hanging pictures, posters, or decorations, then you need to cover them so that they can’t be seen. You should also fix or replace blinds that are broken and paint that is chipped. After you move everything from the rooms in your apartment, you need to do a thorough cleaning so that it’s like it was the first day you unpacked. It’s easier to start at the ceiling and work your way down to the floor.

Declutter and toss out things you don’t need

When you’re packing your belongings, you should get rid of the things that are broken or that you don’t use so that you don’t take any unnecessary boxes with you to your new home. Don’t forget to clean out the refrigerator and freezer. Make sure there is nothing left in the washing machine and dryer or the dishwasher. Wash the walls so that any streaks or smudges are removed. Consider getting the carpet professionally cleaned so that it’s in the best possible condition before you move out.

Mosquitoes Exterminator

Your Guide to Home Mosquito

a comprehensive mosquito control guide all about mosquitoes; what they are, how they feed, why they bite and most importantly, how to get rid of them.

Mosquito Anatomy

Mosquitoes are relatively small insects, measuring an average of just more than 6 mm long and weighing about 2.5 milligrams. They’re divided into three basic parts: the head, thorax and abdomen.

Head

The head is crammed with sensory equipment that help the mosquitoes find and feed on people and animals.

Compound eyes

They have two large compound eyes covered with tiny lenses called ommatidia that are capable of detecting even slight movement. On the top of their heads, they also have ocelli, simple photosensitive eyes detect variations in light.

Antennae

Their antennae, long feathery organs, jut forward from their heads and contain sensitive receptors that detect carbon dioxide in human breath from distances of more than 100 feet. The maxillary palp between the antennae pick up the odor of ocentol and other chemicals released in human sweat.

Proboscis

Right in the middle, also between the antennae, is the proboscis, a long serrated mouthpart used to pierce the skin and suck out blood. The proboscis holds two tubes, one that injects saliva containing an anti-coagulant and mild painkiller, and a second that actually draws the blood.

Thorax

The thorax, or what you might think of as the torso, is connected to the head. A pair of wings and a pair of halteres, small wing-like organs used for steering, sprout from the thorax. The legs also come out of the thorax, six in all, with tiny claws at the end of each to help the mosquitoes stay attached to surfaces.

Abdomen

The abdomen hangs from the thorax and serves as the mosquitoes’ stomach and lungs.

Spiracles

Small openings called spiracles line both sides of the abdomen, allowing the mosquitoes to draw in air. The abdomen holds the blood that female mosquitoes take in, and a nerve in the abdomen signals when it is full. A female’s eggs are also stored in the abdomen.


Mosquito Life Cycle

Eggs

Female mosquitoes lay eggs about every third day during their lifespan, usually in clumps of 100 to 300 eggs. The eggs are deposited either as “rafts” floating on the surface of standing water or on the ground in areas that regularly flood. Mosquitoes can lay eggs in as little as one inch of water. The eggs, generally white when laid, cannot hatch unless they are in water, usually for two to three days.

Larvae

When the eggs hatch, the larvae emerge. They are called “wigglers” because that’s how they swim. Most of the time, they hang from the surface of the water, breathing through tubes. The wigglers feed on organic matter in the water, shed their skins four times over about a week, and develop into pupae. Larvae are the easiest to kill, using oils that block their breathing or bacteria that poison them.

Pupae

The pupae are called “tumblers” for the way the fall into the deepest part of the water when threatened by predators. They are shaped like commas, partially encased in cocoons, with the head at one end and tiny flippers at the other. The pupae do not feed while developing, but breathe through tubes like the larvae. It takes about four days for the the adult mosquito to emerge.

Adults

The newly emerged adults climb out of the water to rest and wait for their bodies to dry out. The males will take a day or two to fully develop their reproductive organs, then seek out a female, by the sound of her wingbeats, for mating. They’ll live about three to five days after that, feeding on fruit and plant nectar. The females mate once, but continue laying eggs after every blood meal. Under the best conditions, they can live up to a month or two.


How to Get Rid of Mosquitoes in Your Backyard: A Step-By-Step Guide

From the inside of your house, it looks like a beautiful night. The stars are out, the lightning bugs are dancing, and you want nothing more than to go outside to enjoy it. But when you do, what happens? You’re met with a swarm of mosquitos. Backyard mosquitoes can prevent you from enjoying outside time. So what can you do to stop them from being a problem? Keep reading for a guide on how to get rid of mosquitoes.

Before learning about how to get rid of them, you should understand some facts about mosquitoes. Although all mosquitoes seem similar and awful, there are around 3,000 different types. In the US, there are around 200 species.

Many people believe that mosquitoes are parasites that suck blood for food. However, the reason they suck blood is to ensure that their bodies have enough nourishment to lay eggs. Mosquitoes lay a large number of eggs at once. In some instances, they can lay over 100. This means that it’s easy for mosquito populations to get out of hand if you don’t control them.

Consider Where They’re Coming From

When you’re looking into cutting down on mosquito populations, consider where they can be coming from. Understand that mosquitoes need standing water to breed. If you have open containers of water at your home, look into repairing leaks or removing them. You can also dump the containers, which will kill the mosquito larvae before they can mature.

Repel Them

If you don’t want to use harsh chemicals and treatments, you can look into more natural ways to keep mosquitoes away. If you’re outside for an evening, there are some other repellents you can use. Burning certain kinds of candles, such as citronella, will help keep them away. You can also use essential oils with lavender, eucalyptus, or lemon. Mosquitoes don’t like these smells and will steer clear of where they originate from.


Home Mosquito Control

Mosquitoes can breed in as little as one inch of standing water, which means there are numerous places around a home that might support them. It is important to get rid of those possible breeding sites to avoid a yard full of biting insects.

Remove empty containers

Start by cleaning up any containers left lying around the yard. Put away buckets, pick up toys, and dump any pet dishes kept outside. If the dog must have a dish in the backyard, made sure the water is changed daily. Other containers might need to stay outside, as well. Punch holes in them so water drains.

Cut the grass and trim the bushes

During the day, mosquitoes like to rest in tall grass or among shrubs in a moist, shady spot. Keeping the grass short deprives them of a resting place. Also, rake up any fallen leaves. An overturned leaf can hold enough water for a mosquito’s eggs, and also give them a place to wait out the day.

Check the rain gutters

They will often become plugged by leaves, blown branches, or other debris, and water will accumulate instead of draining out. Clean them out regularly, especially during the summer. If water is left standing in the gutters more than a week, mosquitoes will lay eggs in them.

Fill in any low-lying areas in the yard

These depressions can hold water after a rain or when the lawn is watered. Without proper drainage, the water will stay for days, allowing mosquitoes a chance to breed. Add dirt and sod, or install a drainage system.

Look after your pool

Keep the water in the pool clean and chlorinated. Drain and cover it when it’s not in use, and the same goes for wading or collapsible pools. Make sure any decorative items, such as birdbaths or ponds, get fresh water at least once a week. Stock the pond with fish that will eat mosquito larvae.


How To Get Rid Of Mosquitoes Naturally

Remove Stagnant water sources

Mosquitoes lay eggs in water, hence its important to change the water in flower pots, pet dishes, bird baths etc on regular basis. Make sure potted plants (indoors/outdoors) never have standing water in trays. Most mosquitoes eggs hatch within 48 hours and it takes only 8-10 days for eggs to turn into adults. It doesn’t take too long.

Throw out all the junk from your yard

If your yard has any items you don’t need, chuck them out. Old tires or any other yard debris hiding at some corner in your yard can retain moisture and provide a breeding area to mosquitoes.

Cleaner surroundings

Keep your gutters cleaned out, fill in unnecessary ditches, mow the lawn, basically tidy surrounding, giving no place for mosquitoes to breed.

Use of anti mosquito herbs

Citronella is the most common ingredient in most mosquito repellents. It’s a beautiful perennial grass that emits a strong aroma which masks other scents keeping mosquitoes away from things located around this plant.

Placing garlic and lavender plants around the home is considered a useful deterrent for mosquitoes.

Lemon balm, basil, Marigold, catnip, rosemary & peppermint are some plants which can make your house smell wonderful as well as keep mosquitoes away.

Use of Oils

Tea light candles made with citronella oil are popular for this purpose. Lavender oil can also be applied to outdoor seating areas or windowsills.

Coconut oil combined with neem oil repels mosquitoes from humans upto 12 hours. It is also an excellent moisturizer for the kin.

Peppermint oil & lemon eucalyptus oil are also useful anti mosquito solutions when applied to the skin.

Is An Auto Transmission Repair Franchise In Your Future

How can I make my transmission last longer?

A transmission can be easy to maintain, but terribly pricey to replace. It makes sense to take care of your automotive transmission now, rather than be caught off-guard by a huge repair bill later. The following strategies will help to keep your transmission working well and shifting seamlessly behind the wheel.

Tips to maintain your car or truck transmission include:

Check your fluids.

It may sound simple but keeping an eye on your transmission fluid is one of the most effective ways to take care of your auto’s transmission that there is. This will also allow service techs and mechanics the opportunity to identify any potential issues, based on the level or absence of fluid. Often times leaks can cause problems so identifying a leak before it becomes and expensive repair is very important for your transmissions health.


Keep it in gear.

Be aware of what gear you are driving in. Repeatedly driving 45mph in first-gear will cause trouble for your transmission over time. Likewise, when driving an automatic, be sure that you are in the recommended “drive” mode before heading out. Most drivers who own a car with manual transmission know what their doing. But they often lend out their car to others who don’t exactly know how to drive a stick. A lot of damage can be done to the gears if driven improperly. Make sure before you let someone else drive, they know what their doing.

Shift only after you stop.

When switching from first to reverse or vice versa make sure you come to a complete stop before shifting in and out of gear. Shifting between these gears while moving could weaken or strip the gears of the transmission if done consistently.

Take time to tune-up.

Don’t miss your regular tune-up appointments. A faulty engine can wreak havoc on the transmission, and can make it work harder than it should have to when shifting. Everything is connected in a car. Check your alignment, get your tune ups, and take care of the overall health of the rest of your vehicle and your transmission will benefit.

Let it get warm.

Take time to warm your vehicle up before dropping it in gear and driving. This applies to both cold-weather and warm-weather driving. Give the vehicle five minutes to idle before taking off. This is especially true during the cold snaps that we get in Portland, Oregon during winter. Let your vehicle warm up before changing gears and be safe when you’re out driving in bad weather this winter.


Use caution when helping out others.

Think twice before offering to tow or haul vehicles or other heavy loads with your vehicle. The added weight can cause wear and potential issues for your transmission, unless you have a heavy-duty vehicle that is designed for such utility. Instead, be helpful by offering to call a tow-truck!

Address repairs and concerns quickly.

Don’t delay in having your vehicle looked at when you notice signs of a transmission issue. This might include a strange smell, grinding when shifting gears, or an unusual sound. Failure to promptly address these concerns could result in a far more serious and costly problem.

Keep things cool.

If you put your vehicle through its paces, the rough terrain, added weight, and heavy utility can generate heat, which wreaks havoc with a transmission. Cool down your transmission by installing an auxiliary cooling system or fan. Talk with automotive experts regarding the most practical options for your specific vehicle.


Servicing the vehicle right way

It’s always important to stick to your regular service routine. This should also be done according to the guidelines in your manual. The transmission fluid, as well as the fluid filter, should also be changed periodically. For older cars, you’ll want to do this every one and a half years or anywhere between 20,000 to 30,000 miles. New cars will be fine with two-year periodical changes or every 40,000 to 50,000 miles. Most manufacturers would expect you to change the fluid every 30,000 to 60,000 miles cover, for manual transmissions. Under heavy-duty use, you may consider changing the fluid after 15,000 miles. Automatic transmissions can be serviced anywhere from 30,000 miles or longer.

Don’t ignore warning signs

Funny sounds, grinding gears, strange smells, or droplets of red or green fluid on the garage floor all point to transmission problems. If you want your transmission to remain fully functional for a long time, things like these should not be delayed or ignored. This can prove very expensive, going forward.

Check your driving style

You may have to check your driving style for bad habits that may put your transmission at risk. These can include quick starts and stops as well as constant acceleration and deceleration. You’re better off with an even speed or perhaps using cruise control when you’re on the highway.

Invest in a transmission cooler

Transmission coolers can help you get more life out of your transmission. This will help keep heat under control while also keeping the fluid very cool. This is necessary since heat can cause substantial damage to your transmission. It can damage the seals, the electronic components, and the metal surface. This can easily prolong your transmission’s lifespan by as much as twice or thrice than you can get without a cooler.


Getting the most out of your transmission

Granted, no transmission lasts forever (though some try), but regular maintenance can keep your car on the road for many years and miles without ever experiencing any transmission problems. Ignore the maintenance, however, and an automatic transmission can fail in as few as 75,000 miles, leaving you with costly repairs, and in some cases, a voided warranty. A typical transmission service includes:

  • Replacing the automatic transmission fluid (ATF) roughly every 40,000 miles, depending on the OEM’s recommended schedule. Learn how to perform this relatively simple, inexpensive procedure yourself.
  • Upgrading to a synthetic transmission fluid (if appropriate for the vehicle)
  • Adjusting transmission bands every 60,000 miles (such as on an older car or heavy-duty pickup)
  • Checking the fluid level often and refilling it to the proper level when it’s low.
  • Using the ATF specified by the vehicle manufacturer and never mixing different types of transmission fluids.
  • Replacing the transmission filter or screen based on the vehicle manufacturer’s mileage and/or time intervals.
  • Cleaning the transmission pan’s magnet(s) to remove metal fragments it has trapped.
  • Using a transmission conditioning product to help restore performance and fix small leaks.

The Business Of Home Builder

Construction Process

When construction begins, the build phase utilizes your selections and designs within the contract documents and specifications. During this phase, Builders focuses on providing expert oversight to achieve the desired end result — your high quality dream home on budget and schedule. With our established industry relationships, we ensure the homeowner is receiving the best materials and workmanship.

A Step-by-Step Guide to the Home Building Process

Here’s what to expect during the major phases of construction. Building your new home is exciting, especially when you understand how the process works. The following overview outlines the typical steps your builder will take in the construction of a home and will help keep you abreast of what happens at key stages.

Keep in mind that the homebuilding process may vary from region to region and builder to builder, especially if you’re building an elaborate custom home. Be sure to ask your builder about his or her specific policies and procedures.

Prepare site and pour foundation: Often, site preparation and foundation work are performed by the same crew, but this may not be the case with a wooded lot. Using a backhoe and a bulldozer, the crew clears the site of rocks, debris and trees for the house and, if applicable, the septic system. The crew levels the site, puts up wooden forms to serve as a template for the foundation, and digs the holes and trenches. Footings (structures where the house interfaces with the earth that supports it) are installed. If your home is going to have a well, it will be dug at this point.

If the home has a full basement, the hole is dug, the footings are formed and poured, and the foundation walls are formed and poured. If it’s slab-on-grade, the footings are dug, formed and poured; the area between them is leveled and fitted with utility runs (e.g. plumbing drains and electrical chases); and the slab is poured.


Steps for Custom Home Construction

There are tons of decisions to make, from the architectural style you want for your home to the smallest details like ideal locations for electrical outlets. To get through it, keep reminding yourself of the reason you are doing this and how well the end-result will fit your needs.

Also, if you play your cards right upfront, you will have a solid team supporting you throughout the entire process. You don’t have to go through it alone or feel that you must be an expert in every phase of home design and building.

A Brief Overview of Custom Construction

Custom construction is performed in phases, with aspects of each phase directly dependent upon the successful completion of previous steps.

Architectural Design Phase – this is where you and your team develop your preliminary home design and estimate, final plans, specifications, and engineering, as well as a detailed budget and schedule.

Pre-Construction Phase – in this phase, you get all your approvals for financing, from the homeowners association, and permits. Also, this is the time we sign on key subcontractors for the major systems in your new home.

Construction Phase – here is where the dirt starts to fly. The site work, foundation, and shell begin to go up, then everything else is built into place from the insulation to the flooring.

Final Inspection Phase – you get to walk through your brand-new home for a last look before moving in.

Warranty Phase – we do our best to ensure your home is perfect when you move in, but our work doesn’t stop until everything is completed to your satisfaction.

Custom Homes vs. Semi-Custom Homes vs. Production or Tract Homes

A custom home is quite different from what’s known as a production home or a tract home. A production home is constructed by a company that offers its customers a selection of floor plans, exteriors, layouts, and interior design elements. The customer selects one of the designs to go on a lot, often in a “master-planned community” filled with other homes using that slate of designs.


BUILDING VS BUYING

Old houses have their charms. But if you want a spacious house with an open floor plan, state-of-the-art technologies and low-maintenance comfort, put new construction on your shopping list for these reasons:

ENERGY EFFICIENCY: Older homes are seldom as energy efficient as new homes. Homes built only 10 years ago may use twice the energy of today’s homes. Your new home will have improved heating and cooling systems, energy-saving windows and super insulation. Also, many mortgage companies nationwide take energy use into account when qualifying buyers and will make a large loan on an energy-efficient home because average monthly utility bills will be lower, which frees up more of the budget for mortgage payments.

UPDATED APPLIANCES: Appliances are new, energy-efficient and easy to use. New dishwashers are quieter and use less water, ranges are easy to clean, and refrigerators are larger and come with more convenient options. Even a home inspection is no guarantee that older home appliances will last long after closing. Especially for cash-strapped first-time buyers, the sudden need for a new furnace or dishwasher can lead to other expensive repairs, such as replacement of wiring or plumbing.

SAFETY CODES: New homes are safer and less expensive to operate and maintain. They stand the latest fire, health and safety codes. These codes need life saving detectors to signal smoke presence or carbon monoxide. Newer homes are free of lead paint and asbestos filled pipes.

BUILDING TECHNIQUES: Builders today benefit from advances in building techniques. This means dry basements, expansive rooms and a quieter, more comfortable atmosphere.

UPDATED WIRING: Often, new homes of all price ranges include whole-house wiring for cable, telephone and music systems. Home offices and home theaters are becoming a part of standard packages. When it comes to wiring and electricity, more is better. New homes have 200-amp electrical service; some older homes have inadequate 60-amp services.

A ROOM WITH A VIEW: New homes are light and bright. Not only do they have more energy efficient windows, but they also have more of them. New homes are often “see-through” homes. From the front door, the viewer looks through the home to a panorama of windows that frame views of the back garden.

A HOUSE FOR TODAY: New homes mirror today’s lifestyles. Families live differently than they did 10 to 15 years ago. Cooking is a group experience, and no one wants to be too far from the television. New homes blend the kitchen, eating area and family room into one informal space. New homes also have more and larger bathrooms and closets

Choosing the right builder is as important as choosing the right style of home or neighborhood. All these decisions affect you—positively or negatively—long after the builder finishes your home. How do you know what builder is right for you? There is no single answer to this question, unfortunately. You have to rely on your own instincts to make the right decision.

The first question you need to answer is what kind of builder you want: Custom or production?

Custom builders may cost you more, but the houses can match the customer’s needs and wants.  If you want extra square footage in the living room or kitchen, you are able to add on. A custom homebuilder will also take the time to make sure all your finishing’s, cabinets, countertops, faucets, lighting, appliances, doors, etc., match your personality.

Here are some other guidelines that will help you choose the right builder:

The builder’s reputation is generally an excellent guide. That goes for most any kind of purchases you make. If the company’s reputation is poor, you’re not going to want to buy from them. Homeowners in the area are a good resource when finding information about different builders. The Better Business Bureau is also a good place to check. You can find out if there have been any major complaints about the builders you’re considering. Very good and very bad builder reputations usually surface quickly. The builders who are in the middle of very good and very bad are usually harder to investigate.

Check to see how long the builder’s have been in business. There’s nothing wrong with “new” builders, but nothing beats quality sustained through many years of service. You can’t fool the consumer for long, and builders who provide poor quality, do not survive over time.

Look at the overall service records of the builder’s you’re considering. Ask for names of previous customers. Find out how responsive your builder has been. Has the builder responded quickly to complaints? Has the builder provided help to the customer with securing manufacturer warranty claims?

Check the builder’s affiliations with professional organizations. These organizations are a good source of up-to-date information for the builder. The National Association of Home Builders provides a continuous flow of information. The highest quality builders have personnel who work with the NAHB technical departments to keep abreast of innovations in design and energy conservation.

Ask the builders what kind of materials they use. Find out which brand names are used in the appliances and in the materials, such as windows and insulation. A quality builder uses quality brand name products whenever possible.

Check to see how accommodating the builders are. Will they accept variations to standard plans? Will they do it willingly and at a reasonable cost?

Financial stability of the builder is also an important thing to check. Don’t be afraid to ask for bank references. Good builders will supply them.


The Definitive Guide to Branding for Home Builders

Branding for home builders is EVERYTHING. Your business sinks or floats on the perception of your ideal buyers. Without a proper brand strategy in place, you can expect decreased consumer awareness, fewer referrals, and a smaller slice of market share.

Every home builder wants a powerful brand, but few have mastered the art of carving out a strong identity in an overcrowded market. Your main business goal is to out-build and out-market your local competitors: you don’t want to become the “Apple” of your industry, but rather the apple of your prospects’ eyes. Creating a powerful brand isn’t black-and-white, so it’s important you focus on tactics and strategies tailored for home builders.

This definitive guide to branding for home builders was designed with your company in mind, because we understand the journey today’s modern home buyers take and the decisions they make along the way.

“Brands live in people’s heads. They are the sum total of perceptions about them.” By this definition, your brand isn’t something you control; however, you can certainly influence it. This is made possible by having a clear understanding of your company’s purpose, mastering the delicate art of persuasion, and making the whole process as systematic as possible.

What is your brand saying when you’re not around?

A powerful brand transcends words and moves peoples’ emotions – touching their hearts through visuals, storytelling, and shared experiences. Remember, every single touchpoint a prospect has with you is an opportunity for your brand to shine.


FIRST TIME HOME BUILDERS

Thinking of building because you have out grown your current home, looking to upgrade to your dream home or are you looking to enter into home ownership? Homes know that building a new home is exciting, we also know that there is a lot to take in if you haven’t built before

DESIGN

Selecting your new home design allows you to get exactly what you are dreaming of. You get a layout that suits your lifestyle, with matching interior finishes and fixtures. By building you can avoid the potential issues that can arise with renovating an established property due to hidden factors and unexpected issues.

LOCATION

Selecting the right location for your dream home is one of the biggest decisions. Homes offer free site inspections, this allows the team to advise you on suitable blocks for your project. Once you have selected a block, our Sales Team can complete a siting of your proposed home on the block so that you can visualise your final design, along with recommendations on orientation and positioning to maximise best energy efficiency.

SELECTIONS

You can view display homes so you understand the quality what will go into building your new home. Homes has a large Selection Centre, the MyChoice Design Studio, where you will find many products and ideas on display to assist you with your selections and the customisation of your home to meet your needs.

CONSTRUCTION

Once all Council requirements are met, you will be able to watch as your new home becomes a reality. Your Site Supervisor will make sure that your home is built with the utmost of care and complies with our quality assurance guidelines.