Roofing

Residential Roofing Make The Right Choices

Roof Problems and What to Do About Them

Your roof covers the largest asset you own, so it pays to know the signs of trouble. Fortunately, many of the danger signals are easy to see-you can sometimes even spot them from the ground. (Tip: Binoculars help!) A small leak can go undetected for years, causing huge damage before you notice anything. It’s a good idea to inspect your roof regularly. Many contractors offer free inspections. But even if you have to pay, it’s better than finding leaks after the damage is done. Here are a few of the most common and easy to recognize signs of roof problems.

How to Find Roof Leaks

When you’re trying to track down a leak, start by looking at the roof uphill from the stains. (Plus: here’s how to clean roof stains.) The first thing to look for is any roof penetrations. Items that penetrate the roof are by far the most common source of leaks. In fact, it’s rare for leaks to develop in open areas of uninterrupted shingles, even on older roofs. Penetrations can include plumbing and roof vents, chimneys, dormers or anything else that projects through the roof. They can be several feet above the leak or to the right or left of it.

If you have attic access, the easiest way to track down a leak is to go up there with a flashlight and look for the evidence. There will be water stains, black marks or mold. But if access is a problem or you have a vaulted ceiling, you’ll have to go up onto the roof and examine the suspect(s).

Solution for a Small Leak

Some roof leaks are tough to locate. Sometimes the water shows up at a ceiling spot distant from the leak. If your ceiling has a plastic vapor barrier between the drywall and the attic insulation, push the insulation aside and look for flow stains on the plastic. Often water runs to openings in the vapor barrier, such as at ceiling light fixtures.

If you can’t see any telltale flow marks, and since the stain is fairly small, look at the underside of the roof for ‘shiners.’ A shiner is a nail that missed the framing member, in this case when the carpenter nailed the roof sheathing to the rafters. Moisture that escapes into the cold attic from the rooms below often condenses on cold nails. Sometimes you can spot this if you climb up into your attic on a cold night. The nails will look white because they’re frosted. When the attic heats up a bit during the day, the frost melts and drips, then the nails frost up at night again and so on. The solution is to simply clip the nail with a side-cutting pliers.

How to Fix Roof Vents

Check for cracked housings on plastic roof vents and broken seams on metal ones. You might be tempted to throw caulk at the problem, but that solution won’t last long. There’s really no fix other than replacing the damaged vents. Also look for pulled or missing nails at the base’s bottom edge. Replace them with rubber-washered screws. In most cases, you can remove nails under the shingles on both sides of the vent to pull it free. There will be nails across the top of the vent too. Usually you can also work those loose without removing shingles. Screw the bottom in place with rubber-washered screws. Squeeze out a bead of caulk beneath the shingles on both sides of the vent to hold the shingles down and to add a water barrier. That’s much easier than renailing the shingles.

Roof Cement

Metal flashing prevents leaks where shingles meet other surfaces, like walls and chimneys. Proper flashing work takes time and know-how, so sloppy roofers sometimes slather on roof cement instead. It seals out water long enough for them to cash your check, but it soon hardens, cracks and leaks. In the end, all it does is make a proper repair more difficult. So if you see heavy ‘tar’ patchwork on your roof, fix it right—before it leaks and leads to interior damage.


Your Flashing Has Cracked

What Does It Look Like: Flashing are thin pieces of metal that are installed under shingles and on the joints of your roof in order to create a water-resistant barrier, which can be concealed or exposed. If exposed, they will look like long runs of sheet metal and, if concealed, they will have a rubberized coating overtop. Broken flashing will feature large cracks

Why It Happens: Roofers often use tar to seal the flashing together and that can corrode over time. In the event that your flashing is left exposed, elements like wind and rain could be the reason behind its crack.

How To Fix It: (Via The Family Handyman): Once you locate the source of the leak, pry up the nails used to secure the old flashing. Lift any shingles out of the way and remove the cracked segment. Gently put a new run of flashing in its place, fasten the new flashing in the same pattern as your old piece using roofing nails. Then, apply a coat of roofing sealant to the nail heads.

You Have Broken Shingles

What Does It Look Like: Look up! This one is easy to spot. Since shingles are the exterior layer of a roof, you should be able to identify missing shingles by seeing different-colored patches on your roof. Alternatively, you may find the shingles themselves littering your yard after a heavy storm.

Why It Happens: Again, weather. High winds and heavy rains.

How To Fix It: Slide a pry bar underneath the row of nails that connects the damage shingle to the one below it. Lift up until the nail pops and then press down on the shingle while you remove the nail. Repeat for the remaining nails. Pull out the damaged shingle, replace it with a new one, and secure it with four new nails.


Types of Weather Related Roof Damage for Commercial Buildings

As the seasonal weather begins to heat up and cause more storms and severe weather, commercial roofs will start to show signs of damage and wear. More times than not, we find commercial building owners are surprised to find out they have had many underlying issues caused by weather and storm damage that could have been prevented. Here are a few of the types of commercial roof damage that can be caused by weather, and ways you can keep an eye out.

Look for Moldy Smells or Musty Odors that won’t go away.

This can be a huge indicator that you have a leak and water has settled in a hidden area of your building. It may even be impossible for you to inspect the area between walls. Any moldy or musty smells that show up after a storm and don’t go away easily are a cause for concern. We suggest giving us a call right away so we can fix the damage before it spreads and gets worse.

Moldy smells are just one symptom of a hidden leak, and if untreated, the problem can cause huge issues, including structural damage. The sooner this type of roof damage is fixed, the less impact it will have on your wallet.

Standing water on your flat roof should that is visible after 2 days is a red flag.

If the rain water is left standing after 2 days, it will begin to cause damage to your commercial flat roof and eventually lead to leaks and more internal damage. Even if you do not notice any leaking or unusual smells, if the water stands on your roof, it will deteriorate your roof at a much faster rate and lower your roof’s life expectancy.

Commercial roof flashing located around the edge of your roof seals out all runoff and temporary standing water.

If your flashing or edge of your roof is damaged, peeled back, or loose, then rain water will find it’s way under your roof and into your building. If you have debris or tree branches fall along side your building, it is a good idea to check the flashing and edges of your roof after a storm to ensure there are no damaged areas.

Once water has gotten under your roof and into your building, it can still be difficult to detect.

We suggest looking for moist walls, water stains along the ceiling, and unusual wet floor areas that cannot be attibuted to plumbing. It is difficult to trace exactly where the stains have come from without a professional consultation. If left unattended though, internal water damage will cause massive issues for your commercial building down the road.


Roof and Carpentry Repairs

Roof and Carpentry Repairs in Orange County with Tom Byer Roofing ServiceIf you want to make your roof last as long as possible, it is vital that you never put off a roof repair. Small issues with roofing become big issues in a hurry. No matter how major or minor the repair you need is, we are here to help. Some common problems we help repair include the following:

  • Clogged Gutters: You might not think of these as a roofing problem, but clogged gutters can cause damage to your roofing due to stagnant water and even the strain from the weight of the clogged gutters.
  • Deteriorating Shingles: Your home’s shingles are essentially its first line of defense against the forces of nature. Any problem with the shingles can lead to problems with the rest of the roof, including the carpentry.
  • Wood Rot: Any rot within the wooden structures of your roof is major cause for concern. Rot can compromise the integrity of wooden structures, risking the collapse of your roof. Additionally, rot in the roof can spread into the rest of your home if left untreated.
  • Mold and Mildew: These two spread fast, and unless you catch them early, they can require the replacement of the entire roof frame. As soon as you notice mold or mildew,


Warning Signs of a Hole in the Roof

Check your attic for one or more of the following warning signs of a hole in the roof:

  • While water dripping from the attic ceiling is an obvious indication of a hole in the roof, it’s often not so easy to pinpoint the hole’s location. It could be several feet away from the drip.
  • Damp areas on your ceiling or walls. In your attic or upstairs, surfaces may actually be moist to the touch, or simply appear discolored. Unusual wall or ceiling bulges and peeling paint are also clues that you might have leakage from a hole in your roof.
  • Visible daylight. Inspect your attic on a sunny day. If you can spy one or more patches of daylight through the ceiling, unless your home is equipped with skylights, you’ve got a hole in your roof.
  • Missing or cracked shingles. If you can safely perform a roof inspection, check your shingles. Missing or cracked roofing shingles may mean a hole in the roof.

Repair a Hole in Your Roof

You may be able to make a minor DIY roof repair IF (and only if):

  • the hole in your roof is small and accessible
  • your roof is basically sound and within its expected lifetime (20 years for an asphalt shingle roof)
  • you have solid knowledge of home improvement and roof safety – plus a proper roofing ladder, good non-skid shoes, and a buddy to assist you.

Asphalt Tile Roof And Safe Roof Access

Tips in Choosing The Best Roof Tile For Your Home Extension

Roofing tiles are the latest trend in home improvement and for good reason – roofing tiles are hardy, elegant, and long-lasting. Roofing tiles have had a long reputation of being one of the most reliable roofing materials ever made, in fact, it use goes as far back as the time of the Mesopotamians and Ancient Egyptians

Popularity of Roof Tile for Home Extension Returns

Today, its popularity is again taking hold thanks in part to a renewed interest in old-fashioned aesthetics. If you’re contemplating investing in roof tile for home extension purposes, it pays to educate yourself on the best roof tiles available, to suit your specific needs.

Pricier doesn’t always mean better – you’ll be tempted to invest in extremely pricey roofing tiles with the general presumption that the most expensive ones last longer, or that they require less maintenance, but don’t be fooled! More often than not, mid-priced roofing tiles and even ones that are downright dirt-cheap are just as hardy as the over-priced ones, and investing in them won’t empty your pockets.

Pick the right tile for your climate – if you live in a tropical climate, don’t pick roofing tiles that are made from rock, since these tend to trap and collect heat, but do not diffuse it as well as other materials. Opt instead for clay, terra cotta, or ceramic tiles which are more ideal for tropical environments. If you live in a place that has its fair share of sunny days and cold spells, investing in tiles made from rocks like shale or limestone will be worth your while.

Combine functionality and aesthetics when picking roofing tiles – the shape of roofing tiles aren’t there for mere aesthetics; it too also serves a very practical purpose. Slatted and curved tiles are perfect for climates that undergo regular bouts of rain, but dead-flat tiles are far more ideal for places which experience regular snowfall.


TIPS ON HOW TO CHOOSE THE BEST COLOR FOR YOUR ROOF TILES

Do you wish to give a stylish and elegant look to the exterior of the house? If yes, then investing in roof tiles installation in Phoenix will be a wonderful choice for you. A Tile roof can be described as a roofing system made out of tiles which are known for its high resistance, longevity, and impermeability. Choosing the color for the brand-new tile roof will surely be an exciting process for you, and the reason is that now you have several options to pick from than before.

Wait there is a caution for you! Avoid getting lost in the ocean of colors to find the iconic one for you. You need to keep in mind that whatever color you choose to need to match with the overall look of the house interior. There are some key factors that you need to take into consideration for choosing the colors for the roof and the roofing contractors of your locality

Paint Quality:

It is one of the key factors to consider when you begin the search for the perfect color for your roof. Your search should target high-quality paint perfect for applying on the tile roof and the one that can serve you long. There are various companies which are manufacturing a wide range of color paints for the flat roof tiles to select from. You can seek the assistance of the roofing contractors to help you choose the right quality and shade of paint for the roof. The paint should be the one with acrylic resin which can block the ultraviolet light. This will help to protect the roof from premature fading, corrosion, peeling, rust as well as water infiltration. Ask for the paint warranty period before you buy it, it is better to go with the one with the maximum warranty period. Check the reviews of the paints online for getting more ideas on quality roof paints.

Style Of The Home:

The roof color or better to say the roof tile color that you will be selecting for your roof need to match your overall home style. Select the color taking into consideration all elements of the exterior design of the home, for example, the color of doors, windows, walls, landscape, frames of doors, balcony grill, etc. One thing that you need to keep in mind is that the color of the tiles will stay for several years and so even if you don’t like the color after a year and so, it will cost you big to change. Select the shade which will please your eyes long and keep complimenting the beauty of the house externally. There needs to be a cool balance between the roof color and the color of the rest sections of the house exterior. Take suggestions from roofing services in Arizona experts and compare color samples to pick the right shade for the roof. We will suggest you check the samples in the various time slot of the day. This will give an idea of how it looks under a bright light in the afternoon, semi-dull in the morning and when the sun is about to set.

The Appearance Of The House:

Many are not aware that the use of dark with light colors create a magical impact on the appearance of the home exterior. When you have a light-colored roof it will make the house appear taller than actual and will be an ideal option when the house is having a low roof or a shallow looking pitch. Contrasting, using a darker color will make the tall roof appear less overwhelming

Common Trends Of The Neighborhood Houses:

Besides personal aesthetic sense, you need to take into consideration the colors of the roofs of the neighborhood houses. If all have a similar pattern of color then its safe to go with the same color. On the other hand, you can make a little bit change in the shade or pattern of coloring the tiles of the roof to make your house stand apart from the rest without turning an eyesore.


tips for choosing clay roofing tiles

When your customer decides to invest in a clay tiled roof, naturally they will need to consult you regarding which tiles will best suit their home, their tastes, and their budget. Choosing the right roofing material is paramount, especially with clay tiles, since the initial investment is higher than concrete coverings. With a vast range of clay tiles available, the choice can often be bewildering; so to simplify things

Decide whether modern machine made clay tiles or handmade tiles will best suit the property: whilst machine made clay tiles can be used for both contemporary and traditional homes, there is simply no substitute for handmade tiles where authenticity or conservation is key. These include high-spec custom homes, or sensitive restoration projects, where local planning authority requirements count. Budget may well be an influencing factor at this stage too

Consider the whole life costs: handmade tiles are an investment, not a cost, asthey stand head and shoulders above most mass produced tiles. In addition to their long life span and colourfastness, they lend charm and authenticity to any building, contributing enormously to the resale value of a property.

Research the ranges and options available:clay tiles are synonymous with rich red roofs, however the beauty of handmade tiles lies in the array of shades that enhance the overall look. Speaking of colour, it’s important to ensure the tiles come with a complementary range of fittings.

Quality pays in the long run: not all clay tiles are of the same quality, and you should carefully review the manufacturers’ certifications to ensure that you are purchasing products that will provide the lifespan you expect. You need to be confident that the tile will maintain its beautiful appearance over time and survive harsh frost, as well as wet weather conditions.


Choosing the Best Type of Roofing Tiles for Your Home

Make the best decision for your home by considering all the features of your roof. Use this guide to make sure you choose the best roofing tile for your home.

With the home median price at $187500, and showing no signs of slowing down, you must protect your property. A home is an investment that will probably last you a lifetime, which is why it’s important that you choose a roofing system will best protect it

Style of Your Home

The architectural style of your house will dictate the type of roofing tiles to use. For instance, some roofing tiles are best suited for historic homes while asphalt shingles are suitable for most architectural styles. Consult with your contractor to choose the roofing that matches your home’s aesthetics

Roof Application

Are you applying the roof to a new structure or is it a replacement roof? With new roofs, your choices are not limited to the existing components such as the roof structure composition or the roof pitch

Your Budget

As a roof of thumb, choose a roofing material that is neither too expensive nor too cheap. The price will vary depending on the material. Always avoid cheap roofing materials, as they are costly to maintain due to frequent replacements.

Durability

Your choice on roof tile types should be guided by durability. The durable roof tile will cost more but it will be worth it since the maintenance cost will be low. Most homeowners will prefer steel or aluminum roofing materials as they can last up to 50 years or more


What Color of Roof Tiles Should You Choose?

Choosing a roof tile color is an essential facet and reflection of your home. A roof is up to 40% of your homes visible exterior, making choosing the color a significant investment for your home. What things should you consider and weigh when choosing a color for roof tiles? Here, we give you a few tips to consider when choosing the right color for your home.

Consider the Climate Your Live In

A significant factor when choosing a color for your roof tiles is the climate and area in which you live. Do you live in more tropical and sunny climates, or those prone to cold and snow? Dark colors tend to hold and retain heat much more readily than lighter colors, which in turn radiate into your home. Leading to your cooling costs rising in warmer months as AC units work harder to keep your home cool. A lighter roof will reflect and absorb much less heat making your home more energy efficient. Similarly, dark colors in colder climates will help keep your home warmer in colder months.

Color Coordination and Architecture

It’s also important to pay attention to the exterior color of your home and the existing architecture. The right coordinating colors and styles add an incredible amount of depth and curb appeal that can heighten the value of your home. You want to choose a color that compliments the color of your home. Brighter colors tend to accent better with black, gray, or brown colored tiles. Consider painting your house too if the color you like clashes with that of your home.

Talk to Your Neighbors

Before making the decision, take a second and look around your neighborhood. What are the general trends that you observe from your neighbor’s roofs? You want to pick something that doesn’t clash with your neighbors’ homes, who will have to live with your color choice just as much as you. Look at the natural surroundings too, factoring in seasonal color changes in contrast to your home.

Are you choosing to make a statement? Check to make sure that statement doesn’t go against the homeowners association. Consider how your color choice will affect the resale value of your home and your neighbors’

Must Know How To Choose Good Shingles Roof

METAL ROOF VS. SHINGLE ROOF: THE PROS AND CONS OF EACH

If you’re in the market for a roof replacement, or buying a new home, it’s important to know your roofing options. There are a lot of different materials used to construct a building and those materials have an impact on the aesthetics, functionality, and longevity of your home. While many people focus on the interior and specific details of the exterior, an often-overlooked area is the roof. Roofing material doesn’t usually cause much speculation other than, does it look nice or not. However, your roof is your home’s first defense system and the type of material used to construct it makes a big difference. In this article, we’ll explore some of the pros and cons of a metal roof vs. shingle roof so you can better understand your roofing options.

The Difference Between Metal vs. Shingle Roofs

Before we dive right into metal vs. shingle roof pros and cons, it’s important to have a strong grasp on the underlying differences between a metal roof and a shingle roof.

A metal roof is a blanket term for a roof that’s constructed from a variety of different metals. Metal roofs are available in tin, steel, aluminum, and even copper and zinc. Needless to say, metal roofs are a bit more complex than shingle roofs. While metal has traditionally been used for commercial or industrial buildings, it’s recently made its way into residential buildings.

A shingle roof is the more common type of roofing you see in residential areas. They’re constructed using small pieces of asphalt shingles and is seen as the “traditional” type of roof used for most homes.

So what are the pros and cons of each?


Metal roofs tend to be more durable.

Metal roofs can stand up to nearly anything Mother Nature throws at them, so you’ll find that they come with 30- to 50-year warranties, and often outlast that with lifespans of 40 to 70 years. Metal roofs are not without weaknesses, however: Extreme hail or falling branches could dent a metal roof, as could walking on it improperly. Discuss vulnerability concerns with the manufacturer. You’ll learn, for example, that steel is hardier than copper.

Shingles have a shorter lifespan due to their own unique set of weaknesses. Pooling water and chronically damp conditions can lead to algae and fungus growth, ice dams can create cracks, and temperature spikes between day and night can reduce the life of your shingle roof. Shingle roofs come with 15- to 30-year warranties, depending largely on the region, environment, and climate.

Metal roofs are more eco-friendly.

Because they’re largely made of recycled material and can be recycled again and again, metal roofs are considered a more sustainable choice than asphalt shingles. Metal roofs are also more energy-efficient thanks to their reflective qualities, which can block heat transmission to the home’s interior. Specialized paint coatings can further reduce your cooling bills. Asphalt shingles, on the other hand, need to be replaced more frequently than metal roofs; it’s estimated that U.S. landfills receive nearly 20 billion pounds of old asphalt shingles annually. Also, asphalt shingles are a petroleum-based product, which increases dependency on fossil fuels.

Asphalt shingle roofs generally are easier to install and repair.

For pros, the work requires little specialized knowledge and basic tools. Shingles can be installed in a day or two in some cases, sometimes right over the existing layer. Metal roofing installation typically requires a more skilled and specialized tradesman. The job is more precise, with less room for error, so it won’t move as quickly as a shingle installation. However, some lightweight metal products may be able to be installed right over an existing roof in good condition, simplifying installation overall and eliminating the cost of ripping the original roof out.


Varieties

Metal roofing comes in a variety of styles, largely dependent on the metal used and coatings applied. Aluminum is a metal that needs no coating. Steel, on the other hand, requires specialized treatment to prevent rusting. Other metals used for roofing are copper, zinc, stainless steel, and titanium.

Asphalt shingles come in two varieties, the newer fiberglass shingles and traditional organic ones. The difference is in their layered make-up. Fiberglass shingles have a fiberglass 3 core covered with an asphalt layer. Organic shingles have a heavy felt layer under the asphalt.

Appearance

The layered look of asphalt shingles is by far the more popular of the two types. The vast majority of homes in the United States have asphalt shingles, largely because asphalt is the material most builders trust and what homeowners are accustomed to seeing on houses. Asphalt shingles can vary in colors to match the paint or brick of a home, and the variety of their colors is more than with metal roofing. The three-tab shingles give a flat appearance while the more expensive architectural shingles appear more three dimensional.

Metal roofs are rarely seen in urban and suburban areas. The sleek, metallic appearance seems more suited for an agricultural setting. Metal roofing does come in a variety of colors and styles to match the rest of the home. The metal can be in panels, tiles, or shingles, but the look of a metal roof still can be jarring in a neighborhood full of asphalt shingles.


What to Consider Before You Choose a Metal or Shingle Roof

Your roof not only protects your home and the items on the inside, it also keeps you and your loved ones safe, which is why choosing the right roof based on your individual needs is vital. Start the decision process by evaluating the following aspects.

Your Budget

Between metal roofing and shingle roofing, the biggest factor to consider is how much money you have to spend and are willing to spend at one time. If you have a lower amount of money or small cash flow to spend at one time and don’t mind the idea that you’ll have to replace the roof in 15-20 years, a shingle roof is your better option. Or, if you have more money to put down at one time or want the peace of mind that your roof won’t need to be replaced for at least 60 years, a metal roof is the best choice

Your Roof Design

Every roof is different, which could really make a difference when choosing the best material for your roof. Get to know your roof by finding out:

  • Roof pitch (slope)
    • It’s imperative to check the manufacturer’s minimum and maximum slope requirements for both metal and shingle roofing before installation, as it could be restricted based on different products or materials.
  • Square footage of the roof
  • The complexity of the design of the roof, including the number of dormers, valleys, hips, skylights, penetrations, flashing points, and vent pipes
  • How much and what parts of the roof are in the shade and in the sunlight

The Building’s Lifecycle

Knowing the predicted lifecycle and use of the building or home the roof will be going on is just as important as knowing your roof design. For example, is the building or home older and in need of extreme renovations or tear-down within the next 20 years? Go with a shingle roof. Or is the building or home newer and likely to last five decades or longer? Go with a metal roof.

Your Environment

There are definitely environments where a metal roof or a shingle roof is the better choice. For example, if you live anywhere threatened with potentially high winds or extreme heat, metal roofing can help alleviate some of those concerns. Or if you live in a very mild environment where you are less concerned with extreme weather, a shingle roof will work just fine too.


How are Metal Roofs Better?

Metal roofs reflect the sun, which reduces the amount of heat penetrating the home. A reflective roof can reduce peak cooling demand by 10 to 15 percent, according to the Dept. of Energy. That, in turn, means the home’s cooling system needs less energy to cool the house.

Some metal roofs can save up to 25 percent in energy costs compared to a dark gray asphalt shingled roof, according to the DOE’s Oak Ridge National Laboratory (ORNL).

Some metal roofs come with warranties of up to 50 years, but can literally last for hundreds of years, whereas traditional roofs typically last 10 to 20 years. Metal roofs aren’t as vulnerable to hail, wind and fire damage and some insurance companies even offer discounts on homeowner’s policies due to metal’s storm-resistant properties.

A metal roof is no (noisier) than a traditional roof. “When you have a metal roof, you’re going on top of a solid deck. In that solid deck you have an attic space, insulation, a ceiling. If you don’t hear rain today, you won’t hear rain with a metal roof on. It doesn’t attract lightning anymore than any other roofs do, but the benefit of a metal roof is if it does get hit by lightning, it will disperse the energy throughout the roof instead of being isolated to one spot where it can cause a fire.”

Choose The Good Way To Roof Repair

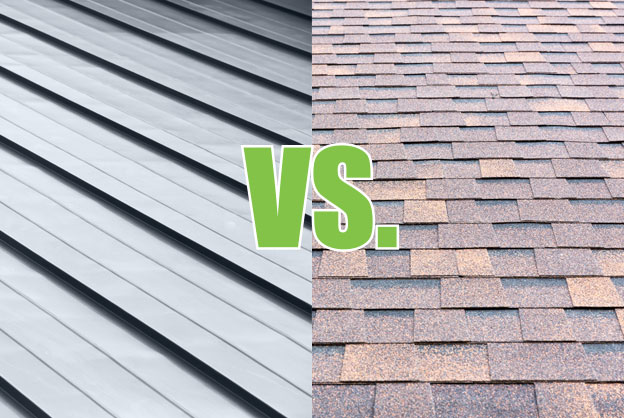
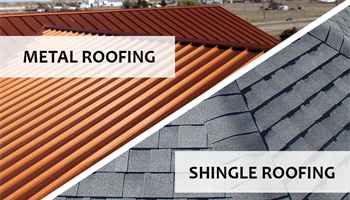
The Ultimate Troubleshooting Guide to Roof Repair

When you discover a fresh water stain on your ceiling or you hear a loud thump on your roof, your first instinct may be to curl up under a soft blanket, or grab a bucket or bowl and look for a possible leak.

Replacing a roof costs thousands of dollars and most homeowners haven’t budgeted for a problem that size, but it is important to address whatever issues arise overhead.

A leak or a fallen tree branch doesn’t always signal extreme damage. Your fix could be as simple as installing a few new shingles or replacing the flashing. According to a survey of more than 38,000 homeowners, the average roof repair costs about $800. This is much more affordable than the $7,000 average for an entirely new roof. Depending on your issue, you could pay as little as $10 for material.

Take a look at the following guide to mendable roof damage, then check for yourself or call a professional to see if yours is an easy fix.

Disclaimer: Working on a roof is very dangerous and must be handled with extreme caution. If you are uncomfortable and don’t feel safe, it is always worth it to hire a contractor.

01.Damaged Flashing

Flashing is the material that protects the crease between fixtures like chimneys or skylights and the roof. It is usually made of sheet metal or plastic. There is also flashing for the venting pipes under your roofing material. If the flashing is cracked, loose or worn, the area around these fixtures will be vulnerable to rain and moisture.

Solution: ($20) Remove and replace with new flashing. Some surrounding materials, such as shingles, will need to be lifted away for removal and installation.

02.Worn Sealant

A sealant is used with flashing and around the edges of skylights. Cracked and aged sealant will not be able to do its job, resulting in a leak.

Solution: ($6 per tube of flashing sealant) Re-caulk or apply new tar. You will likely need to remove surrounding materials temporarily, to effectively apply the sealant.

03.Punctures

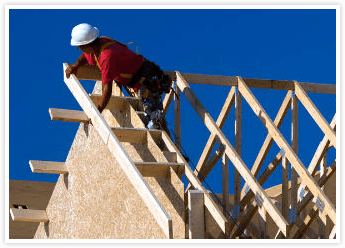
Weather, falling branches and animals can create significant holes and punctures in your roofing material. These repairs are best handled by professional roofers, as they involve more steps and may demand reframing part of the roof itself.

Solution: ($300-$1,000 labor and materials) After your roofer has done any necessary reframing, they will install a layer of sheathing, then felt paper followed by shingles. You may be tempted to cover the hole with a temporary material or, if it is small enough, seal it up with roofing caulk, but this will only allow moisture to seep through and create larger problems.

04.Damaged Vent Boot

This component seals the area around your vents against moisture, much like flashing seals other parts of your roof. A damaged vent boot could be the source of your leak.

Solution: ($10-$20 materials) Remove and replace the vent boot. This will involve lifting away surrounding materials, as well as nailing and caulking the boot.

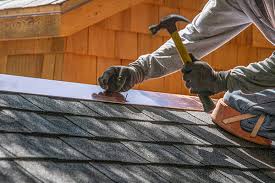
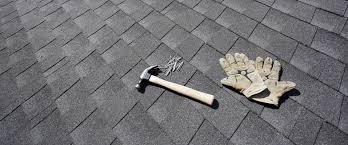
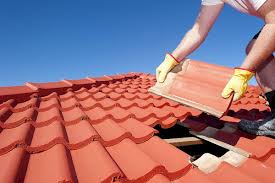
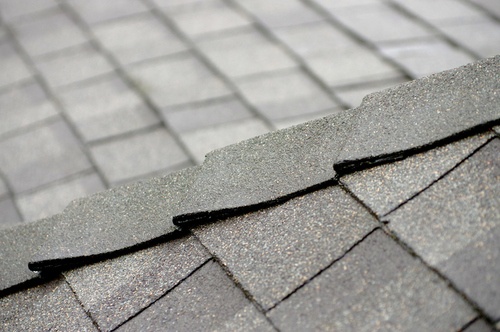
05.Damaged or Missing Shingles

It is common to discover a few damaged or missing shingles, as a number of external factors act against them.

  • Strong weather blows them off or pries them loose.
  • Their protective surface granules wear away.
  • Animal activity cracks and breaks them.
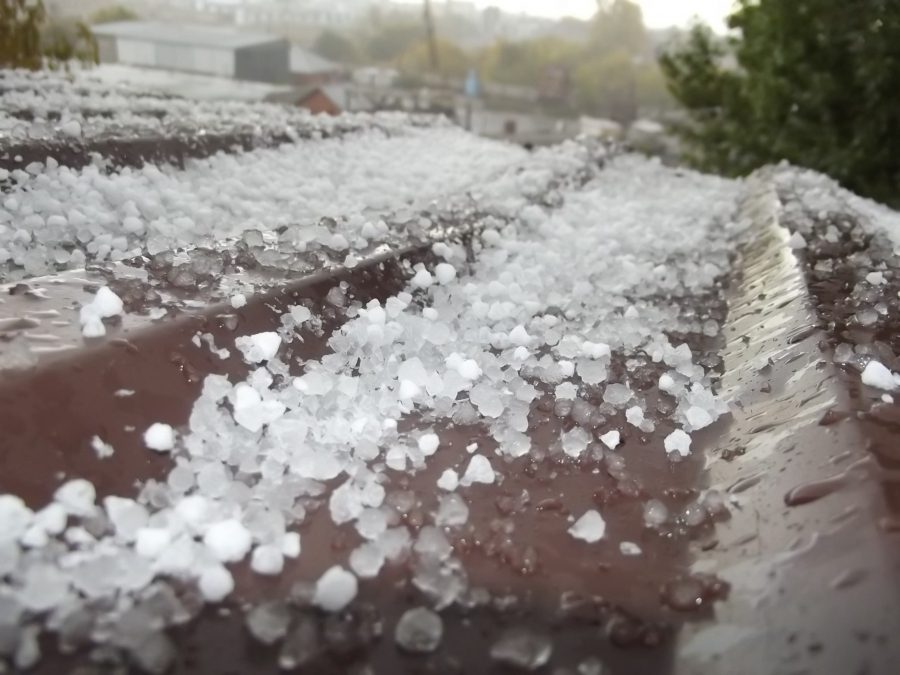
  • Hail cracks and breaks them.
  • Ice dams and pooling water weigh on them.

Solution: ($30 per bundle) Remove the old shingles and replace them with new ones. In the case of ice dams and pooling water, once you have replaced your shingles, you’ll want to be proactive to prevent future damage. Remove snow to prevent ice dams and keep your gutters clean for proper drainage.

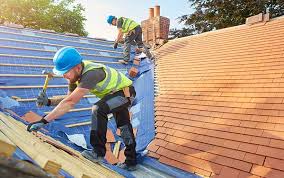
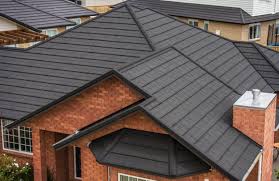
06.Corroded Vertical Slits

The slit between each roofing tile is a vulnerable area and can easily corrode. As water runs through these slits, it exposes the underlying roofing materials more and more.

Solution: ($30 per bundle) Replace the corroded shingles as soon as possible to prevent further damage.

Leaks and aesthetic damage can usually be fixed without overhauling your entire roof. However, there are times when installing a new roof is a wise investment—such as before listing your home. You should have your roof inspected for quality if it is 20 to 25 years old or if it is leaking in multiple places.


Why Is My Roof Leaking?

One of my favorite customer calls is when the customer states “It only leaks when it rains!” I would be concerned if a roof leaked when it wasn’t raining. Leaks occur for several reasons. Browse through some of the common culprits and the cost to get them fixed.

1.Shingles

Shingles may blow off in high winds and hail. To repair blown off shingles, you first match the shingles for color and manufacturer. Then, you should hire someone to install the shingles to manufacturer specifications.

2.Roof boots

Neoprene (rubber) boots can disintegrate over time. We always suggest lead boots, which are slightly more expensive, but will last much longer. Even though you incur the cost of removing the rubber boots and replacing them with lead boots in the beginning, you may save yourself from interior damage in the future.

3.Flashing

If flashing, the metal installed around chimneys, dormers and skylights, isn’t installed properly or becomes damaged, it can lead to leaks. This is a difficult one to put a price on. Shingles surrounding the area must be removed and replaced. Siding may need to be manipulated, and flashing will need to be made to secure the area.
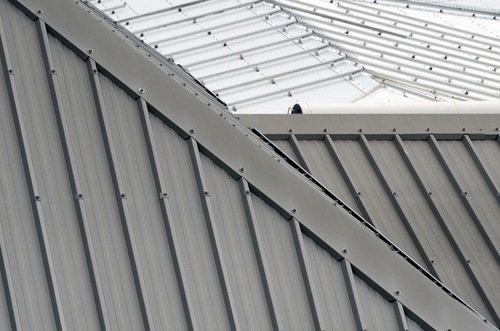
4.Roofing materials

If your roof pitch is less than 3:12, you must use roofing made specifically for flat roofs. A 3:12 roof pitch has 3 feet of vertical rise for every 12 feet of length.

If you have the wrong roofing material, the area will need to be completely removed before installing new roofing material.

5.Siding or windows

Here is the shocker: It may not even be your roof. If there is the slightest hole in your siding, water can get in and appear as a roof leak. Water entering windows can look like a roof leak too.


12 Roof Repair Tips: Find and Fix a Leaking Roof

You can stop leaks yourself-no experience necessary. We show you how to track down and fix the most common types of roof leaks. Most leaks take only minutes to repair.

  1. Leaky Roof Overview

If you have water stains that extend across ceilings or run down walls, the cause is probably a leaky roof. Tracking down the leak is the hard part; the roof leak repair is usually pretty easy. We’ll show you some simple tricks for finding and repairing most of the common types of leaky roofs. But if you live in the Snow Belt and in the winter you have leaks only on warm or sunny days, you probably have ice dams. We won’t go into that roof leak repair in this story. Check out this article for more on preventing ice dams. If you have a leaky roof, you’d better fix it immediately, even if it doesn’t bother you much or you’re getting a new roof next year. Even over a short time, small leaks can lead to big problems, such as mold, rotted framing and sheathing, destroyed insulation and damaged ceilings. The flashing leak that caused an expensive repair bill was obvious from the ceiling stains for over two years. If the homeowner had dealt with it right away, the damage and subsequent repairs would have been minimal.

  1. How to Find Roof Leaks

When you’re trying to track down a leak, start by looking at the roof uphill from the stains. (Plus: here’s how to clean roof stains.) The first thing to look for is any roof penetrations. Items that penetrate the roof are by far the most common source of leaks. In fact, it’s rare for leaks to develop in open areas of uninterrupted shingles, even on older roofs. Penetrations can include plumbing and roof vents, chimneys, dormers or anything else that projects through the roof. They can be several feet above the leak or to the right or left of it.

If you have attic access, the easiest way to track down a leak is to go up there with a flashlight and look for the evidence. There will be water stains, black marks or mold. But if access is a problem or you have a vaulted ceiling, you’ll have to go up onto the roof and examine the suspect(s).

  1. Trick for Finding Difficult Leaks

If a leak is difficult to find, enlist a helper and go up on the roof with a garden hose. Start low, soaking the area just above where the leak appears in the house. Isolate areas when you run the hose. For example, soak the downhill side of a chimney first, then each side, then the top on both sides. Have your helper stay inside the house waiting for the drip to appear. Let the hose run for several minutes in one area before moving it up the roof a little farther. Tell your helper to yell when a drip becomes visible. You’ll be in the neighborhood of the leak. This process can take well over an hour, so be patient and don’t move the hose too soon. Buy your helper dinner. If running water doesn’t reveal the exact location of the leak, don’t be timid. Start removing shingles in the suspect area. With them removed, there’ll be evidence of the leak and you’ll be able to track it down right to the source. You’ll see discolored felt paper or water-stained or even rotted wood directly below and around a leaky roof.

  1. Solution for a Small Leak

Some roof leaks are tough to locate. Sometimes the water shows up at a ceiling spot distant from the leak. If your ceiling has a plastic vapor barrier between the drywall and the attic insulation, push the insulation aside and look for flow stains on the plastic. Often water runs to openings in the vapor barrier, such as at ceiling light fixtures.

If you can’t see any telltale flow marks, and since the stain is fairly small, look at the underside of the roof for ‘shiners.’ A shiner is a nail that missed the framing member, in this case when the carpenter nailed the roof sheathing to the rafters. Moisture that escapes into the cold attic from the rooms below often condenses on cold nails. Sometimes you can spot this if you climb up into your attic on a cold night. The nails will look white because they’re frosted. When the attic heats up a bit during the day, the frost melts and drips, then the nails frost up at night again and so on. The solution is to simply clip the nail with a side-cutting pliers.

  1. Fix Plumbing Vent Boots

Plumbing vent boots can be all plastic, plastic and metal, or even two-piece metal units. Check plastic bases for cracks and metal bases for broken seams. Then examine the rubber boot surrounding the pipe. That can be rotted away or torn, allowing water to work its way into the house along the pipe. With any of these problems, you should buy a new vent boot to replace the old one. But if the nails at the base are missing or pulled free and the boot is in good shape, replace them with the rubber-washered screws used for metal roofing systems. You’ll find them at any home center with the rest of the screws. You’ll have to work neighboring shingles free on both sides. If you don’t have extra shingles, be careful when you remove shingles so they can be reused. Use a flat bar to separate the sealant between the layers. Then you’ll be able to drive the flat bar under the nail heads to pop out the nails.

  1. How to Fix Roof Vents

Check for cracked housings on plastic roof vents and broken seams on metal ones. You might be tempted to throw caulk at the problem, but that solution won’t last long. There’s really no fix other than replacing the damaged vents. Also look for pulled or missing nails at the base’s bottom edge. Replace them with rubber-washered screws. In most cases, you can remove nails under the shingles on both sides of the vent to pull it free. There will be nails across the top of the vent too. Usually you can also work those loose without removing shingles. Screw the bottom in place with rubber-washered screws. Squeeze out a bead of caulk beneath the shingles on both sides of the vent to hold the shingles down and to add a water barrier. That’s much easier than renailing the shingles.

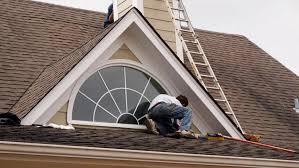
  1. Fix Walls and Dormers

Water doesn’t always come in at the shingled surface. Often, wind-driven rain comes in from above the roof, especially around windows, between corner boards and siding, and through cracks and knotholes in siding. Dormer walls provide lots of spots where water can dribble down and enter the roof. Caulk can be old, cracked or even missing between the corner boards and between window edges and siding. Water penetrates these cracks and works iBts way behind the flashing and into the house. Even caulk that looks intact may not be sealing against the adjoining surfaces. Dig around with a putty knife to see if the area is sealed. Dig out any suspect caulk and replace it with a high-quality caulk. Also check the siding above the step flashing. Replace any cracked, rotted or missing siding, making sure the new piece overlaps the step flashing by at least 2 in. If you still have a leak, pull the corner boards free and check the overlapping flashing at the corner. Often, there’s old, hardened caulk where the two pieces overlap at the inside corner.

  1. Complex Roof Problem

This roof leaks during the snowy part of winter and during storms in the summer, certainly due to poor flashing. The soffit that meets the roof is one of the toughest areas to waterproof. In the photo, you can still see signs of an ice dam. An ice dam occurs when snow melts and the water freezes when it hits the colder edges of your roof. Eventually, water pools behind the dam and works its way back up under the shingles and under the soffit until it finds an opening through the roof. The solution begins with good flashing since this should stop leaks from rainfall and might stop the leaks from ice dams as well. Begin by removing the shingles down to the wood sheathing and slip a strip of adhesive ice-and-water barrier (available where roofing repair products are sold) under the soffit/main roof joint. Depending on how the roofs join, you may have to cut a slot to work it in far enough. It should overlap another piece of ice-and-water barrier laid below, all the way down to the roof edge. This should cover the most leak-prone areas. Then reshingle, sliding metal step flashing behind the fascia board (the trim behind the gutter). The valley flashing, laid over the joint where the two roofs meet, should overlap the step flashing at least 2 in. If leaks continue to occur from ice dams, consider installing roof edge heating cables. (Find them locally at hardware stores or home centers.) Improved attic insulation and ventilation are usually the best ways to prevent ice dams, but they might not be effective in this complicated leaky roof situation.

  1. Fix Step Flashing

Step flashing is used along walls that intersect the roof. Each short section of flashing channels water over the shingle downhill from it. But if the flashing rusts through, or a piece comes loose, water will run right behind it, and into the house it goes. Rusted flashing needs to be replaced. That means removing shingles, prying siding loose, and then removing and replacing the step flashing. It’s that simple. But occasionally a roofer forgets to nail one in place and it eventually slips down to expose the wall. Check out this article for more on installing your own step flashing.

  1. Don’t Count on Caulk!

Rarely will caulk or roof cement cure a leaky roof —at least for very long. You should always attempt a “mechanical” leaky roof fix whenever possible. That means replacing or repairing existing flashing instead of using any type of sealant as a leak stopper. Only use caulk for very small holes and when flashing isn’t an option as a leak stopper.

  1. Fix Small Holes

Tiny holes in shingles are sneaky because they can cause rot, a leaky roof and other damage for years before you notice the obvious signs of a leak. You might find holes left over from a satellite dish or antenna mounting brackets or just about anything. And exposed, misplaced roofing repair nails should be pulled and the holes patched. Small holes are simple to fix, but the fix isn’t to inject caulk in the hole. You’ll fix this leaky roof problem with flashing.

  1. Leaks Around Brick Chimneys

All kinds of bad things can happen around brick chimneys. In fact, there are far too many to cover in this story. Flashing around chimneys can rust through if it’s galvanized steel, especially at the 90-degree bend at the bottom. A quick but fairly long-term fix is to simply slip new flashing under the old rusted stuff. That way any water that seeps through will be diverted. The best fix, though, is to cut a saw kerf into the mortar and install new flashing.


How To Handle Emergency Roof Repair

Your roof is an integral part of your home, protecting the interior from the elements. You depend on it every day without even realizing that you do. So, what happens if a tree limb crashes into your attic during a summer thunderstorm in the middle of the night? How do you protect the inside of your home from extensive damage during a roofing emergency? Learn more about how an emergency roof repair can be handled.

Remain Calm

The first step after a roof emergency is to remain calm. Often, roof damage appears far worse to a homeowner than it will to a professional roofer. You want to try to protect your home as much as possible, but if you panic, you will be unable to manage the steps you need to take to do so.

Protect as Best You Can

If your home has been damaged during a storm, you will want to minimize damage to the interior as much as you can. Try to cover any holes in the living area with plastic tarps or other waterproof materials. If the hole is vast, you may need to place buckets or other containers under the hole to collect water until the storm subsides. You should call a professional roofer as most of them have 24/7 emergency lines, but keep in mind they will not send someone out during the storm as that would be unsafe for their employees. Do not try to climb on the roof yourself to repair the damage.

What Will a Roofer Do?

Once the roofer can get to your home, they will inspect the area and look for any additional issues that may exist. They will cover the opening with strong plastic tarps that are secured tightly against the elements. If your home was damaged by fire, it is possible that firefighters compromised the structural integrity of your roof. This may mean you will need to find an alternate place to live until the roof can be restored.

Contact Your Insurance Company

As soon after the damage as possible, contact your homeowner’s insurance company. Unexpected roof damage can cause significant financial difficulty. If you must vacate the home as it is unsafe, your insurance company may offer coverage for hotels or other living areas while your roof is being repaired. The insurance company will send out an adjuster who will review the damage and determine how much the claim is worth. If you feel the estimate is too low, you can get estimates from different roofing companies and provide those to the insurance company as proof of the damage.

Types of Emergency Roof Damage

There are many different situations that could lead to roof damage. High winds can tear shingles from the roof, exposing the substrate which could then be compromised by rain. Tree limbs can be thrown into your roof, causing significant damage. Lightning strikes can actually blow a hole in your roof as well. Wildlife, including squirrels and raccoons, are known to chew through wooden structures and create holes that can be quite large. As mentioned, fire can lead to structural damage to the roof that may even make your home unsafe to enter.

Choose a Licensed Contractor

When you choose a roofing contractor, be sure to choose on that is licensed and insured. There are “storm chaser” companies that prey on homeowners after severe weather events. These are often fly-by-night companies who appear in neighborhoods to try to convince homeowners to use them for repairs. Often, the repairs are either sub-standard or the company requires a large deposit. Once they receive it, they leave the area and never perform the work. Get references from any company you choose and ask them for proof that they are licensed as well as insured.

The most important thing to do when you are facing a roofing emergency is not to panic. It is also very important that you not try to repair the damage yourself, especially in the middle of a nasty storm.


Roof Repair Mistakes to Avoid

  1. Misdiagnosing a Leak

A leak is the most common sign that there is a problem with your roof. Often, it’s the first sign that something is wrong. But what many homeowners don’t realize is that a leak in your ceiling is not always a sign of a problem directly above the leak. Water is sneak, and it can flow along pipes, joists, or even electrical systems. When it finds the lowest spot, it pools and drips down onto your ceiling. All you see is the final spot where the water ended up, but not its source in the roof.

Diagnosing a roof leak is as much of an art as it is a science. An inexperienced or underqualified roofer may think they’ve found the problem, but next time it rains the homeowner is in for a nasty surprise. We’ve seen cases where a roofer opens up the whole ceiling to find a leak and replace the damaged drywall. But after a large and expensive fix, the leak comes right back.

  1. Ignoring the Root of the Problem

Even once you find the source of the leak, just slapping on a new shingle may be ignoring the root of the problem. Yes, a leak can start with a broken or damaged shingle. But by the time the leak has worked its way into your dining room, there’s a lot more damage. Also, the damaged shingle may not be the source of the problem. Sometimes the decking or underlayment was installed wrong or has become damaged.

  1. Skipping the Attic

If there’s a problem with your roof, there is often a problem with your attic. Sometimes the damage to the roof is a result of what’s going on in the attic. And sometimes whatever started on the roof can have an effect on your attic. Either way, choosing to ignore the attic can cause problems down the road.

If you have a leak that has made its way into your living area, it has to get past the attic. You may only see a small water stain or a little peeling plaster in your living room. But in the attic, you may have more extensive water damage. If decking or framing has been exposed to water for a long time, you could have rot. Another danger is mold, which can grow in the attic and quickly get into your ventilation system. Mold spores can get all around your house, causing respiratory issues and other illness. If you have insulation, the insulation can become waterlogged. Wet insulation is a breeding ground for bacteria and mold.

Even if you don’t have water in your attic, the problems with your roof might be caused by your attic. Specifically, poor ventilation in your attic can do serious damage to your roof. An inadequately ventilated attic can become oppressively hot in the summer, literally cooking your roof from underneath. In the winter, when the air is cold, moisture can collect in an inadequately ventilated attic. The moisture gets into your framing and decking and can cause rot.

  1. Sloppy Installation

There is no excuse for shoddy workmanship. If you can’t correctly install roofing, you shouldn’t be selling your services as a roofer. Unfortunately, many roofers haven’t gotten that message. They cut corners to save themselves time and labor, even as they cost you money and damage down the road. When installing new shingles, there are plenty of places you can go wrong. Let’s look at two of the most common.

  • First, some roofers try to save time and money without thinking it through first. Installing shingles over the existing layer is acceptable in some situations. But it’s not always the best way to make a repair. And it’s never appropriate to build up more than two layers of shingle. If you are doing an extensive repair, laying down a second layer of asphalt shingle over the existing one can save on time and labor costs. But before you do that, you need to make sure the decking and frame of the house can support the weight of a second roof.
  • Second, some roofers just aren’t very good at what they do. We’ve seen installations of crooked or misaligned shingles. In other cases, roofers have used the wrong type of fasteners, like nails that aren’t long enough. Sometimes shingles were nailed in improperly. These problems aren’t just aesthetic. If a shingle isn’t installed in the right spot with the right technique, it is susceptible to wind damage, leaking, and curling. It could also void your warranty for the entire roof, costing you thousands of dollars for a few bad shingles.
  1. Poorly Matched Shingles

When you repair your roof you want it to look like it was never broken, right? The problem is that it’s actually quite hard to match shingles. Think about how hard it is to match paint when you have to fill a damaged spot on the wall of your house. There are hundreds of different types of shingles, and the shingles on your roof don’t look the same as they did when they were installed. Years of weather have changed them.