April 2020

Use Profesional Wedding Photographer For Your Wedding

How to Choose a Wedding Photographer

 Your wedding photographer should capture every detail of your big day. From your place card holders to your hair accessories and your makeup applications, it’s your photographer’s responsibility to capture it all. This way, you don’t have to rely completely on memory.

  1. It pays to have the best

While you can get a good deal with a photographer who’s new to the industry, you do need to find someone you trust to get it right. Perfection comes with experience.

  1. Browse your photographer’s portfolio

Look through the portfolio of any photographer you’re considering. You won’t just be looking for examples of the weddings they’ve captured. You’ll also be looking at their different styles and approaches. When you find the photos that resonate with you, you’ve found your style and photographer.

  1. Decide on the right style

A professional photographer distinguishes all the subtleties of shooting a wedding. They’ll know exactly when to photograph your groom as he first sees you walking down the aisle, how to achieve the perfect confetti shot, and what to do in the event of rain. A creative and flexible approach often results in the most breathtaking and brilliant wedding photographs.

  1. Create a detailed action plan

Everything from your chosen venue to the time of year will affect your wedding photographs. If you’ve got your heart set on certain shots, like couple’s portraits at sunset or a sparkler send-off photo, then you need to talk it through with your photographer.


Important Questions to Ask Wedding Photographers Before You Book

We can’t stress enough how important this is—almost as crucial as their skills behind the camera. You’ll be spending your entire wedding day with this person and if you’re at ease, you’ll not only enjoy yourself more, but they’ll also get better shots. See all the most important questions to ask wedding photographers, below.

  • What style(s) do you specialize in?
  • Will the photos be retouched and color balanced? Is that done before I see the proofs?
  • How many weddings have you shot, and how many do you do in a year? Also, what’s your favorite part of a wedding day, and time of year to shoot?
  • What exactly is included in your packages?
  • Do you bring your own lighting?
  • What will you wear?


How Many Hours You Should Book a Photographer For

When you’re in thick of wedding planning, you’re sure to come across so many questions you never knew to ask. From figuring out what flowers are in season to knowing how much to budget, you’re suddenly expected to become an expert on all-things events. Today, then, we wanted to offer up a resource to refer to when you inevitably find yourself asking, “Wait…how many hours do we need to book our photographer for? Read on for our complete breakdown on wedding photography coverage.

6 Hours of Wedding Day Coverage

Things to consider

  • 6 hours of coverage most likely means that there will not be much (or any) time for detail decor/design shots or photos of you getting ready
  • But, there will be coverage of all of the important moments (portraits, ceremony, family photos, first dance, cake cutting)
  • The end of the night comes early with just 6 hours of coverage so, most likely there will not be many photos of the reception once dancing starts

8 Hours of Wedding Day Coverage

Things to consider

  • If you have your heart set on doing a first look, then we recommend at least 8 hours of coverage
  • Even though 8 hours seems like a lot of time, this works best for weddings where the ceremony and reception are at the same location. Since the additional 2 hours gives the photographer just enough time to take a few getting ready, detail, and dancing shots, you don’t want to waste 30 or 40 minutes on your photographer needing to pack up her/his gear and drive to (and set back up at) a second location

10 Hours of Wedding Day Coverage

Things to consider

  • If the wedding ceremony and reception are taking place in different locations, we recommend at least 10 hours of coverage. This gives the photographer enough time to travel to the second location and still get all of the shots
  • Planning a grand exit? Unless you’re willing to give up coverage in the earlier hours, 10 hours is usually not enough to have a photographer there until the very end of the reception

12 Hours of Wedding Day Coverage

Things to consider

  • If you have a huge wedding party and family, we usually recommend 12 hours of coverage. Why? With everyone in “party mode” it means that it can be hard to get and keep people’s attention (not to mention the fact that it can be difficult to find and get the right people in the right place all at the right time!)
  • If you’re super into design and/or have the budget to make all of those Pinterest inspiration ideas come to life, it would be a bummer if all of those design details didn’t get photographed. So, if you have the wedding signs, custom cocktails, and lounges that everybody dreams of, we definitely recommend 12 hours of coverage to make sure every design detail gets the attention it deserves!


Tips: 10 Things You Should Tell Your Wedding Photographer

1) Tell them what they should wear; you don’t want a photographer in flip-flops and shorts in the middle of a black-tie affair. Your photographer should not stand out amongst your guests. (Massive camera aside of course!)

2) Provide them with an order of service, so they know what is happening and when. The only way for you to have photographs of all your special moments is to tell the photographer where he or she should be when they are taking place. (They need to get the best angle after all!)

3) Talking of group shots, if there are any awkward family circumstances, you should let your photographer know, so that he can position the subjects accordingly and be as tactful as possible.

4) Let your photographer know if any of your guests have mobility restrictions, so that benches and seats can be organised if needed for certain shots.

5) Ask your photographer to take pictures of all the little details you’ve worked so hard over! This could mean anything from the favours and elaborate seating cards, to the flower centrepieces on every table.


Advice For Choosing A Wedding Photographer

With all of the excitement and anticipation that comes with planning your wedding, the day finally comes and passes more quickly than you’d even imagine. While you should savor each moment, one thing is for sure: you’ll want to relive it forever. The best way to draw value out of all you put into your wedding day is to make these moments tangible. So we’ve asked a handful of our favorite pros for their best advice on choosing a wedding photographer to document this day.

  • Land on a budget

There are several things to consider when coming up with your number, and once you have it set, many ways to apply it toward the services you need most.

  • Know your style

Find not only what appeals to you now, but will for generations to come. Looking beyond photography trends will lead you to discover your true taste.

  • Look beyond portfolio highlights

Viewing a full gallery or two of real weddings a photographer has shot will allow you to see a more comprehensive range, from family portraits to reception detail shots.

  • Understand rights to the photos

The permissions and legal intricacies around rights to wedding photos can often be blurry, so any clarification you can get before signing off will benefit both you and the photographer down the line

  • Make sure you mesh

Look for an honest, organized, friendly photographer, because that’s who will be spending the day by your side.

So when it comes to selecting your wedding photographer, it all boils down to picking someone who jives with your visual style and you as a human. When you have a genuine connection with your photographer, they’ll do a better job capturing your emotions—your love, your joy, your stillness

Tips To Make Electronic Leak Detection

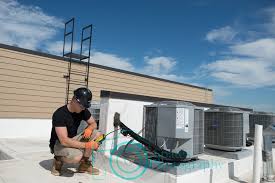
Why is Refrigerant Leak Detection Necessary?

Refrigerant leaks can lead to downtime.

Hotels, restaurants, bakeries, catering facilities, cold storage facilities, supermarkets, medical facilities and many other commercial and industrial facilities rely heavily on air conditioning and refrigeration systems to run their daily operations. A refrigerant leak followed by an unexpected breakdown can cause unplanned facility downtime, negatively impacting your revenue and reputation.


Importance of Spotting Leaks

It’s vital to identify and repair any leaks in your A/C unit early. The benefits vast outweigh the short-term burden of paying to have them fixed, and you’ll be kicking yourself down the road if a smaller leak grows larger and becomes a serious issue.

  • Savings! – When refrigerant leaks, the A/C unit has to kick into overdrive to compensate for the loss. As a result, your energy bill is going to spike to match that extra work.
  • Environmental factors – An improperly charged unit becomes much less energy-efficient, and the carbon dioxide emissions contribute greatly to the greenhouse effect. By getting ahead of refrigerant leaks, you’re helping out the environment!
  • Prevents damage – If an undiagnosed leak flies under the radar, it can gradually become something that can cause significant damage to your home. Water that freezes due to the leak can thaw and seep into the rest of the house and wreak havoc.


Detecting Refrigerant Leaks

November 2015 — Recovery of refrigerant is mandatory. It is important to follow all Environmental Protection Agency (EPA) and Occupational Safety and Health Administration (OSHA) safety guidelines when working around machinery and refrigerants. If the refrigeration system contains more than 50 pounds of refrigerant and has an annual leak rate of 15 percent or more for comfort cooling, or a 35 percent leak rate for commercial refrigeration, the EPA has mandated that it must be repaired.

How do we know if there is a refrigerant leak? Most of the time someone calls and reports that the air conditioning is not working properly. By checking system pressures and temperatures, you can determine whether the system refrigerant charge is either low or empty. Refrigerant leaks typically fall into four types:

  • Standing leaks:occur even while the unit is turned off
  • Pressure leaks:occur at a certain pressure
  • Vibration leaks:occur when a strain is put on a line or component
  • Temperature leaks:occur as a result of the expansion and contraction caused by temperature change

One way to start checking for a refrigerant leak is to listen to the system. Most of the time it will be hard to hear any gas escaping because equipment noise is too loud or the leak is too small.


Why is a Leak Detection Test Necessary?

If your air conditioning system stops working and an HVAC tech diagnosis the problem as low refrigerant, you’ll obviously want them to refill your refrigerant. Even though this will get your air conditioning up and working again, blowing cold air, this is just a Band-Aid solution to the real problem: finding and fixing the leak. By just filling up the system with new refrigerant, you’ll end up having to continue to buy more and more refrigerant as it continues to leak out of your system.

What Types of Leak Detection Tests Are There?

There are a wide variety of leak detection tests. Which one the technician uses for your system depends on what type of system and refrigerant you have and where the technician thinks the leak may be. Here are a few types of leak detection tests your technician may complete:

Bubble Solution

This is the simplest leak detection test. With access to accessible refrigerant lines, the technician is able to place a bubble solution on the line. If the line begins to bubble, the technician can tell that the gas is leaking out of the line and can patch the hole.

Fluorescent Leak Detection

If your technician refills your refrigerant and they suspect there’s a leak, they’ll most likely include some fluorescent dye with the refrigerant. They’ll come back later to use a UV light and see if any of the dye has leaked out of the lines. Once they find where the dye is located, they can easily locate and repair the leak. However, there are different dyes for different systems and refrigerants, and using the wrong dye with the wrong system can ruin an entire air conditioning system. That’s why it’s extremely important to hire a qualified technician.

Halide Torch

A halide torch has a flame that, when it comes in contact with chloride atoms, turns green. However, this isn’t always an effective test because not all refrigerants have chloride.

Electronic Detectors

There are a few different types of electronic detectors. One, the corona-suppression uses an electric current to detect leaks. When the electric current drops, gas is detected. The lower the drop in electric current, the higher the amount of gas.

A heated diode detector heats the refrigerant and breaks the molecules into negative and positive charged atoms. The positive atoms in the gas will attach to the negatively charged wire on the detector, and the detector will sense them, showing a gas leak when the detector goes off.

Ultrasonic Detector

An ultrasonic detector can hear where the gas is escaping in the line, even with pinhole sized leaks.


Repairing the AC Refrigerant Leak

Repairing a refrigerant leak in your AC unit usually requires hiring a skilled technician. For the DIYers, repairing a refrigerant leak in the air conditioner unit can be inexpensive if all that’s needed is to tighten a fitting or replace a valve core. At the same time, it can be very pricey if it repairs involve replacing the evaporator coil or copper line set.

Whether you try to repair the leak or hire a technician, there are some common sites to watch for leakage. These include:

  • Copper tubing
  • Shipping valves
  • Filter canisters
  • Weld joints
  • Valve cores

As mentioned previously, technicians may use an electronic sniffer to identify AC refrigerant leaks. Bigger leaks typically require using soap bubbles or the black light method.

The black light method requires installing a liquid tracer into the system and let it circulate for a couple of weeks. During this period, the tracer will ooze out slowly from places where there is a leak.It is common knowledge that refrigerants are very expensive. Time and effort spent to locate leaks, plus repairing AC equipment makes it imperative for preventive maintenance of systems. The best way to begin repairing to select a method that can quickly pinpoint leaks. This will not only keep loss of refrigerant at a minimum, but it will also help you avoid headaches and scorching heat.

Choose The Best Led Electrical Lighting For Your Home

Tips for Choosing LED Bulbs for Your Home

Be Careful of Using LEDs in the Garage

Note that LEDs don’t fair well in many garages. First, they can confuse older garage door openers and sensors. Second, the vibration caused by the garage door opening and closing can damage the diodes over time.

Stay Away from Extreme Temperatures

High temperatures can quickly fry an average LED bulb cluster, and freezing temps aren’t great for longevity, either. Stick to mild-temperature locations for LEDs, and use LED bulbs designed for the outdoors when necessary.

Read LED Labels

Manufactures are beginning to adopt LED-specific labels with many of the standard specifications. Compare bulbs by referring to the information on these labels.

Be Wary of Enclosed LED Bulbs

Enclosed (when you screw on a translucent covering) or recessed lighting can be dangerous for LED bulbs. LEDs only produce a small amount of heat, but they are highly susceptible to heat damage, so heat needs to be channeled away with a heat sink, a metallic base designed to conduct heat away from the sensitive parts of the LED. Enclosed bulbs can’t get rid of heat as easily, which can kill LED bulbs not designed for those situations.

Buy From a High-Quality Manufacturer

LED bulbs are famous for their long lives. In practice, they do last a long time, but not necessarily for years and years. Quality is still important, and poorly made LED lights for home will die just as soon as an incandescent bulb, if not faster. Choose high-quality, reliable manufacturers with good reviews, even if that means paying a little extra.


The Basics of LED Lighting

What are LEDs and how do they work?

LED stands for light emitting diode. LED lighting products produce light approximately 90% more efficiently than incandescent light bulbs. How do they work? An electrical current passes through a microchip, which illuminates the tiny light sources we call LEDs and the result is visible light. To prevent performance issues, the heat LEDs produce is absorbed into a heat sink.

Lifetime of LED Lighting Products

The useful life of LED lighting products is defined differently than that of other light sources, such as incandescent or compact fluorescent lighting (CFL). LEDs typically do not “burn out” or fail. Instead, they experience ‘lumen depreciation’, wherein the brightness of the LED dims slowly over time. Unlike incandescent bulbs, LED “lifetime” is established on a prediction of when the light output decreases by 30 percent.

How are LEDs Used in Lighting

LEDs are incorporated into bulbs and fixtures for general lighting applications. Small in size, LEDs provide unique design opportunities. Some LED bulb solutions may physically resemble familiar light bulbs and better match the appearance of traditional light bulbs. Some LED light fixtures may have LEDs built in as a permanent light source. There are also hybrid approaches where a non-traditional “bulb” or replaceable light source format is used and specially designed for a unique fixture. LEDs offer a tremendous opportunity for innovation in lighting form factors and fit a wider breadth of applications than traditional lighting technologies.

LEDs and Heat

LEDs use heat sinks to absorb the heat produced by the LED and dissipate it into the surrounding environment. This keeps LEDs from overheating and burning out. Thermal management is generally the single most important factor in the successful performance of an LED over its lifetime. The higher the temperature at which the LEDs are operated, the more quickly the light will degrade, and the shorter the useful life will be.


Light-Emitting Diodes (LEDs)

Introduction

LEDs are all around us: In our phones, our cars and even our homes. Any time something electronic lights up, there’s a good chance that an LED is behind it. They come in a huge variety of sizes, shapes, and colors, but no matter what they look like they have one thing in common: they’re the bacon of electronics. They’re widely purported to make any project better and they’re often added to unlikely things (to everyone’s delight).

Unlike bacon, however, they’re no good once you’ve cooked them. This guide will help you avoid any accidental LED barbecues! First things first, though. What exactly is this LED thing everyone’s talking about?

LEDs (that’s “ell-ee-dees”) are a particular type of diode that convert electrical energy into light. In fact, LED stands for “Light Emitting Diode.” (It does what it says on the tin!) And this is reflected in the similarity between the diode and LED schematic symbols:

In short, LEDs are like tiny lightbulbs. However, LEDs require a lot less power to light up by comparison. They’re also more energy efficient, so they don’t tend to get hot like conventional lightbulbs do (unless you’re really pumping power into them). This makes them ideal for mobile devices and other low-power applications. Don’t count them out of the high-power game, though. High-intensity LEDs have found their way into accent lighting, spotlights and even automotive headlights!

Are you getting the craving yet? The craving to put LEDs on everything? Good, stick with us and we’ll show you how!

Suggested Reading

Here are some other topics that will be discussed in this tutorial. If you are unfamiliar with any of them, please have a look at the respective tutorial before you go any further.


Everything You Need To Know About LED Lighting

What Does LED Stand For?

A diode is an electrical device or component with two electrodes (an anode and a cathode) through which electricity flows – characteristically in only one direction (in through the anode and out through the cathode). Diodes are generally made from semi-conductive materials such as silicon or selenium – substances that conduct electricity in some circumstances and not in others (e.g. at certain voltages, current levels, or light intensities).

What is LED Lighting?

A light-emitting diode is a semiconductor device that emits visible light when an electrical current passes through it. It is essentially the opposite of a photovoltaic cell (a device that converts visible light into electrical current).

How Do LED Lights Work?

It’s really simple actually, and very cheap to produce, which is why there was so much excitement when LED lights were first invented!

The Technical Details: LED lights are composed of two types of semiconducting material (a p-type and an n-type). Both the p-type and n-type materials, also called extringent materials, have been doped (dipped into a substance called a “doping agent”) so as to slightly alter their electrical properties from their pure, unaltered, or “intrinsic” form (i-type).

Application of the Technical Details to LED Lighting:

When a light-emitting diode (LED) has a voltage source connected with the positive side on the anode and the negative side on the cathode, current will flow (and light will be emitted, a condition known as forward bias). If the positive and negative ends of the voltage source were inversely connected (positive to the cathode and negative to the anode), current would not flow (a condition known as reverse bias). Forward bias allows current to flow through the LED and in so doing, emits light. Reverse bias prevents current from flowing through the LED (at least up until a certain point where it is unable to keep the current at bay – known as the peak inverse voltage – a point that if reached, will irreversibly damage the device).


How To Determine How Many LED Lumens You’ll Need To Properly Light Your Space

Efficacy

The number of lumens a bulb produces for each watt it consumes. The higher the number, the more efficient the bulb. For example, lighting products that have been designated with the ENERGY STAR label are deemed high efficacy, meaning they have been determined to deliver the same features while using less energy.

The Breakdown—How Much Light is Enough?

Determine Room Square Footage. Multiply the length times the width of the room to get the room square footage. For example, if the room is 10 feet wide and 10 feet long, the room square footage will be 100 square feet.

Lumens

Lumen output, also known as brightness or light output, is a measure of the total quantity of visible emitted by a light source per unit of time, weighted according to the human eye’s sensitivity to wavelengths of light, the study of which is known as luminous efficiency function. The reference point: a standard 100-watt incandescent light bulb produces about 1,500 – 1,700 lumens.

Watts

Not a measure of brightness; instead, it’s a measure of how much electricity (or energy) a light bulb consumes to reach its claimed brightness.  Each type of light source, LED, fluorescent, halogen or incandescent has a different lumen-per-watt ratio.  Below we’re going to use lumens as a measurement to make sure we have enough light for a space.

Wattage Equivalence

Since we’ve conflated watts and lumens, it’s easier to talk about bulbs in terms of watts. So if a 100-watt incandescent produces 1,500 lumens, and a 10-watt LED does the same, the 10-Watt LED may advertise “100-watt equivalent” on its label.

Must Know A Little About Electrician

Electricians – What Their Work Includes

What is the job of most electricians? What do they do? Most people think of electricians as people that only come to your house to fix an electrical problem. Well, they do that a lot, but they also do other work that serves not only individuals but also large companies, the state, etc. Usually, the job of an electrician lasts about forty hours a week. That, however, doesn’t mean that it is fixed. Sometimes, they may work overtime. Other times, it may be necessary to supervise a certain machine for hours.


Work Environment

Electricians work indoors and out, at construction sites, in homes, and in businesses or factories. The work may be strenuous at times and may include bending conduit, lifting heavy objects, and standing, stooping, and kneeling for long periods. Electricians risk injury from electrical shock, falls, and cuts, and must follow strict safety procedures to avoid injuries. Data from the U.S. Bureau of Labor Statistics show that full-time electricians experienced a work-related injury and illness rate that was higher than the national average. When working outdoors, they may be subject to inclement weather. Some electricians may have to travel long distances to jobsites.

Most electricians work a standard 40-hour week, although overtime may be required. Those who do maintenance work may work nights or weekends and be on call to go to the worksite when needed. Electricians in industrial settings may have periodic extended overtime during scheduled maintenance or retooling periods. Companies that operate 24 hours a day may employ three shifts of electricians.


Training

Most electricians learn their trade in a 4- or 5-year apprenticeship program. For each year of the program, apprentices must complete at least 144 hours of technical training and 2,000 hours of paid on-the-job training. In the classroom, apprentices learn electrical theory, blueprint reading, mathematics, electrical code requirements, and safety and first-aid practices. They also may receive specialized training related to soldering, communications, fire alarm systems, and elevators.

After completing an apprenticeship program, electricians are considered to be journey workers and may perform duties on their own, subject to any local licensing requirements. Because of this comprehensive training, those who complete apprenticeship programs qualify to do both construction and maintenance work.

Several groups, including unions and contractor associations, sponsor apprenticeship programs. The basic qualifications to enter an apprenticeship program are as follows:

  • Minimum age of 18
  • High school education or equivalent
  • One year of algebra
  • Qualifying score on an aptitude test
  • Pass substance abuse screening

Some electrical contractors have their own training program. Although most workers enter apprenticeships directly, some electricians enter apprenticeship programs after working as a helper.


What Do Electricians Do

Electricians install, maintain, and repair electrical wiring, equipment, and fixtures. Ensure that work is in accordance with relevant codes. May install or service street lights, intercom systems, or electrical control systems. They also plan layout and installation of electrical wiring, equipment, or fixtures, based on job specifications and local codes.

Other tasks include:

  • Connect wires to circuit breakers, transformers, or other components.
  • Test electrical systems or continuity of circuits in electrical wiring, equipment, or fixtures, using testing devices, such as ohmmeters, voltmeters, or oscilloscopes, to ensure compatibility and safety of system.
  • Use a variety of tools or equipment, such as power construction equipment, measuring devices, power tools, and testing equipment, such as oscilloscopes, ammeters, or test lamps.
  • Inspect electrical systems, equipment, or components to identify hazards, defects, or the need for adjustment or repair, and to ensure compliance with codes.
  • Prepare sketches or follow blueprints to determine the location of wiring or equipment and to ensure conformance to building and safety codes.
  • Diagnose malfunctioning systems, apparatus, or components, using test equipment and hand tools to locate the cause of a breakdown and correct the problem.


What Types of Electrician

Below are just a few examples of possible jobs you could take on when trained as an electrician:

  • Domestic Electrical Installers

Perhaps the most common type of electrician, domestic electrical installers work on domestic properties. So that’s small and larger jobs around the home, ranging from simple socket fixes to installation of wiring throughout a property.

  • Installation Electrician

You’ll be responsible for installing systems such as lighting, security, power, fire protection systems and structure cabling.

This job is slightly larger in scope than a domestic electrical installer’s work, as it allows the possibility of working on larger projects. Installation electricians can work anywhere ranging from construction sites to commercial properties.

  • Maintenance Electrician

Maintenance electricians ensure that modern electrical systems and the equipment that they serve are always running effectively, safely and efficiently.

This can involve anything from maintaining the power grid to fixing problems with machinery within factories.

  • Electrotechnical Panel Builder

They use programmable logic controllers and information technology to build and manage the electrical control panels that control buildings heating, ventilation, air conditioning and refrigeration equipment.

  • Instrumentation Electrician

This job involves commissioning, testing, fault finding and the repairing of building environmental control systems, such as large air conditioning units, heating and refrigeration.

  • Electrical Machine Repairer & Rewinder

Skilled electrical machine repair and rewind specialists are required to repair and maintain equipment machinery such as transformers, compressors, pumps and fans within buildings.

  • Highway Electrical Systems Electrician

Trained highway electrical systems electricians ensure that our street lighting, including traffic management systems are continuously managed and maintained to a high standard.

The Best Way To Find Termite

Tips For Finding The Best Termite Control Company

Hopefully, you will never have to deal with looking for a termite control company, but if you are a homeowner, chances are you will have to face this problem at some point. If you do find yourself with an infestation problem, this article will give you a few tips on how to find the best termite control company.

One of the best ways to find the right termite control company for you is to ask your friends and family who they have used in the past. They may already have a rapport with a certain company that is top notch in the field of termite control. Or they may know the name of a friend who has experienced similar infestation problems and has a go-to-guy to fix them.


Tips On Choosing The Right Termite Control Company

As a customer, before hiring any pest control technician

Ensure that you have a look at his/her qualification with their respective regulatory authorities.

Following these tips ensures that you get the best company that will offer the best termite control measures and drugs.

Check on the qualification the employees who work for the company.

Pest control is like any other profession. It should never be looked down upon. While most people have the tendency to think that pest control jobs can be offered by any unskilled individual, the truth of the matter is that the Singapore Government expects all pest practitioners to be well qualified with proper certification.

Safety measures

Almost every pest control drug is dangerous to humans. Every pest control company should be willing to discuss about the dangers of its products. It should explain on how to use the drug in order to reduce such effects. The company should also be willing to address the environmental concerns. It should be able to come up with measures that will reduces any sort of accidents and any unnecessary exposure to the dangerous risks involved in it usage.

The customer relations

The best company is the one that adheres to its customers’ requirements. The company should be willing to address any concerns raised by its customers. They should be ready to clarify in details the degree of pest control and its effects. They should be able to explain the behavior that relates to the use.

Quality and value of the work.

You should identify the company that offers the best drugs at affordable prices. One thing to consider before buying anything from a shop is their prices. The price of a product should represent its quality. If any company requires you to sign up for a long term contract, you should consider their costs and if they offer guarantee to their products.


Tips For Finding A Termite Control Company

Reviews

Since the market these days is flooded with a lot of contractors who are infamous for shady practices, knowing the reputation of the termite company is essential. You can search for online forums that talk about termite control companies. The good thing about online forums is that you will obtain practical information from the discussions by other clients. Of course, the information you will get will help you with your decision on which company to pick.

Licenses

It is vital that you only deal with companies who have the right paperwork to operate as a termite control company. Keep in mind that companies offering pest control services need to adhere to many regulations set by the relevant authorities. More often than not, fly-by-night contractors failed to secure a permit because they did not make an effort to follow the standards.

Affordability

Your first course of action when in search of a termite control firm is to know their rates.  Visit the official site of the company of choice to ask for free estimates. Most of the contractors these days will provide estimates free of charge, so you do not need to worry about finding one.

Your goal here is to find a company who offers services at a reasonable price. Hence, it will be a wise decision to contact several companies to find out who provides the most pocket-friendly prices.


Must-Know Tips for DIY Termite Control

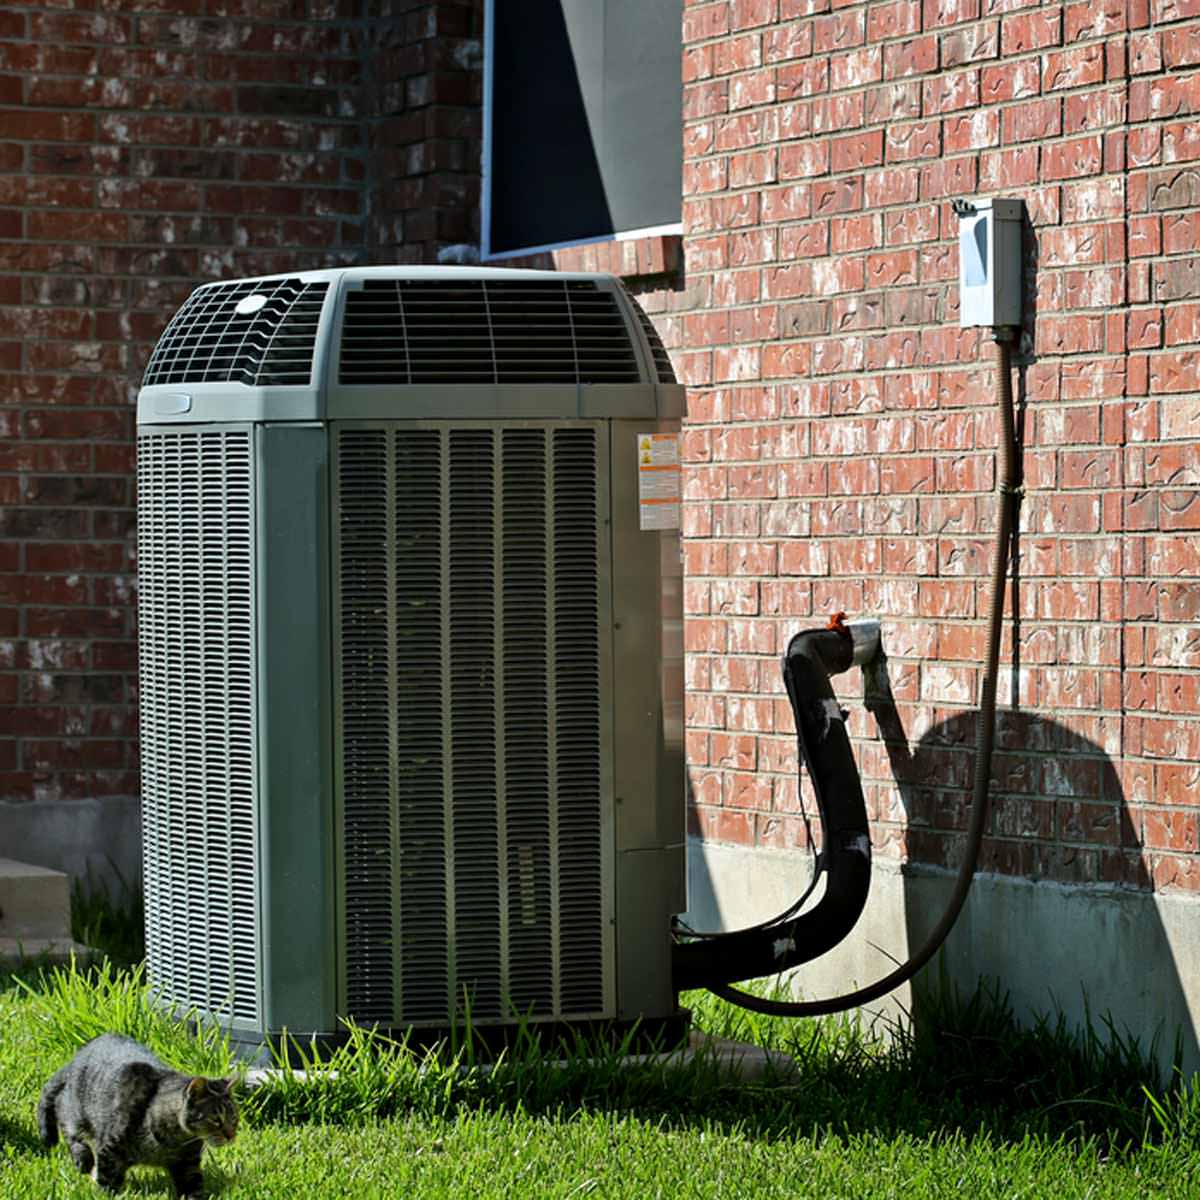
Guard Your Air Conditioner

Because of the way that air conditioners and heat pumps work, they are always creating and draining moisture via a natural condensation process that occurs as temperatures change. And that’s one type of moisture that you won’t be able to eliminate. It’s important to make sure that your AC unit is difficult for termites to find, and that your moisture drainage system is clear and carries water way instead of depositing it near your house.

Use Plastic for Storage

Cardboard is another big draw for termites. If you store anything in cardboard around your house or garage, replace that cardboard with plastic bins. If you store cardboard for recycling, make sure it’s in a recycling bin and not just piled up somewhere.

Building in the Garden? Buy Treated Wood

When building something new for your garden or yard, remember to use pressure-treated wood to help prevent termite damage. Termites rarely try to eat wood combined with chemicals.

Heat Can Also Kill Termites

Termites are heat-sensitive, so heat can be an excellent termite repellent and an easy homemade termite killer. If you can heat up a space to at least 120 degrees F. for at least half an hour, the termites there will die. This is a cost-effective way for DIY termite control without using pesticides. However, you can’t try this near plastics or wiring, and it doesn’t work as well on especially large beams, so be careful.

Use Repellent Termiticide on Safe Wood Structures

Repellent termiticides help you protect wood that has not yet been located by termites. Use it around sheds, decks, fences and similar areas to help prevent termites from discovering them.


How to Get Rid of Termites and Never Think of Them Again

How Much Damage Can House Termites Do?

The most dangerous thing about house termites is that they are almost impossible to detect at an early stage of infestation. Often called hidden invaders, they can eat away at your home for years, and you’ll never even know. Termites hollow out wooden structures and beams from inside out, leaving them with no visible damage on the outside. Their traces are not easy to spot, either. It takes house termites 2-3 years to completely devastate the house in which you were going to live for several decades. In different countries, these insects cause billions of dollars worth of property damage each year.

DIY Termite Prevention

The struggle against these pests is long, difficult and expensive. Therefore, it is much cheaper and easier to conduct do it yourself termite prevention, take all necessary precautions during house construction, follow a simple set of rules and inspect wooden structures regularly.

The most effective measure for termite prevention is conducted during the construction of a wooden house or wooden structures. You need to treat all wooden parts with a 0.1% solution of permethrin. This way, you will perform a good termite prevention and ensure that pests will never approach the building. If this wasn’t done initially, you can treat all wooden structures in the basement, as well as outside and around the house after the construction is finished.

Professional Wood Treatment For Termites

In case of severe infestation, getting rid of termites is better left to professionals. But in this case, some caution is also necessary. There are lots of unscrupulous or unskilled “professionals” on the termite extermination market. Before applying professional termite treatment services, you should familiarize yourself with the services offered by the company, check their qualification certificates, read the reviews. You should pay special attention to quality warranty, free treatment result inspections scheduled after a specific time period, and free re-treatment in case of unsatisfactory results of the termite extermination.

Termite Treatment Chemicals

The best way to get rid of termites is to use termite treatment chemicals. They are selected depending on how they act and which is more suitable for the situation.

Choosing Best Termite Treatment

Termites can cause serious damage to your property. Luckily, you can find many special termite treatments on the market that can help you to protect your home. However, there are so many products available that it may be difficult to choose the best one right away.

How To Choose The Best Car Accident Lawyer

Attorneys Answer: When do you need to hire a car accident lawyer?

Keep in mind that the insurance companies have teams of lawyers and adjusters who begin evaluating your injury claim right away. Because of this, it is essential that you retain a personal injury lawyer immediately if you are injured in a car collision in order to level the playing field.

Facing a team of professional attorneys that work full-time for billion-dollar insurance companies isn’t a wise move. It is possible to go at it alone, but you are literally at their mercy; they may give you a thousand dollars, a few hundred bucks, or possibly even deny your claim. It is up to them since you don’t really know what legal rights you have, what alternatives you could use, or what to do to fight them. They spend every day, all day, fighting claims on behalf of their employers (insurance companies) so facing them on your own with no experience has an obvious outcome.

It is important to note that not all personal injury law firms are the same. In fact, many of the biggest advertising firms are little more than settlement mills. A settlement mill is a firm that relies on heavy advertising as the lifeblood of their business and litigate a disproportionate amount of their cases. Such firms do not rely on current or former clients to refer cases via word-of-mouth and can thus afford to employ a mill mentality to their handling of cases.

In fact, settlement mills tend to leave money on the table at the time of settlement as they are more concerned with resolving a volume of personal injury cases each month to pay their expensive advertising budget. Keep in mind that even an average trial lawyer is superior to a settlement mill as the insurance carrier must spend money defending a trial or a case that has advanced far in litigation. The goal of any insurance carrier is to save money and forcing them to run up costs gets their immediate attention.


How soon should you contact an attorney?

It’s recommended you contact a personal injury attorney as soon as possible following the accident. Why? The at-fault party will immediately notify his insurance company, who will then try to get in touch with you to discuss what happened. You should never give a statement to an insurance company without first contacting an attorney. Remember, the insurance company is not looking out for your best interests. They are not concerned with how much you might have in medical expenses or how many days you may have had to take off of work because of your injuries—insurance companies are only concerned with getting you to accept a low settlement offer. An attorney will be able to deal with the insurance company for you so you don’t have to worry about saying the wrong thing or agreeing to a number you’re not satisfied with.

There is also a statute of limitations for personal injury claims, meaning after a certain period of time has passed, you will no longer be able to file a claim to recover compensation for your injuries. In most states, the statute of limitations is two years from the date of the accident. This may seem like plenty of time, but it passes quickly, especially when you are recovering from a serious injury. The sooner you get in touch with an attorney, the sooner he can begin the process of formally filing a claim.

Once you get in touch with an attorney, you will need to provide him with all of the information you have about the accident, including your recollection of what happened, the other parties’ contact information, the police report, and medical documentation of your injuries. Then, your attorney will determine what he thinks your personal injury claim is worth, and begin the negotiation process with the insurance company. If an agreement cannot be reached through negotiation, the case will have to go to trial.


A List of The Most Common Types of Serious Auto Accidents

There are several common types of accidents that often result in serious injuries for the parties involved.

These are some of the cases we deal with most frequently.

  • Rear-End Accidents

A rear-end accident occurs when a driver collides with the vehicle in front of them. These types of accidents can range from minor to extremely severe, depending on the speed at which the vehicles were moving and the exact circumstances under which the accident occurs.

In most instances, the driver of the vehicle that rear-ends the other car is at fault, with these types of collisions often occurring because a driver was following too closely or was not paying attention. However, if the driver of the vehicle that gets rear-ended was reversing at the time of the collision, it’s possible that driver could be found responsible for the accident.

  • T-bone Accidents

Also known as side-impact collisions, a “T-bone” occurs when the side of a car is hit by the front or rear of another vehicle. These broadside collisions can often result in severe injuries for both parties.

  • Sideswipe Collisions

A sideswipe accident is when the side of one vehicle collides with the side of another vehicle, typically while both cars are traveling in the same direction. Common causes of sideswipe accidents are drivers failing to check their blind spot prior to changing lanes and drivers in parked vehicles re-entering moving traffic without first ensuring the lane is clear.

At low speeds, sideswipe collisions may only result in cosmetic damage, but at high speeds, the injuries can often be significant and severe.

  • Head-on Collisions

Head-on accidents occur when two vehicles collide directly with each other while going in opposite directions. Even at modest speeds, head-on collisions can result in severe injuries or death.

  • Single Vehicle Crashes

Single vehicle accidents involve only one vehicle and can be the result of a collision with a stationary object or of veering off the motorway. These accidents can occur due to driver error resulting from factors such as intoxication or fatigue, or can happen as the result of external factors like unsafe road conditions or inclement weather.

  • Rollover Accidents

A rollover accident occurs when one of the vehicles is overturned as a result of either a collision or departure from the roadway. Rollover accidents are typically severe, resulting in substantial injuries and possibly death.

  • Hit and Run Accidents

Hit and run accidents can be any type of accident in which one of the drivers involved in the collision decides to flee the scene. Hit and runs are defined by the driver leaving the scene of the accident without providing contact information and can result in a ticket (at a minimum) and possibly criminal charges.


Why You May Need to Hire a Car Accident Lawyer

Unfortunately, car accidents are everyday occurrences. Most personal injury claims in the United States are a result of an accident involving a car, truck, or other motor vehicle. Many of these accidents result in minor vehicle damage in the form of a “fender bender,” and can generally be handled alone through direct contact with an insurance company. However, car accidents that involve physical injury, fatality, or other significant damage may warrant the legal representation of experienced counsel.

An experienced attorney can help you get compensation to cover any losses incurred due to the accident, such as medical expenses, lost wages, and car repairs. In some states, a car accident lawyer may help you recover when a loved one is killed, especially if reckless driving, speeding, or drunk-driving was involved.

What to Look For When Hiring a Car Accident Attorney

Auto accident attorneys cover a range of issues stemming from personal injury, wrongful death, property destruction, and liability determinations. When looking for a lawyer, you should concentrate on their experience, skill level, commitment, location, and fee structure.

For example, your attorney should be well versed in state and national transportation laws, know how to deal with insurance and health care companies, and know how to effectively prepare and settle a case. Also, it’s important that you check the attorney’s background, references, and track record.

Lastly, a good lawyer will typically accept your case on a contingency or “no win-no fee” basis if the attorney feels your case has any merit, so it’s important to check the attorney’s standard fee structure.

When to Hire a Car Accident Lawyer

It is best to hire an attorney early to avoid any costly mistakes. The deadline for filing personal injury claims varies from state to state. Because you may need to pay for medical bills and/or cover lost wages, the sooner you contact an attorney the better. In general, a person should contact an attorney shortly after the accident occurs — within a week or two of the accident — but before reaching a settlement with the insurance company.


Some surprising ways you didn’t know a lawyer could help you

Lawyers do have skills, you know. There are some great ways they can help:

  1. Completes a professional investigation

Personal injury firms may have their own investigators document the scene of an accident, interview witnesses and develop theories about how the incident occurred. These might be professional investigators or even retired cops working a new job.

Outside experts such as accident reconstruction experts may be necessary if the cause of the accident is in dispute. Your attorney will have a dedicated roster of professionals he or she normally uses and will know who can assist.

  1. Connects with medical providers

A personal injury lawyer may have a business relationship with a medical professional who may agree to provide medical services in favor of a lien on any future settlement or judgment.

They may also have greater experience in understanding serious injuries and may recommend a particular specialist who has provided superb results in previous cases.

  1. Better assesses damages

Many accident victims only think about the immediate impact of an accident. After all, they could be receiving harassing phone calls from bill collectors, making up funds after being off work for a few weeks and may need to repair their vehicle to get back on the road.

However, a personal injury lawyer deals with these cases on a routine basis and can help identify a more accurate estimate of the real and long-term effect of injuries, such as a loss in earning capacity if the accident left the victim disabled. A personal injury lawyer may also ask an economist or actuary for help in assessing the lifetime impact of an accident.

  1. Works through a variety of legal processes

A personal injury lawyer can help in a number of different judicial forums. For example, he or she may help with informal negotiation with the insurance company before or after a case is filed in court.

Alternatively, they may help litigate a case if the settlement offer is not satisfactory to the client or the claim is denied. However, personal injury lawyers can also help in other types of forums such as alternative dispute resolution.

Arbitration may be required if the victim’s own insurance company is involved. This involves presenting a case in front of a neutral arbitrator who makes a binding decision. Mediation consists of the victim and the person responsible for the injury working together to reach a solution out of court with the help of a third-party neutral. (See more on mediation and arbitration.)

Choose The Good Way To Roof Repair

The Ultimate Troubleshooting Guide to Roof Repair

When you discover a fresh water stain on your ceiling or you hear a loud thump on your roof, your first instinct may be to curl up under a soft blanket, or grab a bucket or bowl and look for a possible leak.

Replacing a roof costs thousands of dollars and most homeowners haven’t budgeted for a problem that size, but it is important to address whatever issues arise overhead.

A leak or a fallen tree branch doesn’t always signal extreme damage. Your fix could be as simple as installing a few new shingles or replacing the flashing. According to a survey of more than 38,000 homeowners, the average roof repair costs about $800. This is much more affordable than the $7,000 average for an entirely new roof. Depending on your issue, you could pay as little as $10 for material.

Take a look at the following guide to mendable roof damage, then check for yourself or call a professional to see if yours is an easy fix.

Disclaimer: Working on a roof is very dangerous and must be handled with extreme caution. If you are uncomfortable and don’t feel safe, it is always worth it to hire a contractor.

01.Damaged Flashing

Flashing is the material that protects the crease between fixtures like chimneys or skylights and the roof. It is usually made of sheet metal or plastic. There is also flashing for the venting pipes under your roofing material. If the flashing is cracked, loose or worn, the area around these fixtures will be vulnerable to rain and moisture.

Solution: ($20) Remove and replace with new flashing. Some surrounding materials, such as shingles, will need to be lifted away for removal and installation.

02.Worn Sealant

A sealant is used with flashing and around the edges of skylights. Cracked and aged sealant will not be able to do its job, resulting in a leak.

Solution: ($6 per tube of flashing sealant) Re-caulk or apply new tar. You will likely need to remove surrounding materials temporarily, to effectively apply the sealant.

03.Punctures

Weather, falling branches and animals can create significant holes and punctures in your roofing material. These repairs are best handled by professional roofers, as they involve more steps and may demand reframing part of the roof itself.

Solution: ($300-$1,000 labor and materials) After your roofer has done any necessary reframing, they will install a layer of sheathing, then felt paper followed by shingles. You may be tempted to cover the hole with a temporary material or, if it is small enough, seal it up with roofing caulk, but this will only allow moisture to seep through and create larger problems.

04.Damaged Vent Boot

This component seals the area around your vents against moisture, much like flashing seals other parts of your roof. A damaged vent boot could be the source of your leak.

Solution: ($10-$20 materials) Remove and replace the vent boot. This will involve lifting away surrounding materials, as well as nailing and caulking the boot.

05.Damaged or Missing Shingles

It is common to discover a few damaged or missing shingles, as a number of external factors act against them.

  • Strong weather blows them off or pries them loose.
  • Their protective surface granules wear away.
  • Animal activity cracks and breaks them.
  • Hail cracks and breaks them.
  • Ice dams and pooling water weigh on them.

Solution: ($30 per bundle) Remove the old shingles and replace them with new ones. In the case of ice dams and pooling water, once you have replaced your shingles, you’ll want to be proactive to prevent future damage. Remove snow to prevent ice dams and keep your gutters clean for proper drainage.

06.Corroded Vertical Slits

The slit between each roofing tile is a vulnerable area and can easily corrode. As water runs through these slits, it exposes the underlying roofing materials more and more.

Solution: ($30 per bundle) Replace the corroded shingles as soon as possible to prevent further damage.

Leaks and aesthetic damage can usually be fixed without overhauling your entire roof. However, there are times when installing a new roof is a wise investment—such as before listing your home. You should have your roof inspected for quality if it is 20 to 25 years old or if it is leaking in multiple places.
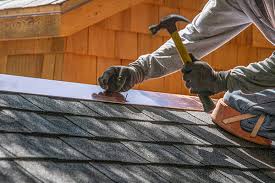
 

Why Is My Roof Leaking?

One of my favorite customer calls is when the customer states “It only leaks when it rains!” I would be concerned if a roof leaked when it wasn’t raining. Leaks occur for several reasons. Browse through some of the common culprits and the cost to get them fixed.

1.Shingles

Shingles may blow off in high winds and hail. To repair blown off shingles, you first match the shingles for color and manufacturer. Then, you should hire someone to install the shingles to manufacturer specifications.

2.Roof boots

Neoprene (rubber) boots can disintegrate over time. We always suggest lead boots, which are slightly more expensive, but will last much longer. Even though you incur the cost of removing the rubber boots and replacing them with lead boots in the beginning, you may save yourself from interior damage in the future.

3.Flashing

If flashing, the metal installed around chimneys, dormers and skylights, isn’t installed properly or becomes damaged, it can lead to leaks. This is a difficult one to put a price on. Shingles surrounding the area must be removed and replaced. Siding may need to be manipulated, and flashing will need to be made to secure the area.

4.Roofing materials

If your roof pitch is less than 3:12, you must use roofing made specifically for flat roofs. A 3:12 roof pitch has 3 feet of vertical rise for every 12 feet of length.

If you have the wrong roofing material, the area will need to be completely removed before installing new roofing material.

5.Siding or windows

Here is the shocker: It may not even be your roof. If there is the slightest hole in your siding, water can get in and appear as a roof leak. Water entering windows can look like a roof leak too.


12 Roof Repair Tips: Find and Fix a Leaking Roof

You can stop leaks yourself-no experience necessary. We show you how to track down and fix the most common types of roof leaks. Most leaks take only minutes to repair.

  1. Leaky Roof Overview

If you have water stains that extend across ceilings or run down walls, the cause is probably a leaky roof. Tracking down the leak is the hard part; the roof leak repair is usually pretty easy. We’ll show you some simple tricks for finding and repairing most of the common types of leaky roofs. But if you live in the Snow Belt and in the winter you have leaks only on warm or sunny days, you probably have ice dams. We won’t go into that roof leak repair in this story. Check out this article for more on preventing ice dams. If you have a leaky roof, you’d better fix it immediately, even if it doesn’t bother you much or you’re getting a new roof next year. Even over a short time, small leaks can lead to big problems, such as mold, rotted framing and sheathing, destroyed insulation and damaged ceilings. The flashing leak that caused an expensive repair bill was obvious from the ceiling stains for over two years. If the homeowner had dealt with it right away, the damage and subsequent repairs would have been minimal.

  1. How to Find Roof Leaks

When you’re trying to track down a leak, start by looking at the roof uphill from the stains. (Plus: here’s how to clean roof stains.) The first thing to look for is any roof penetrations. Items that penetrate the roof are by far the most common source of leaks. In fact, it’s rare for leaks to develop in open areas of uninterrupted shingles, even on older roofs. Penetrations can include plumbing and roof vents, chimneys, dormers or anything else that projects through the roof. They can be several feet above the leak or to the right or left of it.

If you have attic access, the easiest way to track down a leak is to go up there with a flashlight and look for the evidence. There will be water stains, black marks or mold. But if access is a problem or you have a vaulted ceiling, you’ll have to go up onto the roof and examine the suspect(s).

  1. Trick for Finding Difficult Leaks

If a leak is difficult to find, enlist a helper and go up on the roof with a garden hose. Start low, soaking the area just above where the leak appears in the house. Isolate areas when you run the hose. For example, soak the downhill side of a chimney first, then each side, then the top on both sides. Have your helper stay inside the house waiting for the drip to appear. Let the hose run for several minutes in one area before moving it up the roof a little farther. Tell your helper to yell when a drip becomes visible. You’ll be in the neighborhood of the leak. This process can take well over an hour, so be patient and don’t move the hose too soon. Buy your helper dinner. If running water doesn’t reveal the exact location of the leak, don’t be timid. Start removing shingles in the suspect area. With them removed, there’ll be evidence of the leak and you’ll be able to track it down right to the source. You’ll see discolored felt paper or water-stained or even rotted wood directly below and around a leaky roof.

  1. Solution for a Small Leak

Some roof leaks are tough to locate. Sometimes the water shows up at a ceiling spot distant from the leak. If your ceiling has a plastic vapor barrier between the drywall and the attic insulation, push the insulation aside and look for flow stains on the plastic. Often water runs to openings in the vapor barrier, such as at ceiling light fixtures.

If you can’t see any telltale flow marks, and since the stain is fairly small, look at the underside of the roof for ‘shiners.’ A shiner is a nail that missed the framing member, in this case when the carpenter nailed the roof sheathing to the rafters. Moisture that escapes into the cold attic from the rooms below often condenses on cold nails. Sometimes you can spot this if you climb up into your attic on a cold night. The nails will look white because they’re frosted. When the attic heats up a bit during the day, the frost melts and drips, then the nails frost up at night again and so on. The solution is to simply clip the nail with a side-cutting pliers.

  1. Fix Plumbing Vent Boots

Plumbing vent boots can be all plastic, plastic and metal, or even two-piece metal units. Check plastic bases for cracks and metal bases for broken seams. Then examine the rubber boot surrounding the pipe. That can be rotted away or torn, allowing water to work its way into the house along the pipe. With any of these problems, you should buy a new vent boot to replace the old one. But if the nails at the base are missing or pulled free and the boot is in good shape, replace them with the rubber-washered screws used for metal roofing systems. You’ll find them at any home center with the rest of the screws. You’ll have to work neighboring shingles free on both sides. If you don’t have extra shingles, be careful when you remove shingles so they can be reused. Use a flat bar to separate the sealant between the layers. Then you’ll be able to drive the flat bar under the nail heads to pop out the nails.

  1. How to Fix Roof Vents

Check for cracked housings on plastic roof vents and broken seams on metal ones. You might be tempted to throw caulk at the problem, but that solution won’t last long. There’s really no fix other than replacing the damaged vents. Also look for pulled or missing nails at the base’s bottom edge. Replace them with rubber-washered screws. In most cases, you can remove nails under the shingles on both sides of the vent to pull it free. There will be nails across the top of the vent too. Usually you can also work those loose without removing shingles. Screw the bottom in place with rubber-washered screws. Squeeze out a bead of caulk beneath the shingles on both sides of the vent to hold the shingles down and to add a water barrier. That’s much easier than renailing the shingles.

  1. Fix Walls and Dormers

Water doesn’t always come in at the shingled surface. Often, wind-driven rain comes in from above the roof, especially around windows, between corner boards and siding, and through cracks and knotholes in siding. Dormer walls provide lots of spots where water can dribble down and enter the roof. Caulk can be old, cracked or even missing between the corner boards and between window edges and siding. Water penetrates these cracks and works iBts way behind the flashing and into the house. Even caulk that looks intact may not be sealing against the adjoining surfaces. Dig around with a putty knife to see if the area is sealed. Dig out any suspect caulk and replace it with a high-quality caulk. Also check the siding above the step flashing. Replace any cracked, rotted or missing siding, making sure the new piece overlaps the step flashing by at least 2 in. If you still have a leak, pull the corner boards free and check the overlapping flashing at the corner. Often, there’s old, hardened caulk where the two pieces overlap at the inside corner.

  1. Complex Roof Problem

This roof leaks during the snowy part of winter and during storms in the summer, certainly due to poor flashing. The soffit that meets the roof is one of the toughest areas to waterproof. In the photo, you can still see signs of an ice dam. An ice dam occurs when snow melts and the water freezes when it hits the colder edges of your roof. Eventually, water pools behind the dam and works its way back up under the shingles and under the soffit until it finds an opening through the roof. The solution begins with good flashing since this should stop leaks from rainfall and might stop the leaks from ice dams as well. Begin by removing the shingles down to the wood sheathing and slip a strip of adhesive ice-and-water barrier (available where roofing repair products are sold) under the soffit/main roof joint. Depending on how the roofs join, you may have to cut a slot to work it in far enough. It should overlap another piece of ice-and-water barrier laid below, all the way down to the roof edge. This should cover the most leak-prone areas. Then reshingle, sliding metal step flashing behind the fascia board (the trim behind the gutter). The valley flashing, laid over the joint where the two roofs meet, should overlap the step flashing at least 2 in. If leaks continue to occur from ice dams, consider installing roof edge heating cables. (Find them locally at hardware stores or home centers.) Improved attic insulation and ventilation are usually the best ways to prevent ice dams, but they might not be effective in this complicated leaky roof situation.

  1. Fix Step Flashing

Step flashing is used along walls that intersect the roof. Each short section of flashing channels water over the shingle downhill from it. But if the flashing rusts through, or a piece comes loose, water will run right behind it, and into the house it goes. Rusted flashing needs to be replaced. That means removing shingles, prying siding loose, and then removing and replacing the step flashing. It’s that simple. But occasionally a roofer forgets to nail one in place and it eventually slips down to expose the wall. Check out this article for more on installing your own step flashing.

  1. Don’t Count on Caulk!

Rarely will caulk or roof cement cure a leaky roof —at least for very long. You should always attempt a “mechanical” leaky roof fix whenever possible. That means replacing or repairing existing flashing instead of using any type of sealant as a leak stopper. Only use caulk for very small holes and when flashing isn’t an option as a leak stopper.

  1. Fix Small Holes

Tiny holes in shingles are sneaky because they can cause rot, a leaky roof and other damage for years before you notice the obvious signs of a leak. You might find holes left over from a satellite dish or antenna mounting brackets or just about anything. And exposed, misplaced roofing repair nails should be pulled and the holes patched. Small holes are simple to fix, but the fix isn’t to inject caulk in the hole. You’ll fix this leaky roof problem with flashing.

  1. Leaks Around Brick Chimneys

All kinds of bad things can happen around brick chimneys. In fact, there are far too many to cover in this story. Flashing around chimneys can rust through if it’s galvanized steel, especially at the 90-degree bend at the bottom. A quick but fairly long-term fix is to simply slip new flashing under the old rusted stuff. That way any water that seeps through will be diverted. The best fix, though, is to cut a saw kerf into the mortar and install new flashing.
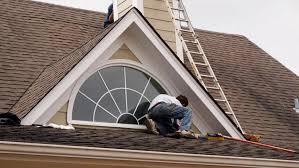
 

How To Handle Emergency Roof Repair

Your roof is an integral part of your home, protecting the interior from the elements. You depend on it every day without even realizing that you do. So, what happens if a tree limb crashes into your attic during a summer thunderstorm in the middle of the night? How do you protect the inside of your home from extensive damage during a roofing emergency? Learn more about how an emergency roof repair can be handled.

Remain Calm

The first step after a roof emergency is to remain calm. Often, roof damage appears far worse to a homeowner than it will to a professional roofer. You want to try to protect your home as much as possible, but if you panic, you will be unable to manage the steps you need to take to do so.

Protect as Best You Can

If your home has been damaged during a storm, you will want to minimize damage to the interior as much as you can. Try to cover any holes in the living area with plastic tarps or other waterproof materials. If the hole is vast, you may need to place buckets or other containers under the hole to collect water until the storm subsides. You should call a professional roofer as most of them have 24/7 emergency lines, but keep in mind they will not send someone out during the storm as that would be unsafe for their employees. Do not try to climb on the roof yourself to repair the damage.

What Will a Roofer Do?

Once the roofer can get to your home, they will inspect the area and look for any additional issues that may exist. They will cover the opening with strong plastic tarps that are secured tightly against the elements. If your home was damaged by fire, it is possible that firefighters compromised the structural integrity of your roof. This may mean you will need to find an alternate place to live until the roof can be restored.

Contact Your Insurance Company

As soon after the damage as possible, contact your homeowner’s insurance company. Unexpected roof damage can cause significant financial difficulty. If you must vacate the home as it is unsafe, your insurance company may offer coverage for hotels or other living areas while your roof is being repaired. The insurance company will send out an adjuster who will review the damage and determine how much the claim is worth. If you feel the estimate is too low, you can get estimates from different roofing companies and provide those to the insurance company as proof of the damage.

Types of Emergency Roof Damage

There are many different situations that could lead to roof damage. High winds can tear shingles from the roof, exposing the substrate which could then be compromised by rain. Tree limbs can be thrown into your roof, causing significant damage. Lightning strikes can actually blow a hole in your roof as well. Wildlife, including squirrels and raccoons, are known to chew through wooden structures and create holes that can be quite large. As mentioned, fire can lead to structural damage to the roof that may even make your home unsafe to enter.

Choose a Licensed Contractor

When you choose a roofing contractor, be sure to choose on that is licensed and insured. There are “storm chaser” companies that prey on homeowners after severe weather events. These are often fly-by-night companies who appear in neighborhoods to try to convince homeowners to use them for repairs. Often, the repairs are either sub-standard or the company requires a large deposit. Once they receive it, they leave the area and never perform the work. Get references from any company you choose and ask them for proof that they are licensed as well as insured.

The most important thing to do when you are facing a roofing emergency is not to panic. It is also very important that you not try to repair the damage yourself, especially in the middle of a nasty storm.

 

Roof Repair Mistakes to Avoid

  1. Misdiagnosing a Leak

A leak is the most common sign that there is a problem with your roof. Often, it’s the first sign that something is wrong. But what many homeowners don’t realize is that a leak in your ceiling is not always a sign of a problem directly above the leak. Water is sneak, and it can flow along pipes, joists, or even electrical systems. When it finds the lowest spot, it pools and drips down onto your ceiling. All you see is the final spot where the water ended up, but not its source in the roof.

Diagnosing a roof leak is as much of an art as it is a science. An inexperienced or underqualified roofer may think they’ve found the problem, but next time it rains the homeowner is in for a nasty surprise. We’ve seen cases where a roofer opens up the whole ceiling to find a leak and replace the damaged drywall. But after a large and expensive fix, the leak comes right back.

  1. Ignoring the Root of the Problem

Even once you find the source of the leak, just slapping on a new shingle may be ignoring the root of the problem. Yes, a leak can start with a broken or damaged shingle. But by the time the leak has worked its way into your dining room, there’s a lot more damage. Also, the damaged shingle may not be the source of the problem. Sometimes the decking or underlayment was installed wrong or has become damaged.

  1. Skipping the Attic

If there’s a problem with your roof, there is often a problem with your attic. Sometimes the damage to the roof is a result of what’s going on in the attic. And sometimes whatever started on the roof can have an effect on your attic. Either way, choosing to ignore the attic can cause problems down the road.

If you have a leak that has made its way into your living area, it has to get past the attic. You may only see a small water stain or a little peeling plaster in your living room. But in the attic, you may have more extensive water damage. If decking or framing has been exposed to water for a long time, you could have rot. Another danger is mold, which can grow in the attic and quickly get into your ventilation system. Mold spores can get all around your house, causing respiratory issues and other illness. If you have insulation, the insulation can become waterlogged. Wet insulation is a breeding ground for bacteria and mold.

Even if you don’t have water in your attic, the problems with your roof might be caused by your attic. Specifically, poor ventilation in your attic can do serious damage to your roof. An inadequately ventilated attic can become oppressively hot in the summer, literally cooking your roof from underneath. In the winter, when the air is cold, moisture can collect in an inadequately ventilated attic. The moisture gets into your framing and decking and can cause rot.

  1. Sloppy Installation

There is no excuse for shoddy workmanship. If you can’t correctly install roofing, you shouldn’t be selling your services as a roofer. Unfortunately, many roofers haven’t gotten that message. They cut corners to save themselves time and labor, even as they cost you money and damage down the road. When installing new shingles, there are plenty of places you can go wrong. Let’s look at two of the most common.

  • First, some roofers try to save time and money without thinking it through first. Installing shingles over the existing layer is acceptable in some situations. But it’s not always the best way to make a repair. And it’s never appropriate to build up more than two layers of shingle. If you are doing an extensive repair, laying down a second layer of asphalt shingle over the existing one can save on time and labor costs. But before you do that, you need to make sure the decking and frame of the house can support the weight of a second roof.
  • Second, some roofers just aren’t very good at what they do. We’ve seen installations of crooked or misaligned shingles. In other cases, roofers have used the wrong type of fasteners, like nails that aren’t long enough. Sometimes shingles were nailed in improperly. These problems aren’t just aesthetic. If a shingle isn’t installed in the right spot with the right technique, it is susceptible to wind damage, leaking, and curling. It could also void your warranty for the entire roof, costing you thousands of dollars for a few bad shingles.
  1. Poorly Matched Shingles

When you repair your roof you want it to look like it was never broken, right? The problem is that it’s actually quite hard to match shingles. Think about how hard it is to match paint when you have to fill a damaged spot on the wall of your house. There are hundreds of different types of shingles, and the shingles on your roof don’t look the same as they did when they were installed. Years of weather have changed them.

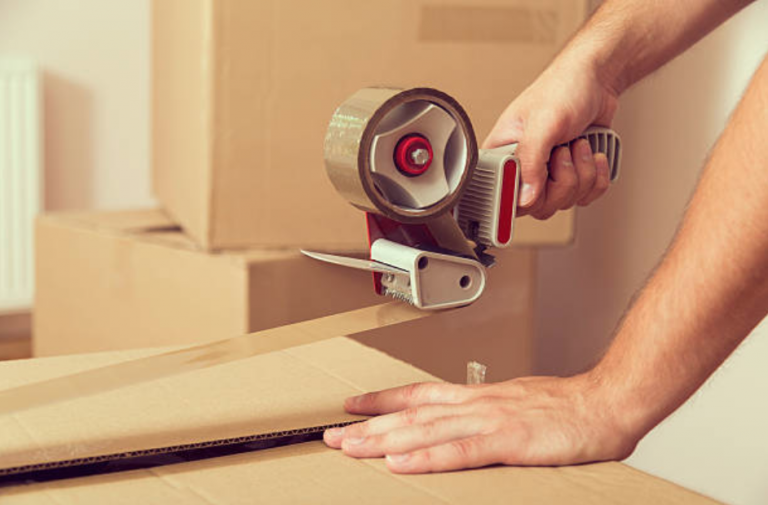
Good Packing Services Make A Good Packaging

Must Know Packing Tips from Moving Services Professionals

Pack One Room at a Time

You should focus on one area of a room at a time and don’t mix various items from more than one room into a box. This will help you prevent miniature items from being thrown away mistakenly or lost during the packing and moving process. You can also use brightly colored packing paper to make sure nothing is forgotten about.

Label Everything Clearly

When you are moving from one home to another, things can get misplaced, this is simply a fact. However, if you take the time to label your boxes carefully, you will discover that it will be easy to get everything sorted out upon arrival. If you are still unsure of where you are going to move, then you may want to work with moving pros. They can provide insightful information to help you get ready for a move and help you find a new home.

Hire Professional Toronto Movers and Packers

If you simply don’t want to handle the move and pack on your own, then consider using Toronto moving services. These services can handle the entire move, offer packing services and provide supplies for moving, or just provide logistical advice on what to do. All of these can be quite helpful for a move.

If you Haven’t Used something in Years, Chances are You Don’t Really Need It

If you have items in your garage, closets or anywhere else that have not been used, touched or moved in years, then chances are you don’t really need these items. Have a garage sale or just donate the items to charity prior to the move. This will reduce the stress and hassle associated with the move, making it easier on everyone involved.

Don’t Box Up Everything You Own

There are likely some items you own that are to large or bulky to pack in a box, while other items are too valuable. If you have expensive family heirlooms, legal documents, important papers, jewelry or anything else with actual or intrinsic value, then it is a good idea to transport these yourself. Don’t pack them away in boxes and take the chance of them becoming lost or damaged.

Moving does not have to be difficult or challenging. Using the tips here, and taking the time to contact the professional movers Toronto, will help you with every step of the process.


Tips for packing glassware for transport

Choices of packing glassware for transport you have

Your options are vast and even greater if you are willing to invest a bit more in the safety of your fragile items. Packing glassware for transport requires a gentle hand and a proper packing material. The goal here is to make it as safe as possible. So, let us mention that you should use higher quality packing materials. Those can be plastic bins, Styrofoam, packing peanuts, bubble wrap, etc. Also, there are containers designed for protecting bigger pieces such as old fashioned mirrors, and sizeable picture frames. Check up on those online, there are thousands of options for you to choose from.

The moving box is your best friend

The absolute winner when it comes to packing is the moving cardboard boxes. Therefore, stock up nicely, to be sure that you have enough can pack everything. You’ll probably need up to 30 boxes, or even more, depending on the size of your relocation. Be sure that you take enough of small-sized ones, as well as the medium-sized. Big ones are ok for transporting lighter items and are not used for fragile items. For this occasion, you should focus on small and medium-size due to stability and they are easier to carry around.

Sort your items

You can’t start packing without figuring out first how much is there to pack. It will give you insight into how many packing materials you need and where to pay special attention. Inspect everything and figure out how many fragile items you possess. Therefore, you need a moving checklist, along with the inventory list. You should not forget to include those into your relocation plan, it will be twice easier to follow a step by step list as a guide. Not only to serve as a guide, but you will know if all your items are still there, once you start unpacking and inspecting the delivery.


Moving Saving Tips by Packing Services

DO NOT USE COMPANIES THAT PROVIDE ESTIMATES:

Many moving service companies will try to give you the lowest “estimate” and this is how the low-ball moving scams begin. They will fight to book your job for the lowest price, you’ll like the estimate, but when you book the job and get going on the moving date, you will find out that whatever they sold you over the phone is completely untrue. Always get a guaranteed flat rate quote from a moving services company directly. Remember, estimates are only an estimation of the final price and are seldom accurate, if ever! Ask for a flat rate quote for the entire job.

When you move, be your own boss:

Never allow a moving company to be in charge! When you hire a moving company, they will tell you how the move will go and how much you are going to pay. With Packing Services, Inc. YOU are the boss, we do what you want us to do. With other moving companies they will TELL you that nothing can go onto their truck unless everything is packed, then the moving scams begin. With Packing Services, Inc. we do not force you to do anything. Whatever will pack whatever you require us to pack, we work for you! Remember you are the boss, so please be smart and make an informed decision. Tell us exactly what you want us to do and let us work hard for you.

Don’t Waste Your Time, think smart:

Let Packing Services, Inc. do all the heavy lifting, we are professionals with over ten years experience. We will accomplish in a just a few short hours what could possibly take you a small lifetime to complete. Why spend time stressing over your move. You do what you do for a living and let us lift the burden and put your mind at ease. The time it takes the average person to pack their own belongings can be quite extensive and will wind up paying much more than going with our services.


Packing services

At New Beginnings we can take the stress out of your move by providing packing services that ensure your valued possessions are safe and secure, ready for transit. Our friendly, experienced team can pack and unpack all your belongings, as well as place your furniture exactly where you want in your new home.

Dismantling/reassembling of furniture

Safe packing of household goods

Extra safe packing of fragile and special items

Get in touch with us to find out more.

DIY packing – Packing list checklist

We understand that you might want to do your own packing. We’ve provided a helpful packing list checklist (PDF guide to DIY packing) with tips, recommendations and packing advice. Here you’ll find the dimensions of our four types of packing boxes and suggestions as to what is best to pack in each. You’ll also find useful tips you may not think of yourself and that we will find very useful when we come to move you.

Packing boxes

We can supply you with packing boxes, tape and paper suitable for household and business items. The packaging materials we provide are good quality and tried and trusted by us. You need to be able to trust your boxes 100% when packing and moving so don’t be tempted to use the cheapest alternative you can find. The last thing you need is your belongings spilling out on the pavement outside your new home before you even start unpacking.


Full Packing Service

When you choose our full packing service we will pack up the entire contents of your property, be it a 1 bedroom flat or a 6-bedroom house. This will be done by a team of elite packers who have all the resources and skills necessary to make sure that all your belongings are efficiently and safely packed and organised to your specification. This service will usually be carried out the day before your move so everything runs seamlessly on the day.

Fragile Packing Service

When you choose our fragile packing service, we will pack all the china, glass and breakables in your property and provide boxes for you to pack all your non-breakables.

Do It Yourself Packing Service

Self-pack is the perfect choice for individuals wanting to pack their own items. With the self-pack option, we will supply you with all of the necessary basic packing materials that you will require to safely and efficiently wrap and box up all of belongings prior to your move. Boxes can be provided in numerous sizes – wardrobe boxes and book boxes for example to cover all your packing needs. Please see our packaging page for more information.

Our recommended moving kits will give you a guideline as to what you might need and also our packing tips page to help you with the packing process.

Hanging Clothes

Portable wardrobe boxes will be on our vehicles for your use on the moving day. If you are storing hanging garments we can provide these at an additional cost.

Use House Cleaning For A Better House

Amazing Cleaning Tips You’ll Wish You Knew Sooner

Eliminate upholstery stains with shaving cream.

There’s no need to hire an expensive professional to get those stains out of your upholstery. Instead, rub a little bit of shaving cream (anything but the gel kind) into the stain, let it sit for 30 minutes or overnight, and then blot it dry. Just make sure that you test this method out on a hidden area of your couch before actually putting it to use, as there is always the small chance of damaging the fabric.

Sweep your baseboards with a dryer sheet.

Getting on your hands and knees to clean your baseboards is anything but enjoyable. The good news? You can keep them clean and keep your house smelling fresh with one clever trick. Just attach a dryer sheet to your Swiffer in place of a microfiber cloth and you’ll pick up all that unwanted dust while simultaneously lending a sweet scent to your home.

And use dryer sheets to clean your pans, as well.

That grime stuck to your cookie sheets and frying pans is no match for your dryer sheets. Simply put your dirty pan or sheet in the sink with a little dish soap, warm water, and a dryer sheet, and let the combo sit for an hour or two. When you’re ready to pour out the water, the mess will easily wipe away.

Scrub the bathtub clean with grapefruit and salt.

The next time you’re at the supermarket, make sure to throw an extra grapefruit into your cart—not for eating, but for cleaning. According to the money-saving DIY experts at The Krazy Coupon Lady, this citrus fruit is the perfect solution for a dirty tub. Just cut the fruit open and cover it in salt. “The salt creates an abrasive texture while the citric acid in the grapefruit will help break down stains,” they explain.

Get a mop you can throw in the laundry.

You might have heard that cleaning with a wet mop is akin to washing your floors with dirty water. And it turns out, it kind of is. Research suggests that when stored wet, mops support so much bacterial growth that they can’t even be cleaned through chemical disinfection.

However, when laundered and dried, mops are perfectly sanitary. That’s why you’ll want to ditch your traditional mop in favor of a mop that is machine washable.


Why Regular House Cleaning Is Essential

House cleaning is one of the tasks that no one wants to compromise on. Regular house cleaning is essential to keep your house clean and tidy. It will not only make your home a pleasant and better place to live but also will do a lot to keep you healthy. In a well-cleaned house, bacteria will not find any place to live, which will, in turn, help you and your family stay free from frequent illnesses or ailments. A well cleaned and properly organized house will bring you admiration from your friends, neighbors, and relatives.

That said, keeping the house clean and tidy is not easily done because most people do not get the time to do the house cleaning. You would need at least a few hours to clean inside and outside of your house properly. You have to keep the things in order and then do a thorough sweeping followed by moping. The time and tools you require for house cleaning depending on the area of your house. Well, if the thought of house cleaning makes you worried, here are some useful housecleaning ideas for you.


Santa Clara County – House Cleaning

Most people don’t know where to begin when it comes to locating a house cleaning company that meets their needs. After all, one wants to know that their home is safe from health risks and that your cleaning needs have been met by high customer satisfaction and quality.

After you’ve spent your energy and time at the office, running errands, or shuttling children, there’s nothing quite like coming home to a house that is freshly cleaned from top to bottom. Your counter tops are shiny, your floors are sparking, your shelves are free from dust and grime, and you can breathe a sigh of relief. You could accomplish other things on your list rather than cleaning your home for three or four hours. Or you can truly kick up your feet and relax in the comfort of your own comfortably clean home.

So how do you choose the house cleaning company that’s right for you and your home? There are many house cleaning companies to choose from in Santa Clara County that serve the major cities such as San Jose, Sunnyvale, Santa Clara, Mountain View, Milpitas, Palo Alto, Cupertino, Gilroy, Campbell, and Morgan Hill. Research and good information are the keys to success. Making an informed decision will save you time, worry and hassle. So how do you begin your search?

Look for Certified, Professional House Cleaning Companies in Santa Clara County

Diamond Certified companies have already been thoroughly vetted for you, including certification verification. But if you’re unable to choose a Diamond Certified house cleaning company in your area of Santa Clara County, you’ll have to do the research yourself.

Obviously, not all house cleaning services are the same. They have different methods, various experience and differing personal philosophies about house cleaning. In any case, it’s your right to choose a qualified, honest house cleaning company in Santa Clara County that will clean your home as you want it cleaned the first time and continue providing quality service over the long-term.

Finding House Cleaning Companies that Offer the Services You Need in The Major Santa Clara County Cities of San Jose, Sunnyvale, Santa Clara, Mountain View, Milpitas, Palo Alto, Cupertino, Gilroy, Campbell, and Morgan Hill or in Your Area

Before you begin the search for a house cleaning company, it’s important to do some research. Cleaning can be overwhelming and time consuming. Families and careers demand a great amount of attention these days, and that doesn’t leave a lot of time for house chores. The benefits of hiring a professional cleaning service are numerous: more time for your spouse, more time for your kids, more time to spend on your career, or more time to simply enjoy your life. So as you begin your research, consider the following tips.

Many persons or “private parties” can certainly clean your home well. However, if you hire an individual rather than a professional cleaning company, you pay them a certain amount in a year. This means that you are their employer. The end result of this means that if they fail to pay proper taxes, you could end up being liable. Also, if someone comes into your home to work for you and is hurt or injured, you could be liable. You avoid all of these risks by hiring a professional cleaning service. Furthermore, a professional cleaning company will offer training for their employees. All of the risk and liability is no longer your responsibility as the customer.

Make sure the house cleaning service is insured and bonded. This will protect you from theft and accidents which might occur. Because cleaning often involves wet floors, maids may slip. If the company you hire is not insured, this can be your liability.

Cheapest does not always mean best. As the saying goes, you get what you pay for. If the estimates you are receiving are significantly cheaper than the average quote from reputable home cleaning companies, chances are you shouldn’t hire them. Several factors could be worth considering. The cheaper company may use less than standard equipment and chemical products; they may not be bonded or insured; or it could be a really small company that simply lacks experience and knowledge. Ultimately, lack of experience and certain equipment or products may be damaging to your home. For example, the wrong chemicals may damage wood floors, marble and granite surfaces, or even be hazardous to your pet and children. Your loved ones are not worth the risk.

Consider the house cleaning company’s customer service. Can you always contact someone during working hours? Are your phone calls or emails promptly returned?

Preferably, make sure the house cleaning company uses individuals rather than teams. If an individual cleans your house, there is no pointing the finger when it comes to why an area wasn’t properly cleaned or why an item is missing from your home. A team increases the possibility of items being stolen or misplaced. Also, if a team of several maids cleans your home while you are present, this can seem overwhelming.

Try to locate a professional house cleaning service in Santa Clara County that charges a flat rate rather than by the hour. It is always nice to know what you are agreeing to upfront rather than having an unexpected surprise.

The cleaning products that are used should be environmentally friendly and harmless to your children, pets and home. A large number of cleaning products sold in stores today contain toxic chemicals that are dangerous for children and pets. Look for products labeled “eco-friendly”, “green cleaning”, “environmentally friendly”, “green certified”, etc.

Make sure the house cleaning company offers a satisfaction guarantee. This does not necessarily mean a refund of your money. This does mean that any problems you may have will be addressed in a timely manner. You should have assurance that if the maid has a bad day, the company will make it right.

Make sure that you are able to communicate clearly with the house cleaning company. Usually, bad performances are due to misunderstandings or lack of communication. In order to avoid this,   be sure that both of you are able to clearly understand each other.

Verify that the house cleaning service provides their own equipment and supplies. It is important to find a cleaning service that is equipped in all areas. This is one less thing for you to worry about.


Cleaning Tips and Tricks to Make Your Home Shine

Clean the Exhaust Fan

If the grille on your bathroom exhaust fan is clogged with dust, try a trick that’s faster and more effective than vacuuming. Here’s how to clean a bathroom fan: Turn on the fan and blast out the dust with “canned air.” The fan will blow the dust outside. This works on the return air grilles of your central heating/cooling system too. Run the system so that the return airflow will carry the dust to the filter. You’ll find canned air at home centers and hardware stores, usually in the electrical supplies aisle. Caution: The cans contain chemical propellants, not just air. Don’t let children play with them.

Beat and Shake Area Rugs

Vacuum large area rugs at least once a week. But also take them outside three or four times a year for a more thorough cleaning and forhow to clean dust. Drape them over a fence or clothesline and beat them with a broom or tennis racket. A good beating removes much more dust than vacuuming. Take smaller rugs outside to for a vigorous shaking every week.

Ditch Your Carpeting

In most homes, carpet is by far the biggest dust reservoir. It’s a huge source of fibers and absorbs dust like a giant sponge. Even the padding underneath holds dust, which goes airborne with each footstep. Although ripping out your wall-to-wall carpet may sound radical, it’s the best thing you can do if you suffer from serious allergies. For how to remove dust from air the best thing you can do is to replace carpeting with hard floorings like laminate, wood or tile, and wet mop it regularly (with a microfiber cloth) instead of sweeping. Sweeping is more likely to stir up dust than to remove it. Keeping it? Here are some carpet cleaning tips for long-lasting carpet.

Dust with Your Dryer

Blankets, pillows, slipcovers, drapes and other textiles not only trap household dust, but they create it as they shed and disintegrate. Curtains and drapes, in particular, get dusty because they absorb moisture and dirt from the outside and act as a landing pad for dust from ceiling fans and air vents. The best idea for how to clean dust is to buy machine-washable items and launder them twice a year (OK, at least once). For non-machine-washable textiles, throw them in the dryer on the air-fluff setting (no heat) for 20 minutes with a damp towel. The damp towel will attract pet hair, and the tumbling movement and airflow will remove the smaller particles for you. Keep towels out of the way with a space-saving towel rack on a cabinet door.

Rotate Bedding Weekly

Your cozy bed is a major dust distributor. The bedding collects skin flakes, sheds its own fibers and sends out a puff of dust every time you roll over. To minimize the fallout, wash sheets and pillowcases weekly. Items that aren’t machine washable don’t need weekly trips to the dry cleaners—just take blankets and bedspreads outside and shake them. You can spank some of the dust out of pillows, but for a thorough cleaning, wash or dry-clean them. When you change bedding, don’t whip up a dust storm. Gently roll up the old sheets and spread out the new ones; even clean bedding sheds fibers. Washing your bedding weekly can help you identify any pests like bed bugs, too.


Here’s How to Clean Your House More Efficiently

A few years ago, I found out that I’ve been cleaning my home all wrong. I was in a hotel room, when a maid came in and sprayed a solution on every surface…and then left. Right when I thought she’d forgotten, she returned. She wiped for less than two minutes with a thin dry cloth, and the whole place sparkled. It had, frankly, never occurred to me to let one solution do all the work, so I asked her what she’d used. It was something called Butcher’s Bath Mate—an industry standby.

Pro cleaners have brilliant tricks to get the job done. We asked three pros to school us on how to clean every room of the house much more efficiently. Plus, get their can’t-live-without-it cleaning supplies and top dos and don’ts.

The Best Way to Clean Your House

The biggest mistake people make is cleaning room by room (this is called “zone cleaning”). It’s much too slow! “You can either clean your kitchen in four hours, or clean your entire house top to bottom in four hours,” says Lisa Romero, owner of Just Like New Cleaning in Fort Collins, Colorado. “A lot of people get caught focusing on one area—say, doing a super job cleaning the counters—and never get to the stove, let alone the next room. In reality, just wiping things down and moving on is quick and efficient.”