How to Paint a Ceiling
A professional home painter shares his tips for painting both smooth and textured ceilings, with equipment recommendations and tricks of the trade.
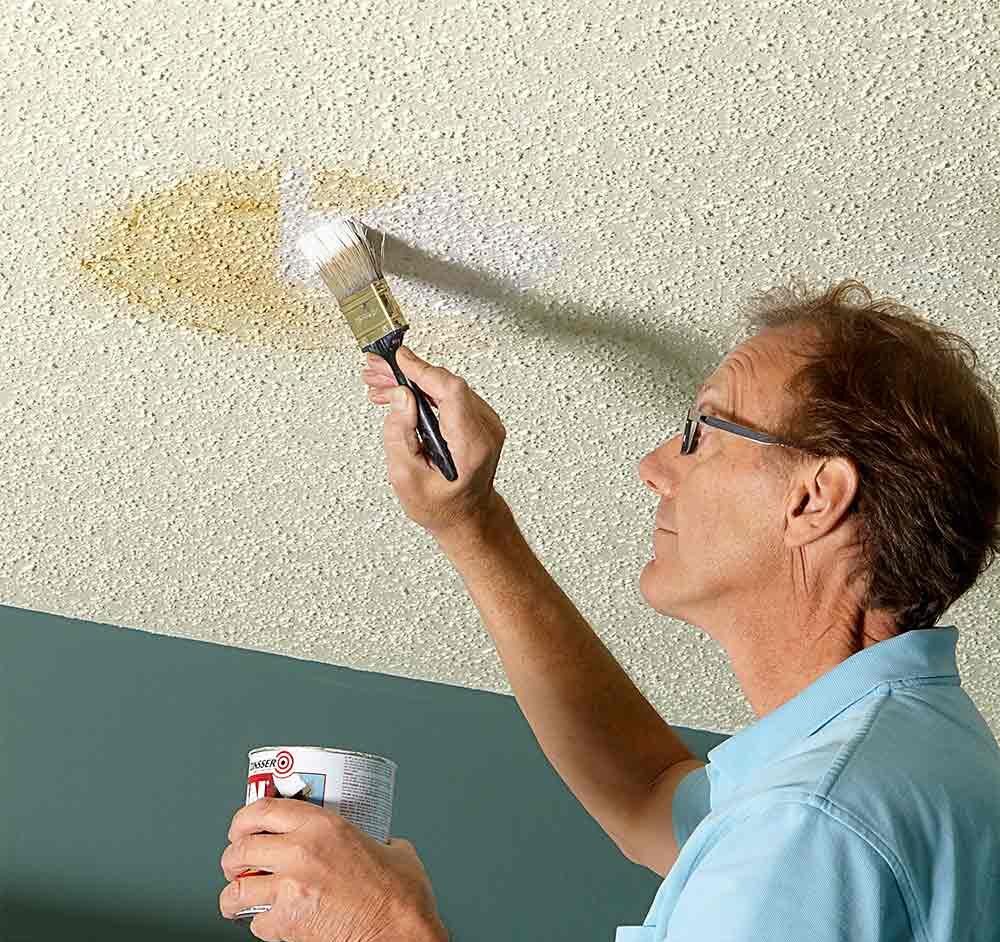
Use a Stain-Blocking Primer to Cover Flaws
Roof leaks, overflowing sinks, tobacco smoke and big spills can all leave ugly ceiling stains or dinginess that is impossible to conceal with plain old paint. But cover the stain with a coat of stain-blocking primer and your troubles are over.
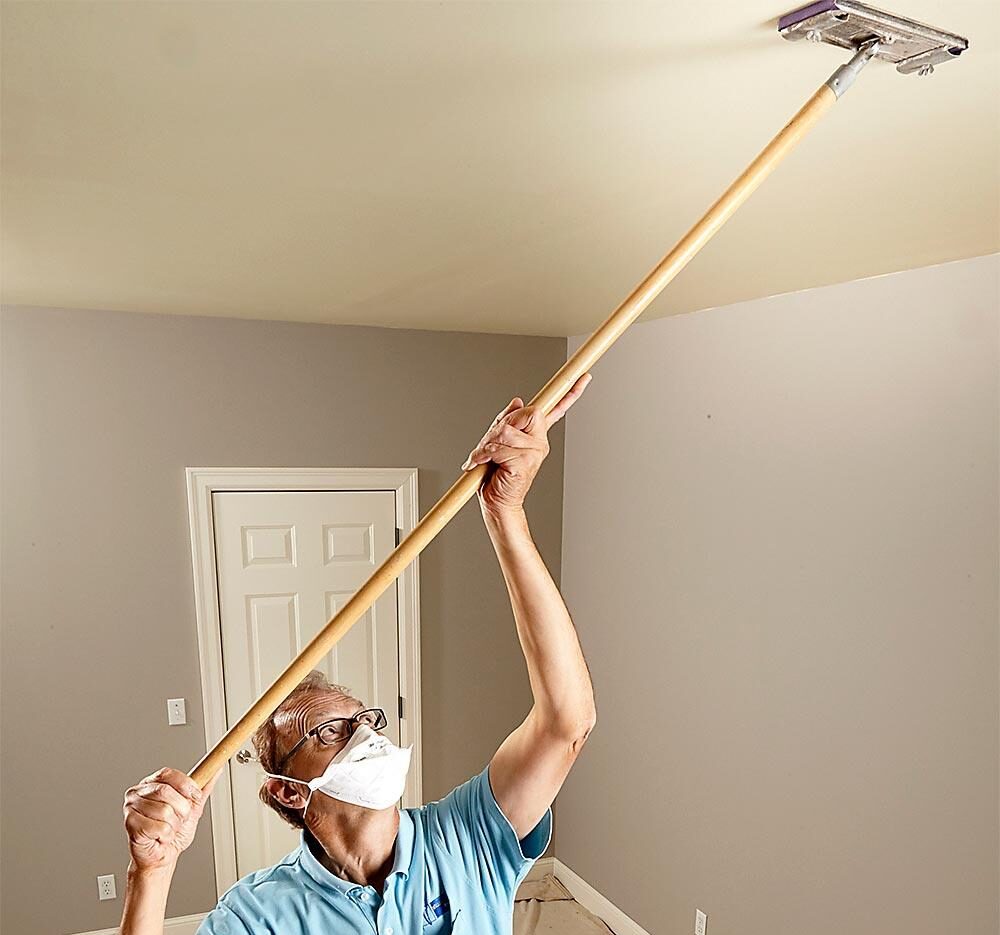
Sand Before You Paint
Over time, and as the layers of paint build up, bumps and crud can get stuck to the ceiling. On untextured ceilings, it’s a good idea to start with a quick once-over sanding with 100-grit drywall sanding paper. This helps ensure a perfectly smooth paint job and increases paint bonding. The easiest way to do this is with a sanding pole. When you’re done sanding, wipe the ceiling with a damp sponge to remove the dust.
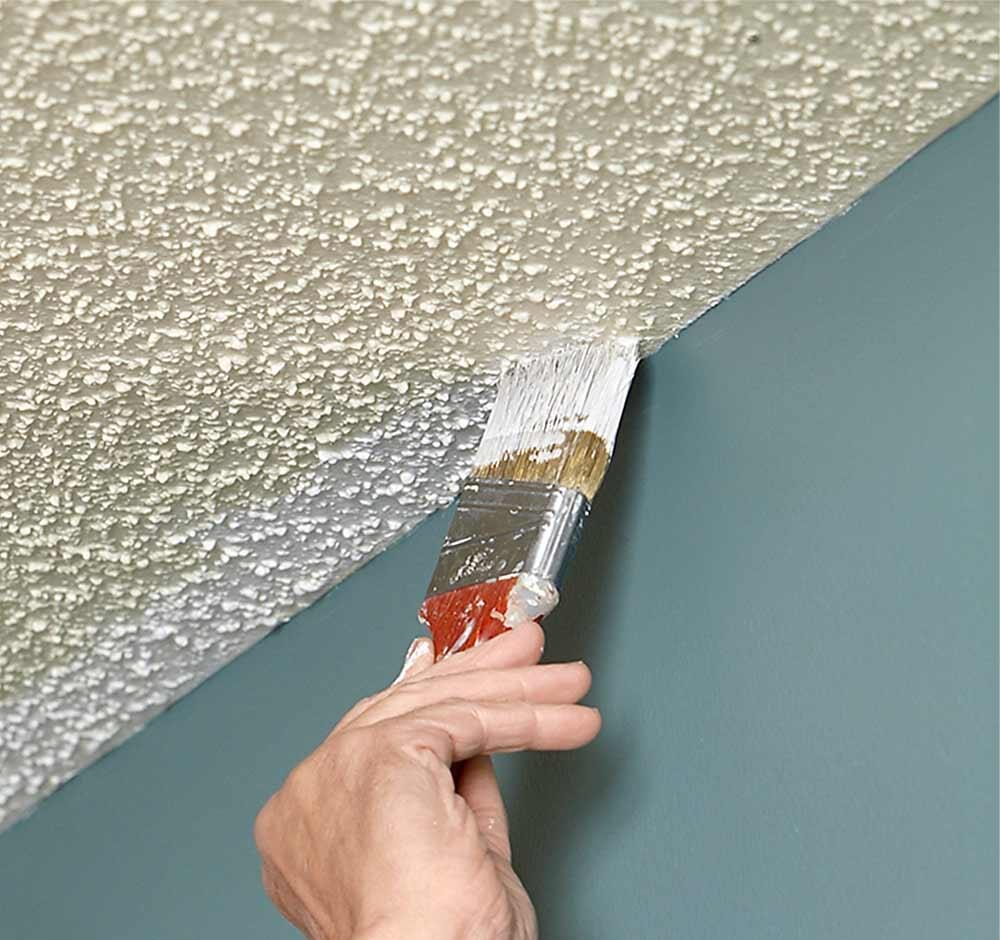
Rules for Painting Ceilings: Cut in Before You Roll
Cutting in before you roll allows you to cover most of the brush marks with the roller. Carefully brush paint along the edge of the ceiling a section at a time. Cut in about 10 linear ft. and then roll that section. This method has a couple of advantages over cutting in the entire room at once. First, the cut-in section will remain wet until you roll, so it blends in better. Also, it’s simply less boring to alternate between cutting in and rolling.
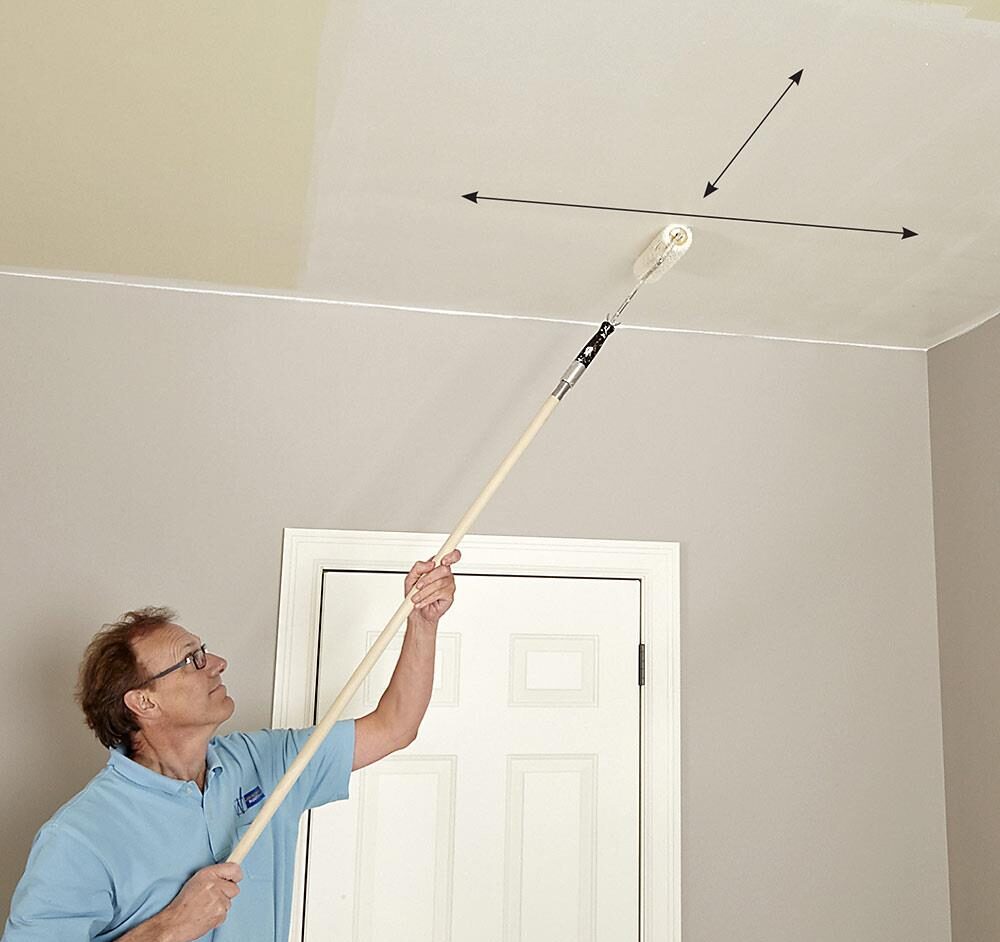
Rules for Painting Ceilings: Roll Both Directions
There are a few tricks to getting a smooth, consistent coat of paint on the ceiling. First, work in sections about 5 or 6 ft. square. Move quickly from one section to the next to make sure the paint along the edge doesn’t dry before you roll the adjoining section. This is called “keeping a wet edge” and is the key to avoiding lap marks. You’ll get the best coverage by immediately rerolling each section at a right angle to your first roller direction as you go.
Paint a Ceiling
Prepare to Paint
Painting a ceiling isn’t much different from painting a wall. A good job takes preparation. To repair existing damage and protect your furniture, floors, fixtures and trim, read Prep for Paint.
For the best results use a ceiling paint and primer in one. It’s formulated to spatter less and has a flat finish to help hide imperfections. A gallon generally covers about 400 square feet.
As for color, white can brighten rooms without much natural light. On the other hand, a large room with high ceilings feels cozier by painting a darker color. Small rooms can feel less confining by minimizing contrast between walls and ceiling
If you’re not going to paint the walls, apply painter’s tape around the edges for a crisp line. Then cut in using a 2- to 2-1/2-inch sash brush and a cut bucket, which is a smaller receptacle that you can easily carry up and down the ladder. Don’t load the brush too much, and start each stroke away from the edge and work the paint toward the tape. Make long strokes and always finish brushing back into the wet paint. Paint several inches onto the ceiling and feather the edge.
When it’s time to roll, use a low nap roller for smooth ceilings, and a 1/2-inch or 3/4-inch nap for textured ceilings. An extension pole helps you reach the ceiling without a ladder.
How to Paint a Ceiling – Tips & Best Practices
Painting a ceiling can be a long, arduous process—but it is often necessary and worth the visual impact. Follow this guide to painting flat ceilings for helpful tips concerning the right material choices, the best techniques, and the potential decision to hire a professional. This guide does not cover tips and processes involved in painting with drop or textured ceilings.
Ceiling-specific Paint. Buy a variety designed specifically for this application. These are usually flat finish latex and come out with the most ideal results. They perform well in the two areas where this project could go wrong: splatter and drying. These application-specific varieties are slow-drying and less likely to splatter—though some drips are inevitable.
No Gloss Finish. Don’t buy a product with a glossy finish. Semi-gloss and high-gloss finishes are highly reflective and detracting for room design. The best choice for most rooms will be a matte or flat finish in latex. However, there are certain situations that might call for a semi-gloss, such as in bathrooms and even kitchens.
High Quality. You save yourself a lot of time and get better results when you choose higher quality products. A higher-quality product or one with a primer mixed in will require less coats overall. This work can be tough on your back and neck, and you will have limited use of a room during the days that the project is active. A shorter completion time can be a major advantage.
White vs. Colors
In most homes, these surfaces are white or some shade of white, and that trend continues in remodels and new construction. White makes for a brighter, lighter room and gives the illusion of a larger and taller space. It doesn’t distract the eye, allowing for intentional accents to draw attention.
Tips For Painting Ceilings
They’re usually much larger than a single wall and are often illuminated with raking light that accentuates even the smallest flaws, which means ceilings present some unique painting challenges. Add to that the difficult task of working overhead and things can get messy in a hurry, so we’ve grilled a pro to help you get the best result.
Over time, and as the layers of paint build up, lumps and bugs can get stuck to the ceiling. On ceilings that aren’t textured, start with a quick once-over, sanding with 100 grit abrasive paper. This helps ensure a perfectly smooth paint job and also increases paint bonding.
Roof leaks, overflowing sinks and tobacco smoke can all leave ugly stains that are hard to conceal with regular ceiling paint. Apply stain-blocking primer to cover any stubborn ceiling marks. Try Zinnser Smart Prime, which is formulated for this purpose and water-based for easy application.
Use a paintbrush to cut in at the edges of square-set ceilings. Doing this before you roll means the majority of the brush marks will be covered with the roller. Carefully brush paint along the edge of the ceiling in 3m sections, then roll that section.
There are a few tricks to getting a smooth and consistent coat when applying paint to the ceiling. Work in square sections about 2 x 2m, moving quickly from one section to the next to make sure the paint along the edge doesn’t dry before you roll the next section
How To: Paint a Ceiling
Painting is perhaps the easiest of DIY home upgrades, but tackling the ceiling can be a daunting endeavor, particularly since it requires a bit of elevation and contortion. Here are some pointers on prep and techniques for how to paint a ceiling that will help you accomplish the job easily and successfully, just like a pro.
Clear the room out, and cover the floor (and anything that remains) in cloths.
Before you begin, remove as much of the furniture from the room as possible; doing this will make it easier for you to maneuver through the space where you’re working. Use drop cloths to cover any furniture that’s too cumbersome to move.
Mask tops of walls and crown molding with painter’s tape.
If you are just painting the ceiling and not the walls, use quick-release painter’s tape (see this guide for the best painter’s tape options) where the walls meet the ceiling. Painter’s tape should also be applied around any moldings that decorate the ceiling’s edges.
Prime before you paint the ceiling.
Apply a coat of interior latex paint primer by roller (with an extension rod to reach the ceiling). Don’t cut corners and skip this step: The primer will provide a stain barrier and, in most cases, will make it possible to use only one coat of paint to finish.
Cut in around the ceiling’s edges using an interior latex paint with high viscosity.
Now, switch to paint, either one that is labeled as “ceiling paint” or an interior latex paint with high viscosity—measured in Krebs Units (KU), this is generally 106 KU or greater. You’ll find the KU measurement in the manufacturer’s specs for any given paint, if it’s not located on the back of the paint can itself. The slightly thicker paint sticks better to the ceiling and stays there until fully dry.

Recent Comments