Tips To Find Good Event Videographer

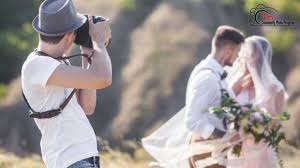
Tips For Shooting An Event Video

Know Your Event

Proactively learn what the event is all about, because the more you know, the better your mind can map out the plan of attack. The first order of business is to ensure you have an open line with the event organizers. Schedule a sit-down and talk about the details of the event, because you need to know and understand what their needs, requirements, and expectations are. While at it, don’t forget to ask for a copy of the detailed program.
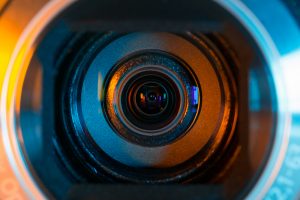
Know Your Equipment

There is standard equipment and there are those that you include depending on your site inspection and chat with the organizers. Whatever you do, don’t forget to bring backups or extras like mics, batteries, flash drives, etc. Since the equipment is technical, aside from the organisers, be sure to know who the event’s technical point people are.

Watch Other Event Videos

No two events are alike, but there will be similarities between events. For inspiration and techniques, study other event videos. See how certain things are done in others’ events and pick up some pointers. It’s all about continuous discovery and learning.

Make a Shot List

When storytelling,“You must begin with the end in mind”, as an old adage says. The important thing is to have a vision of the end product. Be as detailed as possible with your shot list – and actually shoot from your list at the event.

Be on Your Toes

Anticipation is a talent as much as a product of, again, preparation. When you know how the program starts, what happens in the middle, and how it’s going to end, you’re already on top of things. So, congratulations! However, as it’s ‘live’, expect the unexpected.


Tips for DIY Videography

Before you start, ask yourself: “What’s the story that I’m trying to tell?”

Call this a brainstorm, call it a creative brief, call it whatever, just take some real time to consider what it is you’re trying to say. Whether its a 6 second Vine video or a feature length documentary, the good ones all tell a story. Think about what your subject is. Think about how long you want the video to be. Pick some reference videos or photos or magazine clippings so you can concretely communicate your ideas to a collaborator. And stay away from vague, ambiguous language – like “commercially”, “innovative”, or “cutting-edge” that means something different to everyone.

Understand your audience.

Who is this video for? Is it for a room full of suits? Next year’s music fest attendees? Knowing your audience will shape the way you approach telling your story. Don’t get me wrong, some of the greatest works in cinematic history weren’t made for the audience, the audience came because the work was brilliant. But save that for your next Citizen Kane attempt, and consider who’s watching your stuff, now

Shot List!

This is critical for anything scripted. And it actually applies to live events, too. The worst thing any videographer can hear when showing up to film is, “just get everything”. That statement is simultaneously overwhelming and impossible. Take the time to think about which wide shots you’d like, which guests, attendees, or characters are important to the story, and what types of B-Roll, close ups, and cutaways you need to tell your story. This will help you craft your piece, later.

Know your locations.

In an ideal world, you do a location scout of every location before you film there. However, especially in the videography world, time and budget don’t allow for this. In turn, it becomes very important to find out the lighting conditions of each location. Are there big windows that will provide a lot of natural light during the day? If it’s at night time, how will the location be lit? Most times, evening events are dimly lit resulting in the need for faster lenses or external lighting units – whether they are on your camera, or off of it. Knowing these things ahead of time and planning accordingly is crucial. I can’t emphasize this enough. CRUCIAL.

Know your gear.

This one falls more on professional videographers than the people who hire them, but if you do hire a videographer, you’ll be much more prepared to have an intelligent discussion if you take a little time to familiarize yourself with some basics. Camera technology is evolving faster than ever, so I won’t overwhelm you with details, but here are some basics


Tips for Creating Successful Event Videos

Choose Your Style

Before you begin filming your live event, make sure that you have a clear concept of what you want the end product to be. There are countless reasons to create video content, which means that your video should be aligned towards a focussed, achievable goal from the start. Looking to educate viewers about your brand and its services with a live demonstration? Then a simple TED Talk-style video, with your cameras mounted on tripods, might work best. But if you’re trying to capture the flashy, explosive energy of a concert to attract audiences for the next one, a close-up highlight reel could be a better option. Think about what kind of event you’re filming, think about what you want it to accomplish, and then begin building a production framework from there.

Make A Plan

Because of the inherently spontaneous nature of live events, you might feel like you can just call in a couple camera ops and then have them wing it. But the exact opposite is true: Event videos require just as much–if not more–planning and pre-production than a traditional video. Map your location in advance, stick to a tight time schedule, and make sure that everybody in your crew is familiar with their responsibilities. Remember, unlike with a traditional video shoot, if somebody bungles their take, calling “cut” is not an option.

Prep Your Sound

Arguably the hardest part of live event filming is making sure that your sound quality stays up to snuff. It’s possible that you will not not have the opportunity to use traditional mics while moving around a venue, which means that you may need to either use smaller mics for each individual camera or (if this is an event with performances that utilize microphones) plug directly into the venue’s sound system. But even then, be careful. Just because your audio sounds good on the venue speakers does not mean that it’s recording well. Have a sound engineer on-hand to carefully monitor for peaking, distortion, and other potential audio issues.

Keep It Consistent

When you have multiple cameras filming multiple aspects of a live event, it is important to double check that all of your footage stays stylistically and technically consistent. Set your white balance in advance, rather than relying on every individual camera’s “automatic” setting, for a crisp, consistent shoot. If there are any special considerations that must be made because of the venue’s lighting (especially if it’s outside or otherwise inconsistent) determine those before the shoot so that the entire crew has a course of action ready.

Believe In B-Roll

Even once you’ve checked off every frame of your shotlist, don’t put down that camera! Your b-roll footage will be especially invaluable during a live shoot – things like shots of the audience can help establish context for the event, make scene transitions easier, and cover up any cuts that you might have to unexpectedly add during post-production. And believe us when we tell you that there will always be unexpected problems to contend with during the creation of an event video.


How to Shoot Video Like a Professional Videographer

Shoot Steady Video

A tripod is an easy answer to producing steady video, but avoid becoming dependent on it. You can shoot steady video without lugging around a lot of gear. Get your body in position so that every breath you take doesn’t lead to unwanted camera motion. Use the ground, a wall, or another object to brace the camera and get interesting visual perspectives. By ditching the tripod, you have the freedom to move around a scene without being anchored in one spot.

Produce Creative Shots

If you don’t want your videos to look as though they came from a surveillance camera, you’ve got to learn to play with angles and perspective. Producing interesting videos involves learning creative shooting techniques.

Practice Widescreen Videos

With the prevalence of smartphone cameras, even home videos are trending toward widescreen formats, such as a 16 by 9 ratio. Think of how you can make this extra visual space work for you.

Avoid Unnecessary Zooms and Pans

Picking up a camcorder for the first time has just about everyone wanting to hit the zoom button on every shot while panning across the horizon. The result can leave viewers seasick.

Get Good Results When Shooting Outdoors

You’d think outdoor videography would be simple because the sun provides the lighting, but to get the best outdoor results, you have to watch the position of the sun closely.


How To Film an Event

Write a Plan

Shooting an event can get really tricky. There’s usually something that’s the center of the event, whether it’s a performance, a speech, a prize-giving, etc, as well as the audience or crowd, and the atmosphere of the event. Each of these elements has to be included in the plan with the right balance so as not to waste any of your assets.

Keys to A Successful Event Video

One of the keys to success in capturing an event on video is the formation of the right crew for this particular event. A director, cameraman, or sound engineer might be great at their job and highly qualified, but nothing works without them having the right specialty. Just like a heart surgeon would not perform plastic surgery, you have to make sure the team you pick for your sports event is specialized in such events, which would substantially differ for example from a conference on astronomy.

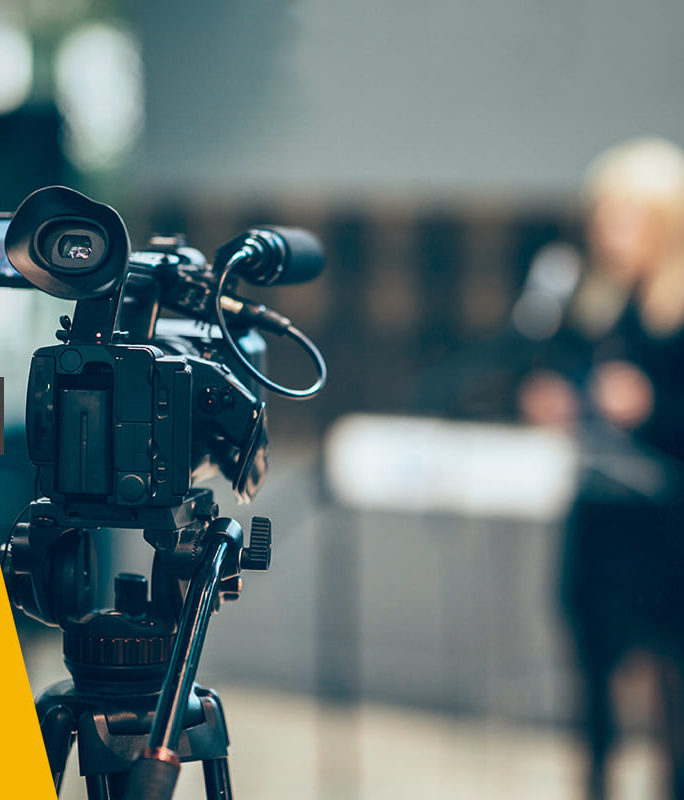
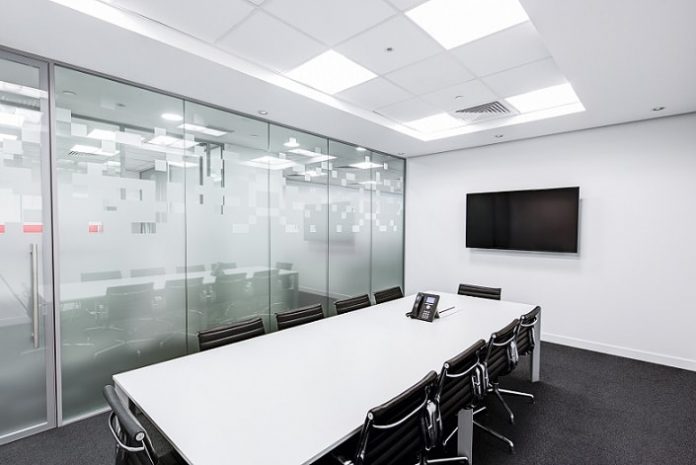
Live Event Camera Set-up

The first thing you have to make sure is available while shooting your event is the variety of angles. Whether you are using one camera or more, you need to make sure the organizers take into account this issue while setting up the stage or the hall where the event is taking place. Also, if there are seats for the audience, it would serve you best to secure a seat in middle for front shots.

Camera Positioning

When you position the camera, you have to know what your limitations are. If you’re only using one camera, keep it close to the stage, because if you’re only shooting the event from one spot, it should obviously be focused mainly on the main performance. However, if this is the case, then you should at least manage to get a sliding deck so that you can move smoothly from one angle to another without causing any disturbance to the video or any rigid movement.

Boxed Zones

You have to mark your safe zones from which the shooting will take place. You don’t want anything to disturb your camera, (such as someone from the audience mistakenly bumping into your cameraperson, or stumbling upon one of the wires). You also don’t want the shooting to depend upon the cameraperson’s steady hands, especially if the event will last a few hours.

Must Know How To Fix Broken Pipes

How to Locate a Broken Pipe in a Wall

Confirm that you have a water leak by shutting off your water-using appliances and fixtures. This includes faucets, showers, washing machines and refrigerators.

Check your water meter box, which is typically located near the main water shutoff valve on the outside of your home. If the meter is moving, you may have a leak somewhere in the system.

Examine the walls in your home for water damage, such as bubbled paint, stains and cracks. Leaking water pipes may also leave wet spots on the wall. But the location of this damage is not usually the exact location of the leak. Water may run the length of a broken pipe and pool at a different location in the wall.

Inspect your crawlspace or basement in the area directly beneath where you find water damage. Look for pools of water or leaks where the plumbing pipes run through holes in the floor.

Look at exposed pipes near the walls in your basement or crawlspace. Corrosion or moisture on or around these pipes indicates a leak nearby. If there is mold, mildew or rotted wood near the pipe, the broken pipe is likely behind the wall next to or above this location.


How to Fix a Broken Pipe Inside a Wall

What Causes Pipes to Break?

Very cold weather is the leading cause of bursting pipes. It causes the water inside them to expand and get close to freezing. When the pressure increases too much, the structure of the pipe gets damaged. This usually happens when the temperature goes down to -6 degrees C.

How Do You Know if a Pipe Has Burst

The signs of a burst pipe can often go unnoticed or they can be all over the place, depending on the spot and magnitude of the rupture. The signs will always include water.

How to Locate the Broken Pipe

When ice forms inside your pipes, it doesn’t necessarily damage the spot where it formed. Sometimes, all the ice does is create a blockage, building pressure that will erupt at the most vulnerable spot, which may be found somewhere else. That’s why it’s very important to locate the exact place of the breakage.

How to Fix a Broken Pipe Inside a Wall

Fixing a pipe inside a wall is no easy task, so it’s a lot better to let a professional plumber deal with this. But if you feel confident you can do it yourself, just follow these instructions.

How to Prevent Pipes from Freezing

If you value your house, you have to pay a lot of attention to the plumbing. If you prefer not to call a plumber every winter, you need to take preventive measures against low temperatures.


HOW TO FIX A BROKEN PIPE UNDER THE HOUSE

WHAT IS A SLAB LEAK?

A slab leak is an industry term for a leak within the waterline piping below a home’s concrete floor, and they can occur in homes and buildings of all ages. Broken water pipes under your home can cause irreparable damage to foundations and cost tens of thousands of dollars to repair. The extent of the damage can be exacerbated by certain types of soils (expansive soils) which absorb greater quantities of water and expand, often causing slabs to lift and crack (see our article The best ways to repair sewer pipes and collapsed drains under slabs).

SIGNS OF A WATER LEAK UNDER THE HOUSE

While water leaks under house slabs are notoriously good at remaining hidden from the untrained eye, knowing what to look for and regularly checking can help you get on top of things before they do too much damage.

MORE SERIOUS SIGNS OF STRUCTURAL DAMAGE FROM WATER LEAKS UNDER SLABS

Sewer line leaks can be a bit more difficult to spot but they can be just as damaging, particularly in areas with expansive soil. Expansive soils contain minerals that absorb water (such as clay soils) which can increase the soil volume by up to ten per cent, which is why leaking sewer lines under slabs can be so serious.

WHAT TO DO IF YOU HAVE GOT A LEAKING PIPE UNDER YOUR HOUSE

ESTABLISH THE LOCATION OF THE LEAK The first step is to establish where the leak(s) are located. If you see or hear water in one particular section of your floor, you might be able to take an educated guess, but there is no guarantee the offending pipe will be located right beneath the wet patch you’ve noticed on your carpet. Water is notorious for pooling in empty or low-lying cavities so the actual break or crack could be some distance away. You won’t be popular if you assure your wife you can repair the pipe yourself and cut up the concrete in her new bathroom floor – only to find the water’s coming from a leaking join two metres along the line.

ARM YOURSELF WITH NUMEROUS QUOTES AND INFORMATION Once the presence and location of a leak have been confirmed, the next step is the repair. If the leak is outside the perimeter of the slab or near the edge, and you know a bit about basic DIY plumbing, you might be lucky enough to be able to reach and repair it yourself without too much trouble.


What to Do When a Pipe Bursts in Your Home

Freezing weather

Extremely cold temperatures, which people in Northern Illinois and Indiana can attest to, can be the most common source of a burst pipe, because when water freezes it expands. Expansion is not something most pipes can handle, so they will split and burst.

Corroded pipes

If you live in an older home, you’ve probably got some pipes that are corroding on the inside. If you live in an area where the pH is out of balance, you’re pipes will corrode at a faster rate.

Moving pipes

Have you ever turned off the water in your home and heard/felt a bang? That’s called water hammer, and it occurs when pipes aren’t secured. Movement is not good on your pipes, particularly in the joints connecting one pipe to the next.

Stop the flow

The only way a burst pipe is going to stop leaking is for the water main supply valve to be turned to the off position. Find out exactly where your water main is and rehearse the steps you need to take to get there and whether you’ll need a tool to turn off the water.

Stay clear of appliances

Again, floods are an electrical hazard, which means you don’t want your feet in water and then touch something with amperage going to it.


Tips For Handling Broken Water Lines Or Pipes

Make A Call

When you are experiencing a leak, your first step should always be to contact a professional leak detection and restoration company. Even if you have experience with plumbing, a professional is equipped with the proper tools to get the problem resolved quickly to minimize the amount of time spent waterless and minimize the amount of damage traveling water can cause inside of a home.

Turn Off Your Water

While this may seem obvious as you are reading this, in a state of panic, it may not be. Your best bet may be to turn the water off to the entire house by turning it off at the meter. This will immediately prevent additional water from continually flowing out of the leak and prevent further damage.

Find The Leak

Next on our tips for handling broken water lines or pipes list can be a tough one. In order to provide a temporary fix to the leak, you’ve got to find the leak. While some may be easy to spot, others may be more difficult, somewhere behind the drywall for example. If that’s the case, be prepared to cut into your drywall.

Patch The Leak

Now that you (or a professional) have found the leak, it’s time to patch it. Sometimes a professional can’t be reached and you may have to create a temporary fix. We suggest using – or make shifting – a pipe clamp to prevent the water from leaking for a short time. A pipe clamp is made of metal, lined with rubber, which locks down over a leak to prevent the free flow of water.

Tips For Handling Broken Water Lines or Pipes

Here, at Leak Science, we harness and utilize two things that generally makeup leak detection – technology and science. Using highly sensitive equipment we are able to find the leaks that continue to cost you money every day until they are located and repaired. We often work against a maze of 100’s of feet of plumbing running in different directions to and from and all-around your home. We know and understand water lines and pipes very well so when it comes to looking for a leak we know what to look for.

Must Know How To Choose The Best Dermatologist

A DERMATOLOGIST FOR YOUR SKIN PROBLEMS

A dermatologist is a doctor that specializes in treating skin, hair, nail, and mucous membrane disorders and diseases.

They can also address cosmetic issues, helping to revitalize the appearance of the skin, hair, and nails.

When to see a dermatologist

If skin, hair, or nail symptoms are not responding to home treatment, it may be time to seek professional attention.

If concerns are cosmetic, a person can seek out a specialized cosmetic dermatologist.

It is important for people to discuss any upcoming dermatological treatments with their insurance providers, who often do not fund cosmetic procedures.

Be sure to obtain copies of any medical reports, consultation notes, and diagnostic test results to assure the insurer of the medical necessity of the treatment.


What to do if you have an urgent issue

If you have an urgent issue, getting a dermatology appointment can sometimes be tough. Currently, there aren’t enough specialists to meet patient needs, and many focus on surgical or cosmetic rather than medical dermatology.

If you do have an urgent need for a dermatologist,  do it this approach:

  • Call your dermatologist and discuss your symptoms in detail.
  • If you can’t get in to see him or her right away, call around and find an office that can see you sooner.
  • Keep in touch with your first choice to watch for cancellations.
  • See your primary care provider and ask him or her to reach out to your dermatologist.

Some offices, particularly those in academic medical centers, offer same-day appointments for patients with urgent problems, he says. Otherwise, for serious problems, you can expect to get in within two weeks. As a last resort, you can seek assistance in the emergency department.


How to Choose a Doctor to Treat Psoriasis

A doctor who specializes in skin care, called a dermatologist, can be a big help with your psoriasis. He’ll be up to date on all the triggers you should avoid, symptoms, and treatments.

When you look for a dermatologist, start by asking your primary care doctor for a recommendation. You can also check with the American Academy of Dermatology, which has lists of specially trained doctors. A nearby medical school is another resource.

Questions to Ask a Dermatologist

Ask these questions to help you choose the right doctor for you:

  • Does your office accept my insurance?
  • How quickly can I schedule a visit?
  • Do you have patient references?
  • Are you available after hours?
  • Do you have evening or weekend hours?
  • Do you have a special area of interest in skin care?
  • How many patients with psoriasis have you treated?
  • Do you offer biologic therapies for psoriasis?


Top  Common Skin Problems

If you’re living with skin problems, you’re probably facing a lot more challenges than people think. Individuals with recurring dermatological issues potentially face a number of emotional hurdles as well, including things like depression and lack of confidence.

Luckily, there are answers. The dermatology field has advanced by leaps and bounds and can provide solutions for a large number of skin conditions. The first step is pinpointing exactly what the issue is. You can then seek out the proper medical help you need.

To help you on your road to clearer skin, we’ve compiled a list of the most common dermatology problems and their symptoms.

  1. Acne

Definitely the most well-known of all dermatology problems, most of us went through some degree of acne during adolescence. However, acne can persist well into adulthood and become more than just a few pimples.

Acne happens when the area between your pores and oil glands get clogged. Depending on the severity, this may happen on the face, neck, shoulders, and back. The symptoms, which are easy to spot, consist of whiteheads and blackheads. More severe cases result in sores deep under the surface of the skin. This is referred to as cystic acne.

  1. Eczema

This condition, also called atopic dermatitis, can affect both children and adults. The condition is usually chronic, but the symptoms and flare-ups come and go.

There’s no cure for eczema, but a dermatologist can provide relief and help reduce the symptoms.

Eczema may appear all over the body and causes dry, itchy skin along with red, rash-like patches. You may also experience tiny bumps that secrete fluid. This condition tends to accompany hay fevers or asthma, so make sure you tell your dermatologist if you have either of these.

  1. Psoriasis

This is one of the more severe dermatology problems on this list. Psoriasis can be disfiguring and very uncomfortable, but there are ways to reduce the symptoms. This is a genetic disease, so find out if there’s a history of it in your family.

A person with psoriasis experiences an excess buildup of skin tissue. This creates a red, splotchy appearance with flaking skin on the affected areas. It’s common for psoriasis to first appear on knees or elbows, but, it can also spread to other areas of the body including the scalp, hands, and chest.

  1. Sunburn

When you think about dermatology problems, you probably don’t consider sunburn. However, a severe sunburn can be extremely damaging and may require medical attention.

Prevention is the best approach when dealing with sunburn, so make sure you always use a strong sunscreen. This is important, as frequent sunburns could result in a higher risk of skin cancer.

If you notice blistering and swelling, you have a bad sunburn. You may also get a headache or fever. You should apply aloe to your burns, but if you feel you need more intensive care, see your dermatologist.

  1. Hives

Unlike psoriasis, which is a genetic condition, hives occur as a reaction to a number of possible external factors. You may get hives after an insect bite, or if you have a bad reaction to certain foods or medications. Hives appear as red welts on the skin. They’re typically raised and very itchy.

It’s possible for hives to go away on their own, but in some cases, they last for months. In this case, you’ll need medical help. Your dermatologist may recommend an antihistamine along with topical ointment.


Vitiligo

Vitiligo is a condition that causes the loss of pigmentation (or color) of the skin. It appears as lighter splotches or patches of skin with undefined borders. Vitiligo can affect any part of the body, such as skin, hair, or even the pigment of your eye. Although the exact cause of vitiligo is unknown, the condition is not life threatening or contagious.

Vitiligo can be treated with the goal of restoring some of the color that is lost. Topical medications, light therapy, and the excimer laser are commonly used options for treatment. Our providers can recommend the treatment that may work best for your skin.

Trick To Find Good Home Builder

Questions You Must Ask Before Choosing a Home Builder

Choosing the right builder is a key step on the journey that leads to your dream home. Asking the builders the questions below will help you choose the right builder to create your new home and give you confidence in your choices. Because building your house will be one of the biggest investments you make, it’s only natural that you want to find the right one for your project.

Questions to Ask Your New Home Builder

  1. How many years have you been in business? How many homes have you built?
  2. Are you licensed (where required) and insured?
  3. How do you compare yourself to other builders? What are the most important benefits of the homes you build?
  4. What type of new home warranty do you offer?
  5. Can you give me references from prior home buyers? Do you build model homes I can tour? If not, can you help me make an appointment to see a home you built for another customer?
  6. What are the major energy-saving features of homes you build?
  7. Do you build only from home plans you supply? Or can I provide my own set of plans?
  8. What standard features do your homes include? What options and upgrades can I select?
  9. Who will oversee the construction of my home? Who should I contact with any questions I may have?
  10. How and when can I make changes or upgrades before and during construction?
  11. How and when will the final price for my home be determined?
  12. How often (and when) will I have access to the home during the building process?
  13. How long will it take to build me new home?
  14. Does the community have a homeowners association (HOA) and/or an Architectural Review Committee? If so, may I get a copy of their rules and the amount of any fees?
  15. What’s your inspection process at key points of construction, at final walk-through, and to address any matters that need to be corrected or finalized?


Is The Lot Cost Included?

When you’re exploring new construction options, you’ll see that each plan comes with a base cost. This is the cost of the structure itself, as well as base interior and exterior features (we’ll get into those in a little bit). What may not be included is the cost of the land, so be sure to ask if the lot cost is figured into the base.

If the lot cost is included, ask if there are premium costs for certain lots. It’s possible that the base cost does include the lot, but the remaining lots in the development all have added costs for certain features that you can’t opt out of, such as look-out windows in the basement or wider yards. If the lot cost is not included, ask what it is (and whether there are additional premium costs) and factor those into the base price for the house.


What was your toughest demand from a client and how did you handle it?

The answer to this question will tell you several things about a builder you are considering. Are they client-focused or merely building homes that they can sell as quickly as possible? Are the owners and managers of the builder attuned to new ideas that you might bring to the project? Are they friendly? The partnership between you and your custom builder must be just that – a partnership.

What is your procedure for handling obstacles and delays?

It has been noted that “the best laid plans often go astray.” In the course of building a home, delays and obstacles are going to happen. The most important consideration is HOW the builder deals with these challenges and how they communicate with their clients. Ask about this. It might give you great insights into the quality of builder you are considering.


What type of residential building work do you specialise in?

Some builders choose to focus on a particular type of build, such as renovations or single storey homes. Selecting a builder that has experience in building projects similar to yours may give you greater confidence that the build will run smoothly.

Which locations do you mainly build in and can you give me a firm start & completion date for my project?

You need to know that your builder is not going to be hampered by distance or location in delivering your dream home within a reasonable timeframe. If your project is a long way out of your builder’s normal area, there may be a risk that your project will be put on hold if your builder becomes busy with other work in more convenient locations.

A builder should be able to provide you with reasonably firm start and completion dates and if they cannot then it could indicate that your project is destined for delays.  That said, in some circumstances delays are unavoidable so it is critical that there are clear lines of communication between you and your builder to avoid any unnecessary build-up of frustration.


Five Questions to Ask Yourself When Selecting a Custom Home Builder

Do you like the builder?

Building a custom home is a huge investment in time and resources, and there is only one chance to get it right. It’s your home. It’s your money. Make sure the custom builder you are working with appreciates that and works to make you happy. If you get bad feelings at the start, take your project elsewhere.

Do you like the builder’s work?

All the personality in the world doesn’t mean a thing if you don’t like the builder’s work. You are allowed to be meticulous. Make sure to vet their portfolio. Look at it from every angle, and ask all of the questions you can. Good work stands up to scrutiny, and a good custom home builder will welcome your questions and concerns and put you at ease. Which brings us to our next question:

Are they accessible?

Before and during the process, you are going to have questions and concerns. You want a builder you can talk to directly. Remember, custom builders are busy people, thanks to a recovering housing market, but they should be responsive and make themselves available to their clients. If your calls go unanswered and unreturned, that’s a bad sign.

Do they have good relationships with subcontractors?

A home is only as good as the subcontractors doing the actual handiwork. You should be able to ask who the subcontractors are, how long they have worked with the builder, and how experienced they are in their field. A good custom builder will retain good, reliable, experienced subcontractors.

Do they have a good reputation?

There are multiple websites and consumer advocacy groups that will allow you to thoroughly vet your potential custom home builder before signing on. Though custom home builders are not as thoroughly reviewed as, say, restaurants, there are still a number of places to find reviews and testimonials about builders.

Make Tax Preparation From The Best Before Start A Company

tax preparation

Types of Tax Return Pros

You can have anyone—your uncle, your neighbor, or your best friend—prepare your tax return. But if you’re paying for this service, the person must be registered with the IRS and have a current preparer tax identification number (PTIN), which is an IRS number issued annually to eligible preparers.

What Will You Pay?

The more credentialed the person who prepares your return is, the more you can expect to pay. As a general rule, you’ll pay the highest fees to attorneys, followed by CPAs and then enrolled agents. The lowest fees are charged by annual filing season program participants and preparers without any special designation.

Who’s Best for What?

Cost is only one factor in choosing a preparer. Depending on your situation, certain other considerations may be important. That includes whether you might want the preparer to represent you if the IRS raises any questions concerning your return. These are some general guidelines, for each type of preparer.

Red Flags to Watch For

Once you’ve decided what type of preparer to use, make sure you steer clear of anyone who may be unscrupulous or could create problems for you. (If the IRS suspects that a preparer’s actions are shady, their clients’ returns may be subject to special review.) Some tipoffs of suspicious behavior.

Some Final Advice

To make the best use of your preparer’s time—and keep your bill to a minimum—be sure to gather all the information you need and make a list of your questions before you meet.


How To Get Your Money’s Worth and Choose The Right Tax Preparer

Free File through the IRS – Anyone can use free file and e-file their federal tax return at no cost.  This is due to a public-private partnership between the IRS and tax preparation software companies called Free File Alliance.   You can simply fill out the forms online and e-file.  For example, this would have been perfect when I helped my mother-in-law with her simple tax return; she only had income from Social Security and some investment income.  That was it.  Free e-file is a perfect fit for very simple returns.

Do-it-yourself with tax preparation software – Tax software programs are popular for a reason: they are easy to use.  The program walks you through every section of your return, highlights deductions you might not have caught, provides red flag audit alerts and to top it off are inexpensive.  Three popular tax software programs are TurboTax, H&R Block at home, and TaxAct.  They range from $10 (Tax Act) to $45 (H&R Block at home) for the deluxe home version.

Use a storefront tax service – People with relatively basic returns who don’t want to do it themselves may want to consider a storefront tax service.  The tax code is complex and constantly changing. In fact in April 2011, IRS Commissioner Douglas Shulman reported that there had been about 3,500 tax changes since 2000, and that doesn’t even include the latest changes in the fiscal cliff negotiations.  It makes sense that most people want face-to-face help where they can get their questions answered and receive personalized guidance from a tax preparer.

Getting help with an Enrolled Agent – The IRS does not currently have any guidelines on who can prepare your tax return (although some states such as California do).  This makes it a challenge to find out if someone is competent with even basic tax preparation.  Instead of just choosing any tax preparer, consider working with an Enrolled Agent.  According to the National Association of Enrolled Agents, they are required to demonstrate competency in all areas of taxation, representation and ethics before they are given unlimited representation rights before the IRS.  An Enrolled Agent is a tax specialist for people who are looking specifically for tax return preparation, tax advice, and audit representation.

Hiring a Certified Public Accountant – As mentioned in a previous blog, the services of a Certified Public Accountant may be somewhat more expensive, but in many cases well worth the money spent.  People who need strategic tax planning such as small business owners or individuals with complex returns, those who pay high income taxes, or have unusual circumstances appreciate the services of a CPA over an enrolled agent or general tax preparer.  You would think that filing your taxes would be very black and white, but where CPAs really provide value is in grey areas.  They give advice on which tax strategies to take or not to take based on their interpretation of IRS rulings and past experience.


Questions To Ask When Choosing A Tax Preparer

How do you determine your fees? Note the wording on this one. I didn’t say ask how much the fees would be but how the fees are determined. Prices may vary based on the complexity of your return, whether you require additional schedules (such as dividend and interest on Schedule B, business information on Schedule C, capital gains and losses on Schedule D and/or rental income and losses on Schedule E); supporting forms (such as those for the child tax credit or additional charitable donation information); or whether your return has out of the ordinary line items (like Roth IRA conversions). Some preparers offer reduced costs for federal return but add on for state and local returns: make sure you understand the total cost. Finally, be wary of preparers who base their fee on a percentage of your anticipated refund: they have a financial incentive to encourage inappropriate credits and deductions.

What about the extras? There’s nothing wrong with paying for the extras: just make sure that you know what those might be ahead of time. When asking about fees (see #6), be sure to ask about the cost of extra services, like the cost to fix any mistakes or to file electronically (see #7). A tax preparer should not charge you extra for a copy of your return when the return is prepared (though charging you extra for additional copies may be appropriate).

Can I file electronically? More than 1 billion individual tax returns have been processed since the debut of electronic filing in 1990. It’s the fastest way to get your refund and tends to result in fewer math errors. It may also be required: a paid preparer who prepares and files more than ten client returns must generally file returns electronically unless the client opts out.

Who will sign my return? Remember that your preparer must have a PTIN (see again #1). The PTIN and the preparer’s signature need to appear on your tax return. Don’t trust a preparer who refuses to sign a return or asks you to sign as self-prepared.

When will I receive a copy of my return? It’s not unreasonable to leave your preparer’s office without a copy of your completed return; assembly may be required. However, you should receive a complete copy of your return within a reasonable amount of time following your appointment. If your preparer can’t offer a window of time to expect the copy, it might be indicative of a time management problem. If your preparer can’t promise you a copy at all, run, don’t walk away: you will need a copy for your own records.


How to Choose a Tax Preparer

  • Review the tax preparer’s credentials. EAs, CPAs, and tax attorneys are all qualified to represent their clients to the IRS on all matters. Other preparers can help you with forms and basic matters, but cannot represent you in case of an audit. Don’t be afraid to ask about these or other qualifications before you hire someone.
  • Be wary of spectacular promises. If a tax preparer promises you larger refunds than the competition, this is a red flag. Many such tax preparers base their fees on the amount of your return and may be likely to use shady tax preparation tactics. In addition, it’s wise to avoid tax preparers who offer “refund anticipation loans” as you’ll probably lose a large percentage of your return to commission fees.
  • Get referrals from friends and family. One of the best ways to find a trustworthy tax preparer is to ask your loved ones for recommendations. Once you have a few options, check the BBB.org, paying careful attention to other consumers’ reviews or complaint details. This will give you a clear view about what you can expect.
  • Think about availability. If the IRS finds errors in your tax forms or decides to perform an audit, will your tax preparer be available to help you with the details? Find out whether you can contact the tax preparer all year long or only during tax season.
  • Ask about fees ahead of time. Before you agree to any services, read contracts carefully and understand how much the tax preparer charges for their services. Ask about extra fees for e-filing state, federal, and local returns, as well as fees for any unexpected complications.
  • If things don’t add up, find someone else. If a tax preparer can’t verify their credentials, has a record of bad reviews from previous clients, or their business practices don’t seem convincing, don’t do business with them. Keep in mind that if you hire them, this individual will handle your sensitive personal information – information you need to keep safe from corrupt or fraudulent tax preparers.


Checklist for Selecting the Best Accountant

Check the Preparer’s Qualifications. Use the IRS Directory of Federal Tax Return Preparers with Credentials and Select Qualifications. This tool helps taxpayers find a tax return preparer with the qualifications that they prefer. The Directory is a searchable and sortable listing of preparers with a credentials or filing season qualifications.

Check the Preparer’s History. Ask the Better Business Bureau about the preparer. Check for disciplinary actions and the license status for credentialed preparers. For CPAs, check with the State Board of Accountancy. For attorneys, check with the State Bar Association. For Enrolled Agents, go to IRS.gov and search for “verify enrolled agent status” or check the Directory.

Ask about Service Fees. Avoid preparers who base fees on a percentage of the refund or who boast bigger refunds than their competition. When inquiring about a preparer’s services and fees, don’t give them tax documents, Social Security numbers and other information. Some preparers have improperly used this information to file returns without the taxpayer’s permission.

Ask to e-file. Taxpayers should make sure their preparer offers IRS e-file. Paid preparers who do taxes for more than 10 clients generally must file electronically. The IRS has safely processed billions of e-filed tax returns

Make Sure the Preparer is Available. Taxpayers may want to contact their preparer after this year’s April 18 due date. Avoid fly-by-night preparers.

Tile Flooring Is One Of Metode To Make Your Floor More Beautiful

Your Guide to Tile Flooring

Ceramic, porcelain, terra-cotta, and concrete tile promise durability, easy maintenance, and long-lasting style. The array of colors, patterns, sizes, shapes, and textures means you can create a one-of-a-kind design to suit the look of any room.

Tile is the material of choice anywhere you want a durable, low-maintenance floor. Proper installation ensures that the floor will last for years, even decades, to come.

Both ceramic and porcelain tile are made from natural clay, a long-lasting material, making it an eco-friendly flooring choice. When deciding between the two, consider their defining characteristics.

Ceramic tile is a composition of natural clay-base products, minerals, and water. It is available with a glasslike, kiln-fired coating called glaze. Glazed ceramic tile resists stains and can be cleaned with a damp mop and household cleaners. Depending on the glaze, the color of the ceramic tile body may be visible if the glaze is scratched. Ceramic tile is less expensive than porcelain, but both are cheaper than natural stone.


2020 FLOOR TILE DESIGN TRENDS

Tile flooring has the ability to seamlessly fit within a multitude of styles, making it perfectly suited for any trend. Bigger is becoming better when it comes to size. Large-format tiles are more popular than ever, and the minimal grout lines they present give a smooth, cohesive appearance to your floor. We continue to love wood-look tile, which flawlessly replicates the texture and grain of real wood in an extremely durable material. Unique shapes and styles, such as hexagons and mosaics, are the newest trend in wood-look tiles. Natural stone remains a popular look that will never go out of style. Marble, travertine and slate add luxurious sophistication to your kitchen, bathroom and any flooring surface in your home. If natural stone is not for you, manufacturers of ceramic  and porcelain tiles have mastered the bright, clean marble look with materials that are less porous, more durable and more cost-effective. Stop in to your nearest Tile Shop to check out the latest selections in fashionable tile flooring.


Grout Sealing

Whether or not you seal your tile floor and how often you seal it depends upon the type of tile, its level of porosity and its location. The grout located between floor tiles should be sealed on a regular basis. Prior to sealing grout, the tile floor should be cleaned and dried. Sealed grout and/or tile repels moisture, protecting the floor from staining or discoloration. It is best to consult with a tile and/or grout manufacturer to determine the most appropriate type of sealant for your tile floor.

Repairs

Tile floors do not need to be refinished, resurfaced or reglazed during their lifetime. However, they may need to be repaired. Overtime damage can occur to a grouted joint or a tile may break. In either case the grouted joint should first be removed using a mechanical rotary tool or a hand tool, such as a chisel. Work carefully to prevent damaging adjacent tiles. If the grouted joint is the extent of the damage, the joint should be free and clear of debris, then re-grouted. If the tile is damaged you will need to remove all grouted joints that surround the tile, then carefully chisel or mechanically cut the tile into small pieces and remove. The mortar or adhesive on the floor under the tile should be scraped and removed as well. Once the area is free and clear of any debris, apply mortar to the back of the replacement tile; place in the existing location and squarely position the tile onto the backer board. The top of tile should be flush with the adjacent floor tiles.


Natural Stone Tile Floors

Natural stone tile is very attractive and can also be strong as well. Common types of stone flooring include slate, marble, granite, limestone and travertine. Note that the qualities of natural stone tile vary enormously depending on where, how and when the stone was quarried.

There are two types of natural stone tile that are extremely strong and hard-wearing. In fact, either could qualify as a contender for the best tile for kitchen floors and/or other high-traffic locations. One is granite, a dense, hard igneous rock. It is a distinctive flooring, offering a speckled appearance from the minerals found within the rock. It is said to be close to impervious and, once polished, it resists scratching.


Ceramic Tiles

Ceramic tiles are also a good tile flooring option for the laundry room. You can get good ceramic tiles online from Amazon. Similar to the vinyl tiles, they are sturdy and water-resistant. The drawback, however, is the installation hassles. Vinyl tiles are easier to install than ceramic tiles. You must, first of all, prepare the subfloor and install a backup board to accommodate a type of tile expansion and eliminate cracking.

If you require additional insulation and texture for your laundry room floor, consider integrating low-pile tiles into the picture. For instance, you can incorporate the office carpet for a bit more feet and kids comfort. These are equally impermeable to moisture.

The other extremely durable natural stone tile is slate. This stone is a dense metamorphic rock that is very durable. The surface of slate tile is naturally textured, although you can find some that have been smoothed and honed. You can find slate in a variety of dark earth tones.

Benefits

  • Very small entry cost
  • Water-resistant
  • Sturdy and long-lasting
  • You can easily install tiles and replace damaged ones without professional help.

Drawbacks

  • Ceramic tiles are slippery, cold and noisy. You are likely to experience a lot more noise reverberations from the sound of your washing machine or dryer compared to other tile flooring options.
  • The grout line collects dirt which makes cleaning more challenging. However, you can make the job easier by getting one of these vacuum cleaners.

Durable Slate-Look Porcelain

Another good tile flooring option for your laundry room or mudroom is the slate-like porcelain tiles. They work well here, especially, due to pressure from foot traffic and heavy appliances. Also, if you’re looking for a casual or rustic option, this is a perfect solution.

They look similar to natural stone tiles but with a better water resistance capacity. However, you need to prepare the floor properly to tolerate the reverberation from the dryer and washing machine.

Make Sure Your Ceiling Looks Good

Types of Ceiling Boards

What is a Grid Ceiling?

There are a number of other names for a grid ceiling, including:

  • Suspended ceiling
  • Drop ceiling
  • False ceiling
  • T-bar ceiling
  • and more

All of the various names describe important aspects of a grid ceiling. Grid ceilings are suspended from (or drop from) an existing ceiling or support system. A grid ceiling is a false ceiling in the sense that it is not part of a permanent support structure such as floor joists or a cement floor/ceiling. Grid ceilings are sometimes called T-bar ceilings because “T-bars” form the grid that holds the ceiling panels in place.

Grid ceilings have been used extensively in highrise and other commercial structures for decades. Originally, they were used to hide pipes, electrical wiring and ducting, which of necessity had to be attached to a ceiling. They have also been used in multi-storey office buildings and apartment complexes because of their excellent acoustic properties.


Suspended Gypsum Board and Plaster Ceilings

Gypsum board suspended ceilings may be screwed to ordinary light gauge steel cee channels that are suspended on wires. Special framing components have been developed that make it easy to suspend more complex shapes of gypsum board ceilings, such as cylindrical vaults, undulating surfaces and deep coffers.

Suspended plaster ceilings have been in use for many decades. Although most suspended plaster ceilings are flat, lathers are capable of constructing ceilings that are richly sculpted, ranging from configurations resembling highly ornamented Greek or Roman coffered ceilings to nearly any form that the contemporary designer can draw.

This capability is especially useful in auditoriums, theatres, lobbies of public buildings and other uniquely shaped rooms.


Direct-Mount Drop Ceiling Grid

Recently there has been a rise in the popularity of basement remodels, which has sparked demand for a new type of ceiling grid. In most basements, ceiling height is extremely important, but so is access to utilities like plumbing and electrical work between ceiling joists. This demand for dual purpose has led to a new type of ceiling grid that is made to apply directly to your ceiling joists or flat ceiling. After installation, you lose only about an inch of headroom, but you still have access to the space above the ceiling if you need it. The grid is made entirely out of plastic, and is attached to the ceiling by glue or screws.


Metal Ceilings

Metal is usually loved because the material is durable and shiny.  This enhances the beauty of the interior of a home. The forms used as ceilings come as planks, tiles, and panels. And the most popular ones include aluminum and galvanized iron.

Fixing and installing these metal slips is easy and takes fewer efforts. The concealed parts are accessed without troubles because the panels are removable and reattached. This ends with low construction, fixing, and maintenance costs.

Pros

  • Good for workplaces that need sparkling environments and easy maintenance including as the machinery housings, Air Handling Units, among others.
  • Fire-resistant so you have no worry about safety!
  • No incidences of cracking or warping over time. It retains the original shape. Without any issues of peeling, it means that close to zero repairs and maintenance are needed.

Cons

  • Investing in genuine metal is costly. Remember you will need to protect the material against corrosion.


Three types of metal ceilings and when to use them

Following is a list of the types of grids and their most suited applications. More importantly the list will describe ways you can utilise metal pan with that associated grid to take your ceiling to places unseen in non-metal applications.

LAY-IN TILE:

The grid of a lay-in tile system is fully seen and is the most common product in standard office buildings. Tiles are simply placed on a T-shaped runner (above left), generally between 10 and 25mm, and can be easily installed and demounted as individual tiles.

Applications:

  • Offices, places that require consistent maintenance, buildings with chilled beam systems such as the above NAB Docklands building by Woodsbagot. (Image: Armstrong)
  • Without perforations they are also generally more wind proof than other suspended ceiling systems.

CLIP-IN TILE:

Ceiling tiles on a clip-in system do just that – they clip on to the suspended grid and therefore conceal the grid from view. Manufacturers have their own unique clip-in systems that match their boards but generally they all consist of a spring tee runner from which boards clip on to.

Application:

  • These are suitable for food preparation areas and hospitals where cleanliness is important and tiles are frequently cleaned and hosed down.
  • They are also used frequently in airport and transport hubs.
  • Unlike mineral fibre boards, metal pan is impervious to moisture so they can be hosed down without damaging the board or causing it to sag or stain

HOOK-ON TILE:

Hook-on systems attach to a suspended J or Z suspension rail and can be hung in a variety of square, rectangular, trapezoidal and triangular shapes.

Application:

  • The hook-on system affords easier access to ceiling plenums than clip-on systems but still has the same aesthetic features.
  • They see consistent use in transport hubs and retail stores.

Tips To Find The Best Mold Remediation

Steps to Proper Mold Removal

Learn about moisture

Assessing mold growth involves more than just looking at what’s visibly growing on the walls or in a corner. Mold can be an invisible intruder, growing behind and around what you first see. Such devious behavior requires inquisitive thinking.

Document the mold problem and create a remediation plan

Before you begin mold removal, document the mold situation with writing, photos and video. The warranty team supervisor will use the documentation to develop a remediation plan, which typically answers questions like when work is slated to begin, when that work is scheduled to be completed, who will be performing the remediation, any testing that should be done, and if homeowners will be temporarily relocated. In the longer term, the documentation can help manage liability for your company or point to larger trends in mold growth.

Calculate the extent of the mold contamination

Mold may not always grow in one area, so you need to figure out how much contamination you’re really looking at. Calculating the extent of the contamination will impact how you approach mold removal and clean up. The goal of mold removal is to clean up mold growing within the home, and to avoid exposing homeowners to large amounts of mold.

Remediate mold contamination

Remediation will always involve cleaning up existing mold while avoiding exposure to oneself as well as homeowners, as well as preventing new growth by addressing the moisture source. Based on your calculation of the contamination area, determine if you’re working in an area up to 30 square feet (approximately the size of a full sheet of drywall). If so, you’ll be following the guidelines for remediation levels 1 and 2. Level 1 remediation is used for small, isolated areas of mold up to 10 square feet and Level 2 remediation covers square footage from 10 to 30 square feet.

Determine if cleanup has been successful

Just because the mold is gone and there’s no dirt or dust doesn’t mean that you’re done. Your last step is to determine if your clean-up efforts have been successful. While this last step is a judgment call, there are some options and guidelines to follow.


What Are The Top Features Of A Mould Removal Company?

  • A reputed mould removal company will be licensed in your city and other areas and insured with all certificates and requirements. A trustworthy mould removal company will have trained and experienced staff that carry cleaning and restoration certification or a similar professional certificate. You can search on the internet for a good restoration and mould removal company and then analyse the results by visiting various websites reading about their services and reach. Most of them state the certifications they have.
  • Hiring mould removers gives them direct access to your personal spaces and fixtures. It is, therefore, important that you get quality guarantees and insurance before you hire them. The company should offer provisions to start the whole procedure again if the first attempt does not deliver the required results. Insurance covers are important to protect you from suffering damages to property or accidents. The company should also be willing to cover all damages and liabilities that occur due to their direct involvement and contact with your property.
  • A good restoration services company will offer a wide range of services including water damage, asbestos removal, fire-smoke damage, construction, and mould removal services. This is one of the easiest ways to determine general expertise. There are chances that the company with many options must have trained and efficient staff. Before choosing a mould removal company, it is also essential to streamline the range of services you are looking for.
  • In situations of emergency, whether it is water damage or smoke damage, it is important that the restoration teams arrive on site as soon as possible. Therefore, a good restoration company will address your response as quickly as they receive a word from you. A good restoration company will always offer 24/7 restoration services. So that you can easily avail their mould removal and asbestos removal services whenever required.


Mold Cleanup in Your Home

  • Fix plumbing leaks and other water problems as soon as possible. Dry all items completely.
  • Scrub mold off hard surfaces with detergent and water, and dry completely.
  • Absorbent or porous materials, such as ceiling tiles and carpet, may have to be thrown away if they become moldy. Mold can grow on or fill in the empty spaces and crevices of porous materials, so the mold may be difficult or impossible to remove completely.
  • Avoid exposing yourself or others to mold. See discussions:
  • What to Wear When Cleaning Moldy Areas
  • Hidden Mold
  • Do not paint or caulk moldy surfaces. Clean up the mold and dry the surfaces before painting. Paint applied over moldy surfaces is likely to peel.
  • If you are unsure about how to clean an item, or if the item is expensive or of sentimental value, you may wish to consult a specialist. Specialists in furniture repair, restoration, painting, art restoration and conservation, carpet and rug cleaning, water damage, and fire or water restoration are commonly listed in phone books. Be sure to ask for and check references. Look for specialists who are affiliated with professional organizations.*


Cleanup and Remediation

Mold Clean-Up After Disasters: When to Use Bleach

Bleach and dish detergent, common household items, can be used to clean mold in your home after a storm. The steps to take to clean up mold will depend on how much water damage your home suffered.

Homeowner’s and Renter’s Guide to Mold Cleanup After Disasters

Guide to Mold Cleanup After Disasters

Guidance from CDC, EPA, FEMA, HUD, and NIH on safe mold clean-up after a natural disaster

What to Wear

What to Wear before entering a Home or Building with Mold Damage

Shopping List for Mold Cleanup After A Flood

Shopping List for Mold Cleanup After A Flood

EPA Resources for Flood Cleanup and Indoor Air Qualityexternal icon

If you are repairing your home or building after a flood or hurricane, to prevent mold growth you should be sure your foundation is dry before you replace the flooring.


How Much Does Professional Mold Removal Cost?

Hire a Mold Inspector First

If you find mold growing on drywall, trim, or unfinished wood surfaces, and especially if the affected area is more than 10 square feet, hire a mold investigator to discover the root and extent of the problem. They’ll also be able to direct you to a reliable mold remediation company. Reputable companies work with third-party inspectors instead of doing the inspection themselves.

Ins and Outs of Air Sampling

Analyzing air samples isn’t cheap and, depending on the lab used, can cost $30 to $150 for each sample. Some inspectors roll sampling into their base price; others don’t. So make sure you ask.

What A Mold Remediation Professional Will Do

Mold remediation companies will clean up your mold in a few days if just some washing and removing carpet is involved, or in a few weeks if demolition and rebuilding is required.

Does Insurance Cover Mold Remediation?

Don’t presume your homeowners insurance will pay to fix your mold problems. Insurance typically pays if the problem results from an emergency already covered on your policy, like a burst pipe, but not if mold resulted from deferred maintenance, persistent moisture or seepage, or from floodwaters (unless you have flood insurance).

Use Profesional Wedding Photographer For Your Wedding

How to Choose a Wedding Photographer

 Your wedding photographer should capture every detail of your big day. From your place card holders to your hair accessories and your makeup applications, it’s your photographer’s responsibility to capture it all. This way, you don’t have to rely completely on memory.

  1. It pays to have the best

While you can get a good deal with a photographer who’s new to the industry, you do need to find someone you trust to get it right. Perfection comes with experience.

  1. Browse your photographer’s portfolio

Look through the portfolio of any photographer you’re considering. You won’t just be looking for examples of the weddings they’ve captured. You’ll also be looking at their different styles and approaches. When you find the photos that resonate with you, you’ve found your style and photographer.

  1. Decide on the right style

A professional photographer distinguishes all the subtleties of shooting a wedding. They’ll know exactly when to photograph your groom as he first sees you walking down the aisle, how to achieve the perfect confetti shot, and what to do in the event of rain. A creative and flexible approach often results in the most breathtaking and brilliant wedding photographs.

  1. Create a detailed action plan

Everything from your chosen venue to the time of year will affect your wedding photographs. If you’ve got your heart set on certain shots, like couple’s portraits at sunset or a sparkler send-off photo, then you need to talk it through with your photographer.


Important Questions to Ask Wedding Photographers Before You Book

We can’t stress enough how important this is—almost as crucial as their skills behind the camera. You’ll be spending your entire wedding day with this person and if you’re at ease, you’ll not only enjoy yourself more, but they’ll also get better shots. See all the most important questions to ask wedding photographers, below.

  • What style(s) do you specialize in?
  • Will the photos be retouched and color balanced? Is that done before I see the proofs?
  • How many weddings have you shot, and how many do you do in a year? Also, what’s your favorite part of a wedding day, and time of year to shoot?
  • What exactly is included in your packages?
  • Do you bring your own lighting?
  • What will you wear?


How Many Hours You Should Book a Photographer For

When you’re in thick of wedding planning, you’re sure to come across so many questions you never knew to ask. From figuring out what flowers are in season to knowing how much to budget, you’re suddenly expected to become an expert on all-things events. Today, then, we wanted to offer up a resource to refer to when you inevitably find yourself asking, “Wait…how many hours do we need to book our photographer for? Read on for our complete breakdown on wedding photography coverage.

6 Hours of Wedding Day Coverage

Things to consider

  • 6 hours of coverage most likely means that there will not be much (or any) time for detail decor/design shots or photos of you getting ready
  • But, there will be coverage of all of the important moments (portraits, ceremony, family photos, first dance, cake cutting)
  • The end of the night comes early with just 6 hours of coverage so, most likely there will not be many photos of the reception once dancing starts

8 Hours of Wedding Day Coverage

Things to consider

  • If you have your heart set on doing a first look, then we recommend at least 8 hours of coverage
  • Even though 8 hours seems like a lot of time, this works best for weddings where the ceremony and reception are at the same location. Since the additional 2 hours gives the photographer just enough time to take a few getting ready, detail, and dancing shots, you don’t want to waste 30 or 40 minutes on your photographer needing to pack up her/his gear and drive to (and set back up at) a second location

10 Hours of Wedding Day Coverage

Things to consider

  • If the wedding ceremony and reception are taking place in different locations, we recommend at least 10 hours of coverage. This gives the photographer enough time to travel to the second location and still get all of the shots
  • Planning a grand exit? Unless you’re willing to give up coverage in the earlier hours, 10 hours is usually not enough to have a photographer there until the very end of the reception

12 Hours of Wedding Day Coverage

Things to consider

  • If you have a huge wedding party and family, we usually recommend 12 hours of coverage. Why? With everyone in “party mode” it means that it can be hard to get and keep people’s attention (not to mention the fact that it can be difficult to find and get the right people in the right place all at the right time!)
  • If you’re super into design and/or have the budget to make all of those Pinterest inspiration ideas come to life, it would be a bummer if all of those design details didn’t get photographed. So, if you have the wedding signs, custom cocktails, and lounges that everybody dreams of, we definitely recommend 12 hours of coverage to make sure every design detail gets the attention it deserves!


Tips: 10 Things You Should Tell Your Wedding Photographer

1) Tell them what they should wear; you don’t want a photographer in flip-flops and shorts in the middle of a black-tie affair. Your photographer should not stand out amongst your guests. (Massive camera aside of course!)

2) Provide them with an order of service, so they know what is happening and when. The only way for you to have photographs of all your special moments is to tell the photographer where he or she should be when they are taking place. (They need to get the best angle after all!)

3) Talking of group shots, if there are any awkward family circumstances, you should let your photographer know, so that he can position the subjects accordingly and be as tactful as possible.

4) Let your photographer know if any of your guests have mobility restrictions, so that benches and seats can be organised if needed for certain shots.

5) Ask your photographer to take pictures of all the little details you’ve worked so hard over! This could mean anything from the favours and elaborate seating cards, to the flower centrepieces on every table.


Advice For Choosing A Wedding Photographer

With all of the excitement and anticipation that comes with planning your wedding, the day finally comes and passes more quickly than you’d even imagine. While you should savor each moment, one thing is for sure: you’ll want to relive it forever. The best way to draw value out of all you put into your wedding day is to make these moments tangible. So we’ve asked a handful of our favorite pros for their best advice on choosing a wedding photographer to document this day.

  • Land on a budget

There are several things to consider when coming up with your number, and once you have it set, many ways to apply it toward the services you need most.

  • Know your style

Find not only what appeals to you now, but will for generations to come. Looking beyond photography trends will lead you to discover your true taste.

  • Look beyond portfolio highlights

Viewing a full gallery or two of real weddings a photographer has shot will allow you to see a more comprehensive range, from family portraits to reception detail shots.

  • Understand rights to the photos

The permissions and legal intricacies around rights to wedding photos can often be blurry, so any clarification you can get before signing off will benefit both you and the photographer down the line

  • Make sure you mesh

Look for an honest, organized, friendly photographer, because that’s who will be spending the day by your side.

So when it comes to selecting your wedding photographer, it all boils down to picking someone who jives with your visual style and you as a human. When you have a genuine connection with your photographer, they’ll do a better job capturing your emotions—your love, your joy, your stillness

Tips To Make Electronic Leak Detection

Why is Refrigerant Leak Detection Necessary?

Refrigerant leaks can lead to downtime.

Hotels, restaurants, bakeries, catering facilities, cold storage facilities, supermarkets, medical facilities and many other commercial and industrial facilities rely heavily on air conditioning and refrigeration systems to run their daily operations. A refrigerant leak followed by an unexpected breakdown can cause unplanned facility downtime, negatively impacting your revenue and reputation.


Importance of Spotting Leaks

It’s vital to identify and repair any leaks in your A/C unit early. The benefits vast outweigh the short-term burden of paying to have them fixed, and you’ll be kicking yourself down the road if a smaller leak grows larger and becomes a serious issue.

  • Savings! – When refrigerant leaks, the A/C unit has to kick into overdrive to compensate for the loss. As a result, your energy bill is going to spike to match that extra work.
  • Environmental factors – An improperly charged unit becomes much less energy-efficient, and the carbon dioxide emissions contribute greatly to the greenhouse effect. By getting ahead of refrigerant leaks, you’re helping out the environment!
  • Prevents damage – If an undiagnosed leak flies under the radar, it can gradually become something that can cause significant damage to your home. Water that freezes due to the leak can thaw and seep into the rest of the house and wreak havoc.


Detecting Refrigerant Leaks

November 2015 — Recovery of refrigerant is mandatory. It is important to follow all Environmental Protection Agency (EPA) and Occupational Safety and Health Administration (OSHA) safety guidelines when working around machinery and refrigerants. If the refrigeration system contains more than 50 pounds of refrigerant and has an annual leak rate of 15 percent or more for comfort cooling, or a 35 percent leak rate for commercial refrigeration, the EPA has mandated that it must be repaired.

How do we know if there is a refrigerant leak? Most of the time someone calls and reports that the air conditioning is not working properly. By checking system pressures and temperatures, you can determine whether the system refrigerant charge is either low or empty. Refrigerant leaks typically fall into four types:

  • Standing leaks:occur even while the unit is turned off
  • Pressure leaks:occur at a certain pressure
  • Vibration leaks:occur when a strain is put on a line or component
  • Temperature leaks:occur as a result of the expansion and contraction caused by temperature change

One way to start checking for a refrigerant leak is to listen to the system. Most of the time it will be hard to hear any gas escaping because equipment noise is too loud or the leak is too small.


Why is a Leak Detection Test Necessary?

If your air conditioning system stops working and an HVAC tech diagnosis the problem as low refrigerant, you’ll obviously want them to refill your refrigerant. Even though this will get your air conditioning up and working again, blowing cold air, this is just a Band-Aid solution to the real problem: finding and fixing the leak. By just filling up the system with new refrigerant, you’ll end up having to continue to buy more and more refrigerant as it continues to leak out of your system.

What Types of Leak Detection Tests Are There?

There are a wide variety of leak detection tests. Which one the technician uses for your system depends on what type of system and refrigerant you have and where the technician thinks the leak may be. Here are a few types of leak detection tests your technician may complete:

Bubble Solution

This is the simplest leak detection test. With access to accessible refrigerant lines, the technician is able to place a bubble solution on the line. If the line begins to bubble, the technician can tell that the gas is leaking out of the line and can patch the hole.

Fluorescent Leak Detection

If your technician refills your refrigerant and they suspect there’s a leak, they’ll most likely include some fluorescent dye with the refrigerant. They’ll come back later to use a UV light and see if any of the dye has leaked out of the lines. Once they find where the dye is located, they can easily locate and repair the leak. However, there are different dyes for different systems and refrigerants, and using the wrong dye with the wrong system can ruin an entire air conditioning system. That’s why it’s extremely important to hire a qualified technician.

Halide Torch

A halide torch has a flame that, when it comes in contact with chloride atoms, turns green. However, this isn’t always an effective test because not all refrigerants have chloride.

Electronic Detectors

There are a few different types of electronic detectors. One, the corona-suppression uses an electric current to detect leaks. When the electric current drops, gas is detected. The lower the drop in electric current, the higher the amount of gas.

A heated diode detector heats the refrigerant and breaks the molecules into negative and positive charged atoms. The positive atoms in the gas will attach to the negatively charged wire on the detector, and the detector will sense them, showing a gas leak when the detector goes off.

Ultrasonic Detector

An ultrasonic detector can hear where the gas is escaping in the line, even with pinhole sized leaks.


Repairing the AC Refrigerant Leak

Repairing a refrigerant leak in your AC unit usually requires hiring a skilled technician. For the DIYers, repairing a refrigerant leak in the air conditioner unit can be inexpensive if all that’s needed is to tighten a fitting or replace a valve core. At the same time, it can be very pricey if it repairs involve replacing the evaporator coil or copper line set.

Whether you try to repair the leak or hire a technician, there are some common sites to watch for leakage. These include:

  • Copper tubing
  • Shipping valves
  • Filter canisters
  • Weld joints
  • Valve cores

As mentioned previously, technicians may use an electronic sniffer to identify AC refrigerant leaks. Bigger leaks typically require using soap bubbles or the black light method.

The black light method requires installing a liquid tracer into the system and let it circulate for a couple of weeks. During this period, the tracer will ooze out slowly from places where there is a leak.It is common knowledge that refrigerants are very expensive. Time and effort spent to locate leaks, plus repairing AC equipment makes it imperative for preventive maintenance of systems. The best way to begin repairing to select a method that can quickly pinpoint leaks. This will not only keep loss of refrigerant at a minimum, but it will also help you avoid headaches and scorching heat.