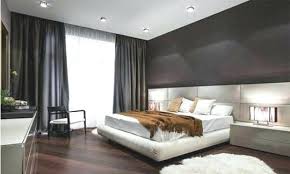
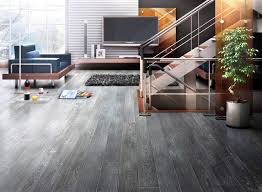
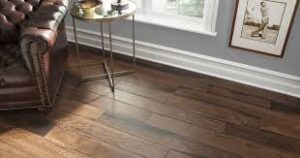
How to Install Engineered Hardwood Flooring Over Concrete Substrate
When is engineered hardwood a better solution?
What do you tell your customers who have a concrete subfloor and want to install hardwood? We recommend an engineered hardwood for several important reasons. One, it’s much less sensitive to changes in humidity compared to wood that can swell with moisture and temperature. Two, it can be installed at any grade level – including below grade. And three, it’s better than traditional plank for installing over in-floor heating systems.
However, while engineered hardwood flooring offers increased durability, that doesn’t mean it can be used anywhere. Installations in wet environments are one example where numerous other types of flooring options are much more suitable.
What are the first steps before installation?
Your very first step before installing engineered hardwood floors over concrete is to let the boards acclimate to the room where they’re going to be installed. Check the manufacturer’s recommendations, but in most cases it’s a minimum of three days with no maximum.
Next, check the boards for warpage or defects, and then remove any bad ones. If you skip this important step, you could face problems later if you need to replace even a single board.
Why is moisture so critical to surface preparation?
Engineered hardwood is sturdier than traditional plank – but surface preparation still matters. For any flooring installation over concrete, you should anticipate potential problems with moisture levels.
Like any wood product, engineered hardwood expands and contracts because of changes in moisture. For that reason, the adhesive you choose depends on the environment and the conditions during installation. You need to be aware of any concrete substrate that has known moisture problems, and remember that new slabs will be high in moisture.
How should you install the floor?
After inspecting your boards and removing any defective ones, plan on following a running bond pattern of the grain. This is the most popular way to install engineered hardwood flooring because it’s stronger and more aesthetically pleasing.
Remember to leave expansion gaps between the flooring and wall. Consult the manufacturer’s recommendations to see how wide the expansion gap needs to be. Installing engineered hardwood flooring over concrete too tight against a stationary object will not allow room for normal expansion, and may cause a failure.
Consult the product data sheet for instructions regarding specific trowel requirements. In general, use a notched trowel to spread the adhesive. Pass the trowel through the glue at a 45-degree angle and install hardwood flooring immediately after the adhesive is spread.
Lay the flooring into the adhesive with the tongue side of the board facing the center of the room. The hardwood may slip and move at first, so be sure to secure one row entirely before moving on to other rows. The initial row will limit the movement of subsequent rows. You may have to temporarily tape edges of adjacent planks together with painter’s tape until installation is complete. Bowed boards or boards over low spots should be weighted down while the adhesive cures.
Periodically lift a piece of hardwood to make sure you’re achieving a 90 percent adhesive transfer. If the board doesn’t appear to have this level of coverage, remove the dried adhesive and apply more.
How to Deep Clean Hardwood Floors
- To deep clean your hardwood floors, start by vacuuming or sweeping. Removing all the loose dirt and debris will ensure that you can move onto the next steps without moving around the dirt and scratching the floors. Be sure to move furniture and rugs to clean the surface of all of your floors. Also, for wood floors with deep character knots, try using the wand attachment to get loose dirt out of the knots and crevices.
- Once you’ve removed the loose dirt from your hardwood floors, you can move on to the next step. You should always check with your manufacturer for floor cleaning solutions or cleaning products that are recommended for your floors before using them. Using a solution that is not recommended can damage the finish on the floors, which can be irreversible.
- Once you have found a cleaning solution, follow the manufacturer’s guidelines if it needs to be diluted. Also, check to see how much product is recommended for use on your floors. It’s always a good idea to test your cleaner on floors in a closet or somewhere that’s not noticeable, just in case it causes any discoloration, bubbling, or warping.
- Once you’ve tested your floor cleaner, you can start at the back of the room with your mop. Work in the direction of the hardwood grain, and don’t add too much cleaning product, as you want the floors to dry quickly. When you’ve finished a room, move on to the next room. Keep working until you’ve finished cleaning the hardwoods, and allow them to dry. Then, enjoy how beautiful they look!

How to Keep Hardwood Floors Clean
One of the easiest things you can do to keep your hardwood floors clean is to remove your shoes when entering and exiting your home. Rocks, gravel, and sand, among other materials, can easily get stuck in your shoes and be tracked around your home. Removing your shoes will help you and your family ensure that there is less of a mess.
With hard-surface flooring, one addition that adds not only warmth and comfort but also protection for your floors is an area rug. Area rugs will keep your hardwood floors from becoming faded, worn, and scratched, and they can be installed in many areas. Living rooms, bedrooms, and hallways are just a few areas where area rugs can change the look and feel of the space, but also protect your wood floors from the wear and tear of daily life.
If you have pets, another thing you can do is wipe their paws when they come inside. Whether it’s raining and their paws are full of water and dirt, or they seem to collect all kinds of mud, using a towel to wipe down your pet’s paws will help you create a home that stays clean.
Spills and accidents are common in any household. From pets to kids and even adults, there’s no telling when water will spill on your floors. To ensure that your hardwood floors stay in good condition, always wipe up spills as soon as they happen. Standing water can damage wood quickly and should not be left to dry.
Solid wood flooring: what should I look for?
Engineered wood floors are often quite similar in appearance. It’s worth choosing one with a click-lock mechanism, rather than tongue-and-groove boards, which are harder to fit. It’s worth seeing how well the planks fit together on in-store display panels. Look at the quality of the finish and the size of any gaps between the planks. Wood is a natural material and the planks will vary a little in colour, but some more than others, so think about whether you want a uniform look or a set of planks with a range of light and heavy grains.
Engineered Flooring
Engineered flooring is a type of layered “timber floor” with an upper layer of hardwood timber with several pieces of plywood. Its the upper layer of hardwood timber is prefinished and bonded to the subsequent plywood layers.
Engineered floors combine the benefits of real timber floors with the versatility of a floating floorboard design – making it suitable to be installed in apartments.
PROS
- Real timber flooring look and feel
- Greater stability compared to solid timber floors
- Suitable for apartments and unit blocks
- Simpler to install than solid timber floors
CONS
- May be expensive (some engineered floors are almost the price of solid timber floors)
- There is only a thin layer of real timber, making it difficult to sand & polish.
- Timber floors tend to be soft, so the thin upper timber layer may be susceptible to wear and tear.

Recent Comments