Flooring

Using Reclaimed Hardwood Flooring In Home Construction

How to Install Engineered Hardwood Flooring Over Concrete Substrate

When is engineered hardwood a better solution?

What do you tell your customers who have a concrete subfloor and want to install hardwood? We recommend an engineered hardwood for several important reasons. One, it’s much less sensitive to changes in humidity compared to wood that can swell with moisture and temperature. Two, it can be installed at any grade level – including below grade. And three, it’s better than traditional plank for installing over in-floor heating systems.

However, while engineered hardwood flooring offers increased durability, that doesn’t mean it can be used anywhere. Installations in wet environments are one example where numerous other types of flooring options are much more suitable.

What are the first steps before installation?

Your very first step before installing engineered hardwood floors over concrete is to let the boards acclimate to the room where they’re going to be installed. Check the manufacturer’s recommendations, but in most cases it’s a minimum of three days with no maximum.

Next, check the boards for warpage or defects, and then remove any bad ones. If you skip this important step, you could face problems later if you need to replace even a single board.

Why is moisture so critical to surface preparation?

Engineered hardwood is sturdier than traditional plank – but surface preparation still matters. For any flooring installation over concrete, you should anticipate potential problems with moisture levels.

Like any wood product, engineered hardwood expands and contracts because of changes in moisture. For that reason, the adhesive you choose depends on the environment and the conditions during installation. You need to be aware of any concrete substrate that has known moisture problems, and remember that new slabs will be high in moisture.

How should you install the floor?

After inspecting your boards and removing any defective ones, plan on following a running bond pattern of the grain. This is the most popular way to install engineered hardwood flooring because it’s stronger and more aesthetically pleasing.

Remember to leave expansion gaps between the flooring and wall. Consult the manufacturer’s recommendations to see how wide the expansion gap needs to be. Installing engineered hardwood flooring over concrete too tight against a stationary object will not allow room for normal expansion, and may cause a failure.

Consult the product data sheet for instructions regarding specific trowel requirements. In general, use a notched trowel to spread the adhesive. Pass the trowel through the glue at a 45-degree angle and install hardwood flooring immediately after the adhesive is spread.

Lay the flooring into the adhesive with the tongue side of the board facing the center of the room. The hardwood may slip and move at first, so be sure to secure one row entirely before moving on to other rows. The initial row will limit the movement of subsequent rows. You may have to temporarily tape edges of adjacent planks together with painter’s tape until installation is complete. Bowed boards or boards over low spots should be weighted down while the adhesive cures.

Periodically lift a piece of hardwood to make sure you’re achieving a 90 percent adhesive transfer. If the board doesn’t appear to have this level of coverage, remove the dried adhesive and apply more.


How to Deep Clean Hardwood Floors

  1. To deep clean your hardwood floors, start by vacuuming or sweeping. Removing all the loose dirt and debris will ensure that you can move onto the next steps without moving around the dirt and scratching the floors. Be sure to move furniture and rugs to clean the surface of all of your floors. Also, for wood floors with deep character knots, try using the wand attachment to get loose dirt out of the knots and crevices.
  2. Once you’ve removed the loose dirt from your hardwood floors, you can move on to the next step. You should always check with your manufacturer for floor cleaning solutions or cleaning products that are recommended for your floors before using them. Using a solution that is not recommended can damage the finish on the floors, which can be irreversible.
  3. Once you have found a cleaning solution, follow the manufacturer’s guidelines if it needs to be diluted. Also, check to see how much product is recommended for use on your floors. It’s always a good idea to test your cleaner on floors in a closet or somewhere that’s not noticeable, just in case it causes any discoloration, bubbling, or warping.
  4. Once you’ve tested your floor cleaner, you can start at the back of the room with your mop. Work in the direction of the hardwood grain, and don’t add too much cleaning product, as you want the floors to dry quickly. When you’ve finished a room, move on to the next room. Keep working until you’ve finished cleaning the hardwoods, and allow them to dry. Then, enjoy how beautiful they look!


How to Keep Hardwood Floors Clean

One of the easiest things you can do to keep your hardwood floors clean is to remove your shoes when entering and exiting your home. Rocks, gravel, and sand, among other materials, can easily get stuck in your shoes and be tracked around your home. Removing your shoes will help you and your family ensure that there is less of a mess.

With hard-surface flooring, one addition that adds not only warmth and comfort but also protection for your floors is an area rug. Area rugs will keep your hardwood floors from becoming faded, worn, and scratched, and they can be installed in many areas. Living rooms, bedrooms, and hallways are just a few areas where area rugs can change the look and feel of the space, but also protect your wood floors from the wear and tear of daily life.

If you have pets, another thing you can do is wipe their paws when they come inside. Whether it’s raining and their paws are full of water and dirt, or they seem to collect all kinds of mud, using a towel to wipe down your pet’s paws will help you create a home that stays clean.

Spills and accidents are common in any household. From pets to kids and even adults, there’s no telling when water will spill on your floors. To ensure that your hardwood floors stay in good condition, always wipe up spills as soon as they happen. Standing water can damage wood quickly and should not be left to dry.
 

Solid wood flooring: what should I look for?

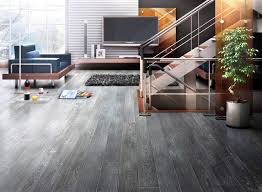
Engineered wood floors are often quite similar in appearance. It’s worth choosing one with a click-lock mechanism, rather than tongue-and-groove boards, which are harder to fit. It’s worth seeing how well the planks fit together on in-store display panels. Look at the quality of the finish and the size of any gaps between the planks. Wood is a natural material and the planks will vary a little in colour, but some more than others, so think about whether you want a uniform look or a set of planks with a range of light and heavy grains.
 

Engineered Flooring

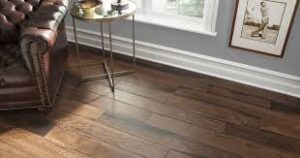
Engineered flooring is a type of layered “timber floor” with an upper layer of hardwood timber with several pieces of plywood. Its the upper layer of hardwood timber is prefinished and bonded to the subsequent plywood layers.

Engineered floors combine the benefits of real timber floors with the versatility of a floating floorboard design – making it suitable to be installed in apartments.

PROS

  • Real timber flooring look and feel
  • Greater stability compared to solid timber floors
  • Suitable for apartments and unit blocks
  • Simpler to install than solid timber floors

CONS

  • May be expensive (some engineered floors are almost the price of solid timber floors)
  • There is only a thin layer of real timber, making it difficult to sand & polish.
  • Timber floors tend to be soft, so the thin upper timber layer may be susceptible to wear and tear.
Choosing Between Laminate And Hardwood Flooring

Things to Know About Cleaning Hardwood Floors

With the dramatic gain in popularity of wood floors in recent years, more and more consumers are turning to cleaning professionals for maintenance advice and services. Following are of the most frequently asked questions and answers about hardwood floor cleaning.

Do different types of wood grains affect the cleaning of hardwood floors?

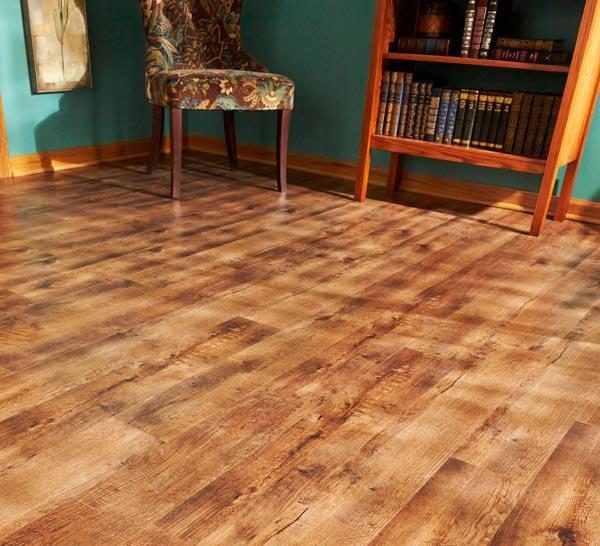
Absolutely. A lot of the wood floors you see today are different than what you would typically find in your mother’s or grandmother’s home. They no longer are all one color, with a smooth, elegant finish, but often contain visible character marks such as knots, checks or splits. Some are even hand-scraped to give them the old rustic look. This is called open, rustic or character grain.

Do wood floors have different finishes? If so, will that affect how they are cleaned?

This is perhaps one of the most important factors when it comes to cleaning hardwood floors. Depending on the manufacturer, each floor has different finish characteristics and will need a different cleaning product or system to properly maintain that finish

How would I know what cleaning product to use on which type of hardwood floor?

You should always defer to the manufacturer guidelines and never assume what type of floor finish is on the hardwood floor, as it is often impossible to tell. This is especially true when it comes to hard wax oil finishes. Because each manufacturer develops its own finish system and its own proprietary cleaning/maintenance formulas, you will need to use a product-specific system to ensure lasting beauty of the wood floor. If the wrong cleaning system is used, you may end up permanently damaging the floor.

When cleaning hardwood floors, what are the most effective cleaning products?

An effective and product-specific cleaning solution, a spray bottle and a cloth is typically all you need. A good rule of thumb for the quantity of floor cleaner is one quart of cleaning product for every 500 square feet of flooring. Although, if your floor is one with a rustic or character grain, you will want to use even less as the cleaning product tends to accumulate into the checks and cracks in the grain.


How To Restore and Care For Your Solid Wood Floor

If you are wondering how to restore and care for your solid wood floor, you’ve come to the right place. Solid wood flooring is a sound investment for your home, with its striking good looks holding fast for many years to come. If maintained properly it can last for tens of years, meaning there’s no need to think about replacing your floors for a long time once you’ve installed your solid wood floors. However, accidents happen, and if your solid wood floors are beginning to look a little tired then you may be considering whether to repair or renew them. To help you decide we’ve put together a comprehensive guide for the maintenance and care of your solid floor.

What kind of care does your hardwood floor need?

The first question you need to answer is what kind of care your floor needs. This can range from resurfacing and refinishing to applying new stains and varnishes. Read on and find out exactly what your solid wood needs to look like new.

Should I repair or renew scuffs?

Scuffs are bound to occur over time, no matter the material of your floor. If this is the issue when you’re deciding to repair or renew your solid wood floor then, depending on the extent of the damage, we would recommend repairing the damage.

Should I repair or renew scratches?

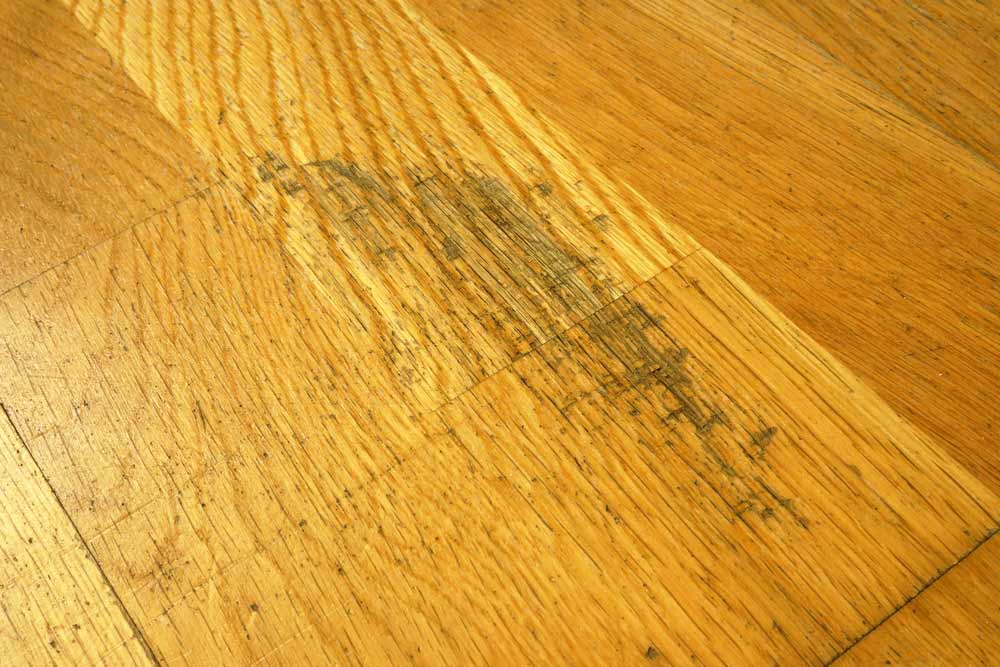
Scratches are an unfortunately common mark to occur to solid wood floors and can be caused by wearing heeled shoes, pets claws or fine dust and dirt. If the scratches on your floor are fine then simply sanding and refinishing should be sufficient. If, however, the scratches are more like gouges, then it may be advisable to replace the boards altogether, as sanding a scratch that’s particularly deep could lead to you sand too much of the board away.

Should I repair or renew dents?

Dents can occur from heeled shoes, heavy furniture or dropping heavy items on your wooden floor. As a dent is simply a compression of the wood fibre it is possible to repair it by applying some water to the site of the mark, covering with a cloth and ironing over it gently. The water will expand the wood as the iron will force the water to rise upwards, expanding the wood as it does.

Should I repair or renew water damage?

Water damage is one of the worst forms of damage for a solid wooden floor. To repair or renew this damage, your only option, in this case, is renewing your floors. If you wish to minimise the cost of a complete renewal of your solid wooden floor then you can try replacing the boards that are affected, though the colour may be slightly different from your original boards.


Hardwood floors

Most property owners think that to get that new-again sheen they have to sand down their floors, restain them, and reseal them. However, if the wear is fairly surface-level (normal wear, scratches in the finish and only a few deeper scratches that gouge that wood itself), it’s easy to refresh your hardwood floors in one day and save yourself from the mess, labor, and expense of sanding off your existing finish.

Approaches to Refinishing Hardwood Floors Without Sanding

Use a store-bought chemical abrasion kit

Buff and recoat floors with polyurethane

Use a revitalizer

Pro tip: When you make the decision to touch up your floors yourself, it’s best to do it between tenants—that way, you’re not moving furniture in and out, nor are you forcing your residents to relocate for 48 hours. Read along to find out if this is the best way to renew or restore your floors.

Figure Out What Kind of Hardwood Floors You’re Working With

Before you dive into any DIY home project, it’s important to know the materials you’re working with. This is especially important if you’re not the original owner. Different floor materials or treatments will have an impact on how you are able to refinish your floors, and you want to make sure you take the best and most effective approach.

Refinishing Prefinished and Laminated Hardwood Floors

Whether you have traditional hardwoods, prefinished wood, or laminated wood, restoring without sanding is a practical solution. Though you can sand your traditional hardwoods, it’s difficult or even impossible to sand prefinished or laminated wood floors. Why? Laminated floors (either glue-down or floating) only have a thin layer of attractive wood veneer over plywood, so you can’t sand these floors more than twice without damaging them and exposing the plywood.


Staining Hardwood Flooring: What To Consider Before You Stain

advise plenty of homeowners about staining hardwood flooring. Whether you’ve recently purchased unfinished wood, or you want to transform your space, your flooring is one of the grandest statements that you can make. With stain, you don’t have to replace floors to get a new look. However, staining is a larger process than some expect, so it’s important to be prepared. Here are the top things to consider when debating whether you stain your floors or not

What Color Should I Stain My Hardwood Floors?

Choosing what stain would work best for your wood flooring is a big decision. One way to make sure the color fits is by considering the theme of the room. While dark has a dramatic flair, a light stain might make the room feel more open. In general, stained wood makes a room feel warmer. You can look at home magazines or take a trip down to the hardwood store to browse colors. Consider the color scheme of the room and the feeling you want it to have to help you determine the color that best fits your flooring.

What is the Condition of the Floor?

Before you decide on a stain color, really inspect your hardwood flooring. If you have blemishes or scratches in the wood, you might consider a darker stain, so to cover up those visual imperfections. However, lighter stain is easier to maintain because scratches and dents are much less visible if they happen.

Process of Staining Hardwood Flooring?

Staining is a popular DIY project for Colorado home owners. If you’re up for the task, here’s a general breakdown of how to stain your floors:

Remove everything from the room. If you have carpet on the wood, you’ll have to pry it all up

Sand the Flooring: rent a sander, or hire a professional

Sweep and Mop: make sure all of the debris is picked up completely

Apply Stain

Apply Top Coat

Do I Need to Re-Finish my Hardwood Floors As Well?

Refinishing hardwood flooring involves sanding down the top layer of the floor, and then applying a new top coat and stain. Hardwood floors should be refinished if there are multiple blemishes, if there are planks bending upwards, or if the flooring is starting to age. Staining is a great option when you have unfinished wood or would like to change the look of newer wood. Staining still needs a sander to get rid of that top coat, however. Ask a professional flooring contractor if your floors need refinishing.


Should you install hardwood floors?

Hardwood flooring is considered a hallmark for floor covering. It has been used for ages and gives a warm and inviting look to any home. The reason I can say “to any home” is because these floor coverings range from elegant to rustic in the choices. You can install this flooring in a contemporary home as well as a traditional one. Wood always emits a feeling of hominess so covering the floor in wood will naturally create a welcome emotion.

There are those who are afraid of using wood as their main flooring throughout the house. Perhaps some cons you’ve heard come from these facts. Solid wood flooring is 100 percent hardwood that is milled from lumber. Since it is a natural material, hardwood reacts to changes in its surroundings such as moisture and extreme temperatures. These can cause solid wood to shrink or expand. All solid hardwood can be sanded and refinished if needed over the years so they do last forever but there is that maintenance that needs to be addressed. Solid hardwood is not recommended for installation in bathrooms and in kitchens because of moisture in those rooms.

Using wood on stairs is beautiful but noisy. With bedrooms upstairs and possibly sleeping children, the wood stairs will send noisy footstep sounds all over the place. Also, safety is an issue. A wood stair is slippery, unlike one covered with carpet. A wood stairs with a runner up the middle will solve those problems. Realize though, that you are paying for the wood (not cheap) then covering with rug. Nevertheless, it is absolutely beautiful.

Here are some pros. Consider engineered wood flooring. It is built up of layers of wood consisting of three to ten layers that are glued together. This multi-ply structure gives engineered wood superior stability, which reduces concerns associated with shrinking and expanding when temperature and humidity change. Engineered wood can be installed in kitchens and in bathrooms so no worries there.

Consider a laminate flooring. It has four layers consisting of a wear layer, a design layer, an inner core layer and a backing layer. This layered construction makes laminate floors remarkably durable. And it looks very much like a regular hardwood floor.

How To Install Vinly Flooring In Your House

The Pros and Cons of Vinyl Flooring

Understand what makes vinyl such a viable flooring option—as well as the downsides to this popular product—to decide whether to install it or remove it from your home

Vinyl is the most popular form of resilient flooring (a category that also includes linoleum and cork) because it’s low-maintenance, water-resistant, cost-effective, and long-lasting. It also has the perfect balance of firmness and “give,” meaning it springs a bit when you walk on it for a comfortable feel underfoot. And thanks to recent technological advances, today’s vinyl comes in a wide range of high-quality, beautiful finishes.

But vinyl flooring does have its downsides. So whether you’re considering installing vinyl or wondering what it takes to remove an existing vinyl floor, read on. We’ve laid out key vinyl flooring pros and cons—from installation and removal—so you can make the right decision for your home.

PRO: Vinyl floors are relatively easy to install.

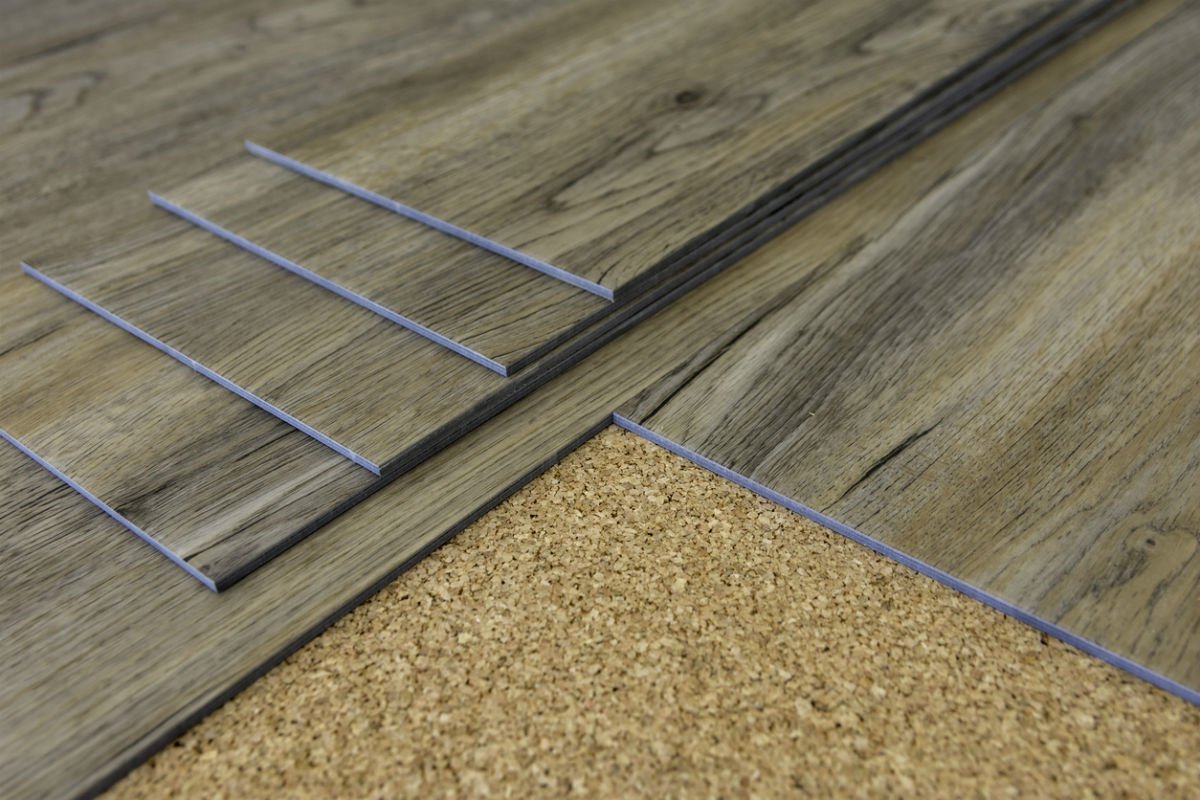
Developments in the vinyl flooring industry have made the product more DIY friendly. While vinyl was once only available in large, unwieldy sheets, today’s tiles and planks are much easier to install with no sawing or hammering. Most luxury brands now offer “self-adhesive” vinyl—simply remove the backing and press into place on a properly prepared subfloor.

CON: Vinyl floors can be tough to remove.

Once vinyl’s adhesive backing hardens to the floorboards, the glue is difficult to remove. Fortunately, removing vinyl floors doesn’t require professional tools or techniques; it’s all about elbow grease.

Clear the room of furniture and remove baseboards and trim if possible.

Cut vinyl into 12-inch strips, using a utility knife. Manually pull up the flooring strip by strip.


Luxury Vinyl Guide LVP and LVT

WHAT IS LUXURY VINYL? AND LVT VS LVP?

In the flooring world, luxury vinyl is one of the new kids on the block. Luxury vinyl is the cousin of sheet vinyl and the competitor of laminate. When someone talks about “vinyl flooring,” they’re most likely talking about sheet vinyl. This is NOT the same a luxury vinyl. Sheet vinyl is has been around for a long time. It’s cheap and water-resistant, but it also doesn’t have a great reputation because it can look and feel cheap

PROS AND CONS OF LUXURY VINYL

Before we get into what to look for in luxury vinyl, let’s consider if it’s the right flooring for you

CONS OF LUXURY VINYL:

A Carpet Captain guide wouldn’t be complete without giving you a heads up on the problems you may run into. This isn’t to scare you off from luxury vinyl—all types of flooring have their problems

A NOTE ON PHTHALATES AND SAFETY OF LUXURY VINYL

One specific question I receive on luxury vinyl is its safety. At times, it’s had a bad reputation, and maybe even an earned a bad reputation. The reason? Luxury vinyl is a plastic. Most plastics are brittle without chemicals called plasticizers, and often these chemicals are thought to possibly be harmful especially to children and pregnant women. You’ve probably heard similar concerns with the plastic used in drinking bottles, and in Europe, some countries have banned certain plastics in children’s toys.

The plasticizers that are concerning in luxury vinyl are called phthalates. The definite impact of phthalates are unknown, but they are thought to possibly be a carcinogen and cause development and reproductive harm. With this in mind, nearly everyone is already exposed to phthalates. The CDC states 90% of Americans have measurable levels of phthalates in their bodies


How to Install Luxury Vinyl Plank Flooring

I’ve installed just about every type of flooring the world has ever known. So when my wife chose luxury vinyl planks (LVP) for the new dining room floor, my first thought was: Why couldn’t she pick something I already know how to do? Now I’ll have to muddle through installing floating vinyl plank flooring — an unfamiliar product, hoping to avoid costly mistakes along the way.

But it turns out that there was nothing to worry about floating vinyl plank flooring. I was able to install 150 sq. ft. in less than a day without any problems. Installing vinyl plank flooring was was fast and easy compared with the other floors I’ve installed. And the next time we need new flooring, my vote will be for luxury vinyl. This article will walk you through the installing vinyl plank flooring process I followed and show you some key tips along the way when learning how to install vinyl flooring.

LV flooring is similar to sheet vinyl, but it’s thicker, tougher and easier to install. It comes in tiles and planks, but this article covers planks only. I used a product called Adura LockSolid. It’s a floating floor which means it isn’t fastened to the subfloor—it just lies there. Luxury vinyl is the fastest growing category in the flooring industry.

Installing vinyl plank flooring ca be done over most surfaces as long as those surfaces are smooth. Rough and uneven spots will telegraph through the new flooring, causing noticeable high spots that will wear faster than the rest of the floor. Concrete subfloors must be at least six weeks old, dry and free of powder and flaking. Large cracks and expansion joints should be filled and troweled smooth. Home centers sell mixable and premixed products that work on most surfaces.

Find the high and low spots on wood subfloors with a straightedge. The floor height should not rise or drop more than 1/8 in. over the span of 4 ft. Sand down the high spots with a belt sander equipped with a coarse-grit belt (Photo1). This is a dusty job, so turn off your furnace to avoid spreading dust all over the house, and wear a dust mask. Fill the low spots in the plywood with floor patch


Vinyl Plank Flooring: Reviews, Best Brands & Pros vs. Cons

Does this sound familiar? “Vinyl flooring gives you the look of hardwood and the durability of laminate — for a fraction of the price.” If you’ve shopped around enough, I’ll bet you’ve encountered at least one variation of that speech.

But, is it the truth or just another pitch? Well, that depends on your outlook. No flooring is 100% perfect, but Luxury Vinyl Plank (LVP) –  aka Luxury Vinyl Tile (LVT) – comes close. Before we dive in any further, understand vinyl won’t work for everyone. There are a few drawbacks. We’ll go into that in a bit, but before we do let’s discuss the benefits

Price

Luxury vinyl plank is a cost-effective way to update your home without breaking the bank. You can save thousands without sacrificing style. Unlike real wood, you can find quality vinyl for under $4 per square foot.

Style

The sky’s the limit when it comes to designing with vinyl. The options are endless. Whether you’re looking to replicate rich earthy mahogany, silvered barn wood or even natural stone, you’re sure to find the perfect shade.

Easy Installation

You won’t need to be a carpenter to install your new vinyl floors. If you’ve tackled home improvement projects in the past, it should be an easy task. Vinyl tiles are usually glued down, while most planks come pre-fitted with click & lock: locking mechanisms that click into place like a jigsaw puzzle


vinyl flooring buying guide

Our selection of vinyl flooring is seemingly endless, with designs ranging from wood to a stone effect, and everything in-between. Vinyl allows you to create any look you want, with hassle-free fitting and with very little on-going maintenance. We aim to make buying your new flooring easier by offering expert advice to guide you smoothly all the way through from browsing to installation. This buying guide will make it easier for you to find the perfect vinyl flooring

why choose vinyl flooring?

Also known as cushion flooring or lino flooring, vinyl will bring comfort and warmth to your home as well as amazing functionality. It works well with underfloor heating and your feet will thank you for the extra comfort it brings underfoot.

how to choose vinyl by room

You may be surprised to learn that you have probably walked on vinyl flooring in homes and businesses many times firmly believing that it was real wood, laminate or stone. Vinyl is so realistic that guests to your home will never be able to tell the difference

vinyl flooring styles

Due to the ever-improving process of vinyl printing, vinyl flooring comes in a huge array of designs and patterns – pretty much any design you fancy can be yours with each one being incredibly realistic. This wide variety of designs allows you the freedom to be creative in your home with colour and pattern. From wood to stone, mosaic to patterns, vinyl flooring is a great way to be creative with your home’s interior whatever your style. Find out what effects are available in our vinyl flooring range below.

Wood effect vinyl

Wood effect vinyl complete with knots and grain detailing is fantastically authentic. Available in any wood type you care to think of from a whitewashed finish or pale beech, to atmospheric dark walnut, in every wood shade, plank detail and finish. Some even have a textured surface creating even more realism, especially when walked on with bare feet. In fact, all wood effect vinyl flooring doesn’t have is the on-going maintenance of a real wood floor

Tile Flooring Is One Of Metode To Make Your Floor More Beautiful

Your Guide to Tile Flooring

Ceramic, porcelain, terra-cotta, and concrete tile promise durability, easy maintenance, and long-lasting style. The array of colors, patterns, sizes, shapes, and textures means you can create a one-of-a-kind design to suit the look of any room.

Tile is the material of choice anywhere you want a durable, low-maintenance floor. Proper installation ensures that the floor will last for years, even decades, to come.

Both ceramic and porcelain tile are made from natural clay, a long-lasting material, making it an eco-friendly flooring choice. When deciding between the two, consider their defining characteristics.

Ceramic tile is a composition of natural clay-base products, minerals, and water. It is available with a glasslike, kiln-fired coating called glaze. Glazed ceramic tile resists stains and can be cleaned with a damp mop and household cleaners. Depending on the glaze, the color of the ceramic tile body may be visible if the glaze is scratched. Ceramic tile is less expensive than porcelain, but both are cheaper than natural stone.


2020 FLOOR TILE DESIGN TRENDS

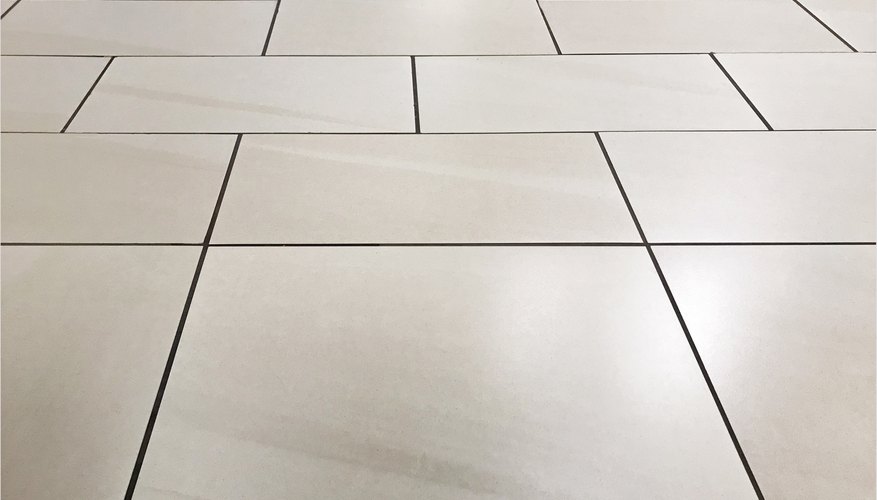
Tile flooring has the ability to seamlessly fit within a multitude of styles, making it perfectly suited for any trend. Bigger is becoming better when it comes to size. Large-format tiles are more popular than ever, and the minimal grout lines they present give a smooth, cohesive appearance to your floor. We continue to love wood-look tile, which flawlessly replicates the texture and grain of real wood in an extremely durable material. Unique shapes and styles, such as hexagons and mosaics, are the newest trend in wood-look tiles. Natural stone remains a popular look that will never go out of style. Marble, travertine and slate add luxurious sophistication to your kitchen, bathroom and any flooring surface in your home. If natural stone is not for you, manufacturers of ceramic  and porcelain tiles have mastered the bright, clean marble look with materials that are less porous, more durable and more cost-effective. Stop in to your nearest Tile Shop to check out the latest selections in fashionable tile flooring.


Grout Sealing

Whether or not you seal your tile floor and how often you seal it depends upon the type of tile, its level of porosity and its location. The grout located between floor tiles should be sealed on a regular basis. Prior to sealing grout, the tile floor should be cleaned and dried. Sealed grout and/or tile repels moisture, protecting the floor from staining or discoloration. It is best to consult with a tile and/or grout manufacturer to determine the most appropriate type of sealant for your tile floor.

Repairs

Tile floors do not need to be refinished, resurfaced or reglazed during their lifetime. However, they may need to be repaired. Overtime damage can occur to a grouted joint or a tile may break. In either case the grouted joint should first be removed using a mechanical rotary tool or a hand tool, such as a chisel. Work carefully to prevent damaging adjacent tiles. If the grouted joint is the extent of the damage, the joint should be free and clear of debris, then re-grouted. If the tile is damaged you will need to remove all grouted joints that surround the tile, then carefully chisel or mechanically cut the tile into small pieces and remove. The mortar or adhesive on the floor under the tile should be scraped and removed as well. Once the area is free and clear of any debris, apply mortar to the back of the replacement tile; place in the existing location and squarely position the tile onto the backer board. The top of tile should be flush with the adjacent floor tiles.


Natural Stone Tile Floors

Natural stone tile is very attractive and can also be strong as well. Common types of stone flooring include slate, marble, granite, limestone and travertine. Note that the qualities of natural stone tile vary enormously depending on where, how and when the stone was quarried.

There are two types of natural stone tile that are extremely strong and hard-wearing. In fact, either could qualify as a contender for the best tile for kitchen floors and/or other high-traffic locations. One is granite, a dense, hard igneous rock. It is a distinctive flooring, offering a speckled appearance from the minerals found within the rock. It is said to be close to impervious and, once polished, it resists scratching.


Ceramic Tiles

Ceramic tiles are also a good tile flooring option for the laundry room. You can get good ceramic tiles online from Amazon. Similar to the vinyl tiles, they are sturdy and water-resistant. The drawback, however, is the installation hassles. Vinyl tiles are easier to install than ceramic tiles. You must, first of all, prepare the subfloor and install a backup board to accommodate a type of tile expansion and eliminate cracking.

If you require additional insulation and texture for your laundry room floor, consider integrating low-pile tiles into the picture. For instance, you can incorporate the office carpet for a bit more feet and kids comfort. These are equally impermeable to moisture.

The other extremely durable natural stone tile is slate. This stone is a dense metamorphic rock that is very durable. The surface of slate tile is naturally textured, although you can find some that have been smoothed and honed. You can find slate in a variety of dark earth tones.

Benefits

  • Very small entry cost
  • Water-resistant
  • Sturdy and long-lasting
  • You can easily install tiles and replace damaged ones without professional help.

Drawbacks

  • Ceramic tiles are slippery, cold and noisy. You are likely to experience a lot more noise reverberations from the sound of your washing machine or dryer compared to other tile flooring options.
  • The grout line collects dirt which makes cleaning more challenging. However, you can make the job easier by getting one of these vacuum cleaners.

Durable Slate-Look Porcelain

Another good tile flooring option for your laundry room or mudroom is the slate-like porcelain tiles. They work well here, especially, due to pressure from foot traffic and heavy appliances. Also, if you’re looking for a casual or rustic option, this is a perfect solution.

They look similar to natural stone tiles but with a better water resistance capacity. However, you need to prepare the floor properly to tolerate the reverberation from the dryer and washing machine.